background image

MAINTENANCE AND CLEANING (contd.)

Cleaning Air Filter

This unit has one air filter. For best results and maximum performance, clean filter every
two weeks, or as required by environmental conditions.

CAUTION: Neglect or failure to regularly clean the filter will result in poor efficiency,

reduced performance, possible damage to the unit, and voiding your warranty.

1.

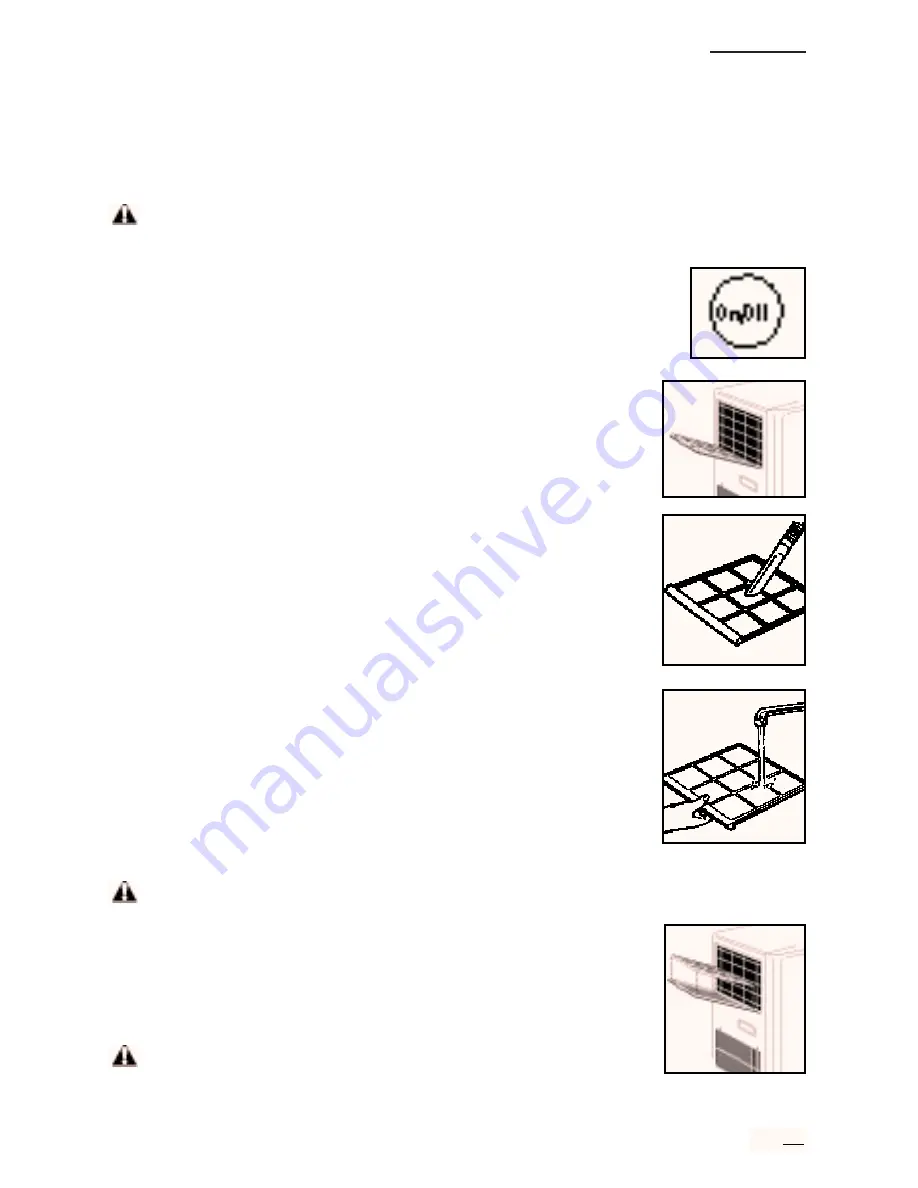
Press “POWER ON/OFF” button to stop unit if it is operating.
Unplug power cord from outlet.

2.

Locate filter pull tab on side of unit (closest to "POWER ON/OFF"
button). Carefully pull filter from side of unit.

3.

Place air filter on a flat, level surface so “dirty” side of filter
faces up. Using a brush or nozzle vacuum attachment, gently
vacuum “dirty” side of filter. Turn filter over and vacuum other
side. Use care not to damage or puncture the filter mesh. DO
NOT use brushes, brooms, or other course materials to clean
the filters.

4.

Hold air filter, “dirty” side down, under cool, running water. DO
NOT use hot water, harsh detergents, chemicals, solvents, gaso-
line or any other abrasive materials or household items to clean
the filters. Be sure to rinse all residue from the air filter mesh.
Carefully shake air filter to remove excess water. Allow air filter to
dry completely before reinstalling into unit.

WARNING: Forcing filter improperly into unit may cause damage to the filter section of

the cabinet. Repair due to improper filter installation is not covered
under warranty.

5.

Align tabs on bottom of filter with square holes in filter opening on
side of cabinet. Carefully replace filter. Filter will "snap" into place.

CAUTION: DO NOT operate the unit without the air filter properly

installed.

13

Summary of Contents for RCS-M2000T

Page 1: ...nit in its upright position for a minimum of two hours before operating For best results and more enjoyment from your new FREECOM portable air conditioning unit please read this instruction manual car...

Page 2: ...wo hours before restarting or operating the unit This time period permits the liquids gases and oils contained within the sealed systems to return to their proper positions OWNER S RECORD Enter produc...

Page 3: ...haust from room to be cooled Window Panel Vent Kit two sizes available special order only prevents outside air from entering the room when used with the Exhaust Ducting Kit Sliding Door Vent Kit speci...

Page 4: ...l exposition directe du soleil en fermant rideaux et stores etc pour am liorer le rafra chissement Ne pas placer l appareil pr s de rideaux qui risquent de bloquer l entr e ou la sortie d air distanc...

Page 5: ...NOT expose unit to water or moisture DO NOT use outdoors CAUTION Failure to follow the safety information below can result in minor personal injury property damage damage to the unit and voiding your...

Page 6: ...l Panel B Horizontal Air Louver up and down C Air Outlet D Vertical Air Louver left to right E Built in Handle F Air Filter G Condensate Water Tank H Power Cord I Plug J Caster Wheels K Power Cord Wra...

Page 7: ...the temperature control by approximately 3 5 F 4 AUTO SWING Choose between fixed position or oscillating 70 degrees vertical louvers 5 TIMER Adjustable 9 hour timer can be programmed to turn off air...

Page 8: ...s Carefully push the unit on its caster wheels to desired location CAUTION Do not operate unit without condensate water tank and air filters properly in place 3 Check that condensate water tank is pro...

Page 9: ...front louvers NOTE This unit is equipped with a special safety time delay feature The compressor cooling mechanism may be delayed for up to five minutes This safety feature prevents damage to the comp...

Page 10: ...onditioning units will increase cooling efficiency by directing warm air exhaust out of the room The Exhaust Duct Kit can be used with other Freecom accessories such as the Window Panel Vent Kit inclu...

Page 11: ...ng rubber weather strips Hold flat side of weather strips along outside of outer panel with cutout Slide weather strips into rails on each side of outer panel 4 Locate two short rubber weather strips...

Page 12: ...nk straight out of unit 3 Carefully carry the tank to a sink or tub and empty its contents Use water and a mild detergent to rinse and clean the inside and outside of the tank Dry tank completely and...

Page 13: ...filter over and vacuum other side Use care not to damage or puncture the filter mesh DO NOT use brushes brooms or other course materials to clean the filters 4 Hold air filter dirty side down under c...

Page 14: ...hold items to clean the unit Remove excess moisture from cabinet and grill areas and make sure unit filters and tank are completely dry before installation operation 1 Press POWER ON OFF button to sto...

Page 15: ...Water Tank under MAINTENANCE AND CLEANING 3 Remove plug from condensate tube inside water tank compartment and drain water Replace plug tightly onto end of tube 4 For long term storage turn the unit...

Page 16: ...be active Unplug unit and wait for 3 5 minutes Plug unit into out let and press POWER ON OFF switch 1 Check and clean air filter 2 Check louvers and grills for obstacles or debris 3 Check MODE and or...

Reviews: