background image

10 


Cycle: 

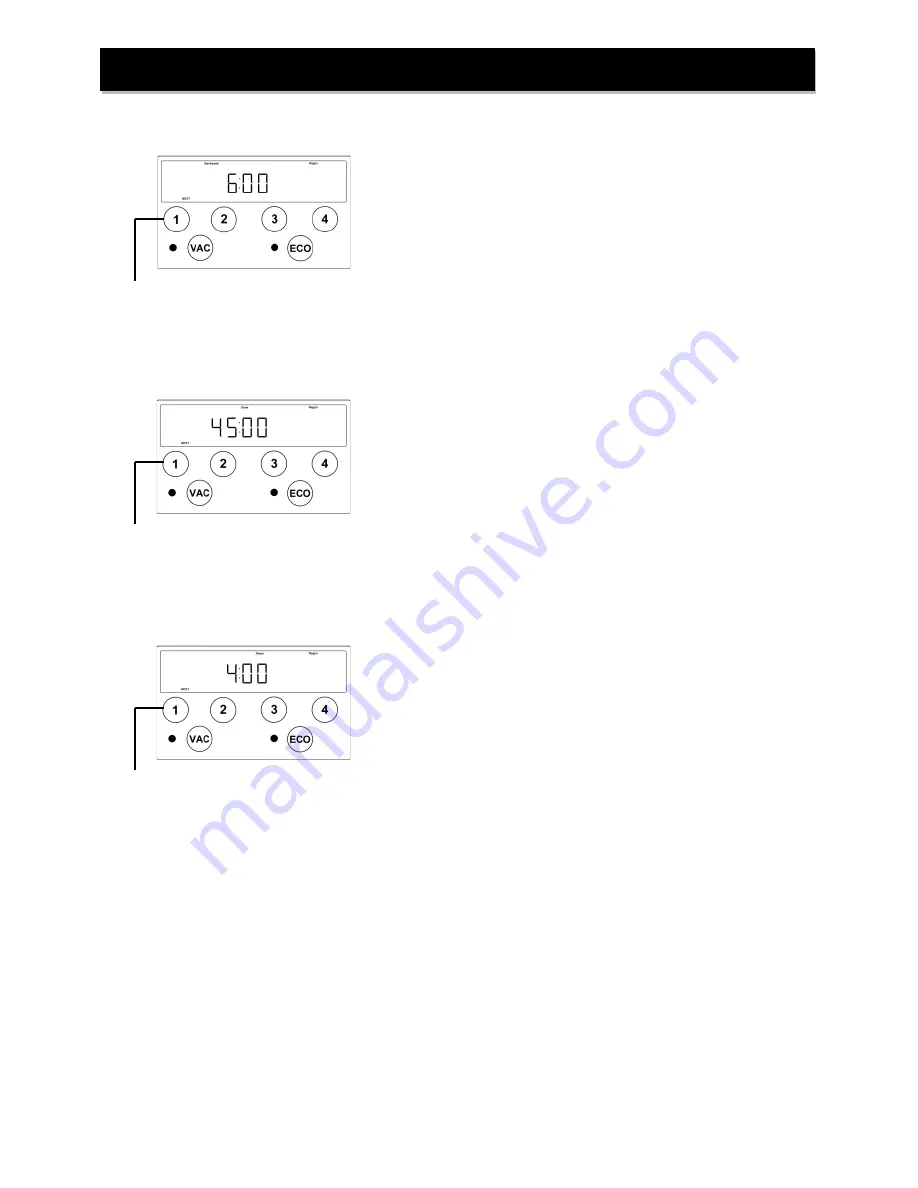
BACKWASH 


Cycle: 

DRAW


Cycle: 

RINSE


Regeneration Process (continued) 

1. The Backwash and Regen indicators will be illuminated on the 

display. 

2. The control valve will advance to the Backwash position.   
3. The cycle duration will begin to count down on the display once the 

control valve is in the proper position.   

4. Water will flow up through the resin and out the drain flushing 

accumulated solids and preparing the resin for the brine cycle. 

5. Softening systems with a single mineral tank will have an internal 

bypass to allow untreated (hard) water for service during this cycle. 


NOTE:

  The initial fill process should be performed while the control is in 

the backwash position to prevent air from being trapped in the media 
tank. 

Press ‘NEXT’ button to advance to 
Brine Draw Cycle. 

1. The Draw and Regen indicators will be illuminated on the  display. 
2. The control valve will advance to the Brine Draw position.   
3. The cycle duration will begin to count down on the display once the 

control valve is in the proper position.   

4. Water will flow through the injector causing suction to draw the brine 

solution out of the salt tank.  The brine solution will flow down through 
the resin and out the drain. 

5. Softening systems with a single mineral tank will have an internal 

bypass to allow untreated (hard) water for service during this cycle.   

Press ‘NEXT’ button to advance to 
Rapid Rinse Cycle. 

1. The Rinse and Regen indicators will be illuminated on the display. 
2. The control valve will advance to the Rapid Rinse position.   
3. The cycle duration will begin to count down on the display once the 

control valve is in the proper position.   

4. Water will flow down through the resin and out the drain flushing the 

remaining salt from the brine cycle and preparing the resin for the 
softening process. 

5. Softening systems with a single mineral tank will have an internal 

bypass to allow untreated (hard) water for service during this cycle.   

Press ‘NEXT’ button to return 
control to the HOME position. 

Summary of Contents for XTCS24

Page 1: ...ay 33 N Churubusco IN 46723 Phone 260 693 1972 Fax 260 693 0602 XTS Series Instruction Manual 200720 docx Scan the QR code above with a smart phone to view the installation video XTS Series Water Softening System Installation Instructions and Owner s Manual ...

Page 2: ... 9 Statistics Page 11 Installer Settings Page 13 Vacation Mode Page 15 Eco Mode Page 15 Specifications Page 17 Component Parts Breakdown List Page 18 Control Valve Parts Breakdown Page 19 Control Valve Parts List Page 20 Installation Fitting Assemblies Page 21 Troubleshooting Page 25 Ten Year Limited Warranty Page 27 Table of Contents ...

Page 3: ...2 This page intentionally left blank ...

Page 4: ...s a pH of 7 0 lower values indicate acidic water If your pH is below 6 8 you may consider installing an acid neutralizer before the water softener to elevate the pH Iron A naturally occurring metallic element Iron levels in excess of 0 3 milligrams liter mg l combine with oxygen causing orange or red rust stains on plumbing fixtures Iron exists in some water sources in clear water ferrous state re...

Page 5: ...nstall with at least 10 of pipe before the water heater to prevent thermal damage to the equipment An expansion tank may need to be installed in the line to the water heater in order to allow for thermal expansion and comply with local plumbing codes 4 The water softener should not be subject to freezing temperatures 5 Ensure that any cartridge or in line type filter installed prior to the water s...

Page 6: ...eat to any fitting attached to the bypass or control valve STEP 6 Use the provided polyethylene tubing NO VINYL TUBING to run drain line from control valve barbed drain fitting Figure 2 to floor drain or sump pit capable of handling the backwash rate of the softener refer to specifications on Page 17 THE DISCHARGE END OF THE DRAIN LINE MUST BE FIRMLY SECURED There must be an air gap at the end of ...

Page 7: ...IN LINE FROM SOFTENER CONTROL VALVE TO BRINE TANK OVERFLOW DO NOT CONNECT BRINE TANK DRAIN LINE TO THE SOFTENER DRAIN LINE STEP 9 Plug the transformer into an un switched electrical outlet and insert the power cord plug into the power socket Figure 2 Page 5 on the back of the control valve Ensure control valve is in Service mode time of day is displayed on the screen refer to page 8 for Home Scree...

Page 8: ... to the time of day Then press and hold the REGEN button 4 until the motor starts and advance the control valve to the BRINE DRAW cycle using the NEXT button 1 Verify that the water level in the brine tank is dropping Allow water level to drop below the top of the salt grid before continuing If the water level does not drop refer to page 25 for Troubleshooting After verifying water level is droppi...

Page 9: ... Active prompts for user input buttons 4 User Input buttons Vacation Mode button and indicator light Eco Mode button and indicator light Display and Operation Setting Time Home screen displays current time of day Press SET button to access time set screen Using and set the current time of day hours Note the AM and PM indicator and set the time accordingly Press NEXT button to set current minutes U...

Page 10: ...ght will display Regeneration Process Momentarily pressing and releasing the REGEN button again will cancel the delayed regeneration cycle 1 The Fill and Regen indicators will be illuminated on the display 2 The control valve will advance to the brine fill position and start adding water to the brine tank 3 The cycle duration will begin to count down on the display once the control valve is in the...

Page 11: ...e Brine Draw position 3 The cycle duration will begin to count down on the display once the control valve is in the proper position 4 Water will flow through the injector causing suction to draw the brine solution out of the salt tank The brine solution will flow down through the resin and out the drain 5 Softening systems with a single mineral tank will have an internal bypass to allow untreated ...

Page 12: ...e the last regeneration 0 indicates the softener regenerated within the current day 12 00 am is considered the beginning of the day Press STATS button to advance to the LBS SALT screen Lbs Salt screen displays the number of lbs of salt used for regeneration within the current day 12 00 am is considered the beginning of the day 0 indicates the unit did not regenerate in the current day Press STATS ...

Page 13: ...nds Regen history screen displays lbs of salt used on any day that regeneration occurs 0 0 indicates the unit did not regenerate on this day Press NEXT button to advance to the peak FLOW screen for the currently selected day number Peak Flow history screen displays the maximum flow rate that occurred on the selected day Press NEXT button to advance to the GALLONS used screen for the currently sele...

Page 14: ...the Hardness indicator is illuminated on the left side of the display and using the and buttons set the incoming hardness level NOTE This softener is set to calculate hardness as grains per gallon gpg If your water hardness is reported in milligrams per liter mg l or parts per million ppm divide these results by 17 1 to convert to grains per gallon Press NEXT button to set regeneration DAYS OVERRI...

Page 15: ...nstruction manual Press NEXT button to set cycle 2 duration Display and Operation Installer Settings Cycles continued Ensure the Pounds and Fill indicators are illuminated Using and set the desired amount of salt to be used during the regeneration cycle Ensure the Service and Minutes indicators are illuminated Using and set the desired length of time to allow fresh water in brine tank to dissolve ...

Page 16: ...tening capacity than is currently available the softener will initiate a regeneration process using a fractional portion of the programmed salt setting This partial salt regeneration recovers only the depleted portion of the softening capacity This proportional regeneration will save in both salt consumption and water use by using lower salt settings and fewer regeneration cycles Ensure the Rinse ...

Page 17: ...16 This page intentionally left blank ...

Page 18: ...18x29x63 21x30x65 18x30x69 21x30x59 18x30x63 21x31x65 18x31x69 27x13x47 22x13x51 27x13x53 22x13x57 21x24x47 16x24x51 21x24x47 16x24x51 Approximate Ship Wt lbs 94 110 143 168 219 115 133 101 113 Description HE Two Tank Models HE Space Saver Models XTS24 HE XTS30 HE XTS45 HE XTS60 HE XTS75 HE XTCS24 HE XTCS30 HE Resin Volume ft3 0 75 1 0 1 5 2 0 2 5 0 75 1 0 Capacity grains Factory Salt 6lb ft3 18 0...

Page 19: ...lbow Locking Clip FC103 FC103 FC103 FC103 FC103 FC103 FC103 FC103 FC103 NA TopScreen NA NA NA NA NA FHS101 FHS101 NA NA NA Distributor Adapter NA NA NA NA NA SA900 SA900 NA NA Ref Description HE Two Tank Models HE Space Saver Models XTS24 HE XTS30 HE XTS45 HE XTS60 HE XTS75 HE XTCS24 HE XTCS30 HE A Control Valve L bypass XTS24 HE VLV ASSY L BP XTS30 HE VLV ASSY L BP XTS45 HE VLV ASSY L BP XTS60 HE...

Page 20: ...19 Control Valve Parts Breakdown ...

Page 21: ...FC902 Drain Fitting 3 4 MNPT NEW 29 OR255 O ring 255 Pilot Tube O ring FC901 Drain Fitting 1 2 FPT OLD 30 RO LC38BL QC 3 8 Locking Clip 12 FC103 Drain Fitting Retainer Clip NOT SHOWN GL463412 Drain Fitting Hose Barb 90 Elbow 3 4 FPT x 1 2 barb NEW 13 FM205 Turbine Flow Meter 12338 Drain Fitting Hose Barb 90 Elbow 1 2 MNPT x 1 2 barb OLD 14 MCA945 Motor and Cam Assembly includes nut micro switches ...

Page 22: ...er 1 4 C 102 Connector Nut 1 4 C 102 Connector Nut 1 1 1 2 PVC MALE NPT ELBOW 3 4 PVC MALE NPT ELBOW Ref Part Description Qty Ref Part Description Qty EBA915 1 1 2 Elbow Assembly 1 EBA975 3 4 Elbow Assembly 1 1 EB150 1 5 Elbow 1 1 EB750 3 4 Elbow 1 2 OR323 O ring 323 1 2 OR323 O ring 323 1 3 C 101 Split Ring Retainer 1 3 C 101 Split Ring Retainer 1 4 C 102 Connector Nut 1 4 C 102 Connector Nut 1 I...

Page 23: ...er 1 4 C 102 Connector Nut 1 4 C 102 Connector Nut 1 3 4 SWEAT ADAPTER 3 4 UPONOR ADAPTER Ref Part Description Qty Ref Part Description Qty SFA975 3 4 Sweat Assembly 1 UPN985 3 4 Uponor Assembly 1 1 SWF175 3 4 Sweat Fitting 1 1 UPNR750 3 4 Uponor Fitting 1 2 OR323 O ring 323 1 2 OR323 O ring 323 1 3 C 101 Split Ring Retainer 1 3 C 101 Split Ring Retainer 1 4 C 102 Connector Nut 1 4 C 102 Connector...

Page 24: ...23 3 4 QUICK CONNECT Ref Part Description Qty QFNCR4 3 4 Quick Connect Assembly 1 Installation Fitting Assemblies cont 2 required ...

Page 25: ...24 This page intentionally left blank ...

Page 26: ...ures C Verify there are no leaks 4 Loss of water pressure A Softener too small for application A Check application requirements and resize water softener as required B Foreign material buildup in plumbing system or water softener B Clean or replace plumbing as necessary additional treatment equipment may be required 5 Loss of resin through drain line A Air in water system A1 Check for low water ta...

Page 27: ... diminish the unit is plumbed in backwards B Hot water backed up from water heater has melted internal components B Replace all damaged components 12 Meter fails to register flow A External bypass or cross connect in plumbing A Test for external bypass by putting inlet bypass handle in the SHUTOFF position Figure 4 Page 7 and open a treated faucet If it does not trickle to a stop locate the open b...

Page 28: ...efect or malfunction occur contact Franklin Water Treatment technical services 260 693 1972 We will require a full description of the problem model number serial number and date of purchase All warranty part replacements must be authorized by FWT technical service personnel or FWT factory sales representatives We assume no warranty liability in connection with this water conditioner other than spe...

Reviews: