19
ENGLISH
3.1 REPLACEMENT/INSERTION OF THE MODULES
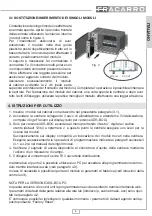
Each module must be inserted when the headend is off. Open the front panel of the
headend, using the key and inserting the modules as shown in Figure 4.
For correct positioning, make sure that
the module slides into the two plastic
guides at the bottom and top of the
rack.
Then match the F connector and the
multi-polar connector to the connectors
on the rack. Gently press it to make
sure the module is locked. Now fix the
module to the cabinet with 2 screws (at
the upper and lower front of the module).
After performing this operation, the
headend can be power supplied. To
remove the module from the cabinet,
switch the headend off, remove the
screws and pull it by holding the metal
handle.
4. OPERATING INSTRUCTIONS
1. Insert the module into the cabinet as described in the previous paragraph (3.1).
2. Plug in the cord and switch the headend ON; wait for the headend initialization: the
Fracarro logo is displayed (only for 3DG-BOX version).
3. Only for 3DG-BOX version: press the
√
key and enter the menu; enter the user’s code
(1234 by default) and press
√
again.
Now the headend will scan and find the present modules.
The display will show the modules that have been found in the headend.
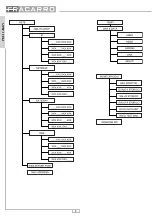
Now you can program the unit as specified within the following paragraphs (i.e. 4.1 and
4.2) and in the manuals of each module.
4. Check the output signal at the output connector of the headend with a field meter.
5. Connect the distribution cable to the TV output connector.
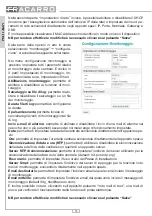
Alternatively to item 2, you can use a PC to program the module by web interface (see paragraph
4.3).
The module can be reset to default parameters (see the control unit’s instructions).
NOTE FOR 3DG-BOX-PC VERSION
The settings with this sort of control unit takes place just through web interface.
Lan network default parameters (IP address, subnet mask and gateway) are displayed on
paragraph 4.2.
It's of course possible to restore default parameters by pressing "Default reset" key on control
unit. Be carefull that everytime the control unit is powered, it needs some minutes in order to
make boot process.
Please refer to led status in order to recognize when control unit is ready.
Fig. 4
Fig. 4
MIX_IN
RF_OUT
Summary of Contents for 3DGFLEX
Page 1: ...3DGFLEX ISTRUZIONI PER L USO OPERATING INSTRUCTIONS INSTRUCTIONS D EMPLOI BEDIENUNGSANLEITUNG...
Page 8: ...8 ITALIANO...
Page 36: ...36 FRAN AIS...
Page 58: ...58...
Page 59: ...59...

