background image

33

T2000 TPMS Service Tool Manual_English_V1.01

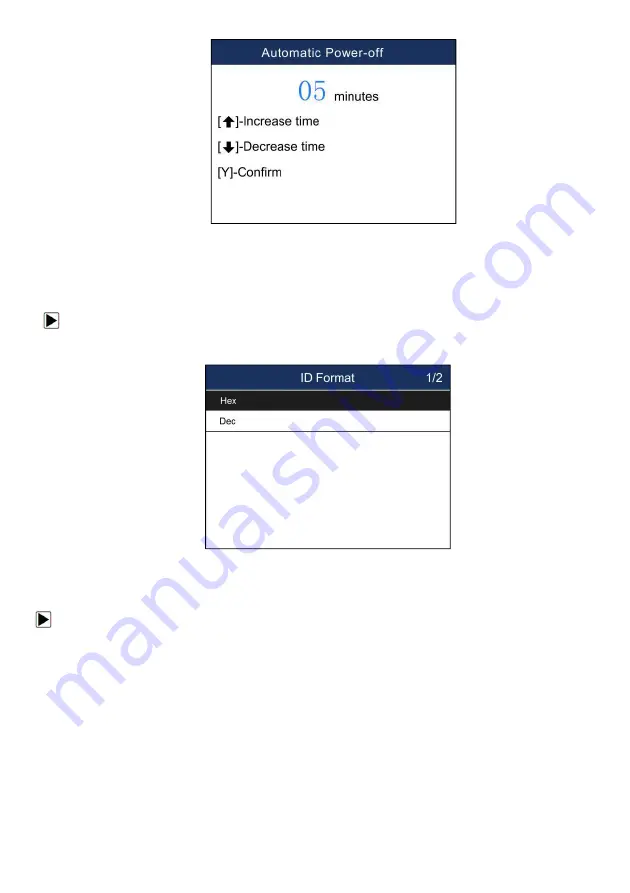
Figure 8-7 Sample Auto Power-off Interval Screen

8.7 ID Format

Selecting ID format opens a dialog box that allows you to set ID data to be displayed in

hexadecimal or decimal format.

To change the ID display format

1. Scroll with the arrow key to highlight

ID Format

from Setup menu and press the

YES

key.

2. Press the

UP/DOWN

arrow key select a format and press the

YES

key to save and return.

Figure 8-8 Sample ID Format Screen

8.8 Pressure Unit

Selecting Pressure Unit opens a screen that allows you to set the pressure unit in kPa, PSI or bar.

To configure pressure unit

1. Scroll with the

UP/DOWN

arrow keys to highlight

Pressure Unit

from Setup menu and press

the

YES

key.

2. Press the

UP/DOWN

arrow key select an item and press the

YES

key to save and return.

Summary of Contents for T2000

Page 1: ...s Copyright Information 2020 Shenzhen Foxwell Technology Co Ltd All rights reserved Disclaimer The information specifications and illustrations in this manual are based on the latest information available at the time of printing Foxwell reserves the right to make changes at any time without notice Visit our website at www foxwelltech us For Technical Assistance send us email at support foxwelltech...

Page 2: ...oduct to Foxwell And Foxwell shall bear the cost of shipping the product back to the customer after the completion of service under this limited warranty 4 Foxwell does not warrant uninterrupted or error free operation of the product If a problem develops during the limited warranty period the consumer shall take the following step by step procedure a The customer shall return the product to the p...

Page 3: ... PRODUCT OR ARISING FROM BREACH OF THE WARRANTY BREACH OF CONTRACT NEGLIGENCE STRICT TORT OR ANY OTHER LEGAL OR EQUITABLE THEORY EVEN IF FOXWELL KNEW OF THE LIKELIHOOD OF SUCH DAMAGES Foxwell SHALL NOT BE LIABLE FOR DELAY IN RENDERING SERVICE UNDER THE LIMITED WARRANTY OR LOSS OF USE DURING THE PERIOD THAT THE PRODUCT IS BEING REPAIRED 6 Some states do not allow limitation of how long an implied w...

Page 4: ... to bystanders Important Safety Instructions And always use your TPMS Service Tool as described in the user s manual and follow all safety messages Do not route the test cable in a manner that would interfere with driving controls Do not exceed voltage limits between inputs specified in this user s manual Always wear ANSI approved goggles to protect your eyes from propelled objects as well as hot ...

Page 5: ...k drive wheels before testing with engine running Put the transmission in park for automatic transmission or neutral for manual transmission And never leave a running engine unattended Do not wear jewelry or loose fitting clothing when working on engine ...

Page 6: ... T2000 9 2 1 1 Descriptions 9 2 1 2 Accessories 9 2 1 3 TechnicalSpecifications 10 3 Getting Started 10 3 1 Power on off the TPMS Service Tool 10 3 2 Charging the TPMS Service Tool 10 3 3 Application Overview 11 3 4 Tool Symbols and Icons 11 4 OBD II 12 5 TPMS Operations 12 5 1 TPMS Sensor Activate 13 5 2 TPMS Diagnose 15 5 3 TPMS Sensor Programming 21 5 4 Study Help 27 6 RKE RF Monitor 27 7 Lates...

Page 7: ...7 T2000 TPMS Service Tool Manual_English_V1 01 8 8 Pressure Unit 33 8 9 Temperature Unit 34 8 10 Area 34 9 Update 35 9 1 Create a Foxwell ID 35 9 2 Register Your Scanner 40 9 3 Update the Scanner 42 ...

Page 8: ...available options displays Menu options include Languages Unit Beep Keypad Test LCD Test 1 2 2 Arrow Icon An arrow icon indicates a procedure Example To change menu language 1 Scroll with the arrow keys to highlight Language on the menu 2 Press the Yes button to select 1 2 3 Note and Important Message Note A NOTE provides helpful information such as additional explanations tips and comments Exampl...

Page 9: ...y used applications or functions 3 No Key Cancels a selection or action from a menu or generally returns to previous screen 4 Trigger Key Executes sensor trigger function 5 HELP Key Displays help information 6 Yes Key Confirms a selection or action from a menu 7 Direction Keys select an option or scroll through a screen of data or text 8 Power Switch Turns on off the TPMS Service Tool and press an...

Page 10: ...nd 433MHz 3 Getting Started This section describes how to provide power to the TPMS Service Tool It provides a brief introduction of applications loaded on the TPMS Service Tool an introduction of symbol and icons displayed on the screen and how to power on off and charge the tool 3 1 Power on off the TPMS Service Tool The T2000 is powered on off by pressing the power switch To power on off the to...

Page 11: ...d into the TPMS Service Tool OBDII leads to OBDII screens for all 9 generic OBD system tests TPMS leads to screens for TPM sensor activation programming TPMS Diagnose and sensor learning process RKE RF leads to screens for checking RF Remote Keyless Entry key FOB Latest Test leads to screens for access the last tested sensor data Settings leads to screens for adjusting default settings to meet you...

Page 12: ...hicle Information When OBD II application is selected from Home screen the scanner starts to detect the communication protocol automatically Once the connection has established a menu that lists all of the tests available on the identified vehicle displays Menu options typically include System Status Read Codes Freeze Frame Data Clear Codes Live Data I M Readiness O2 Sensor Test On board Monitor T...

Page 13: ...for workshops to trigger TPM sensors of the same vehicle 5 1 TPMS Sensor Activate It enters all wheel mode which provides a vehicle icon on the screen to give user prompts for each wheel In this mode each TPM has wheel locations of LF Left Front RF Right Front RR Right Rear LR Left Rear and spare if the car has a spare tire 1 In all wheel mode the solid spot flashes at the wheel to be tested Depen...

Page 14: ...ation of the order of 10PSI the icon will appear on screen Please deflate the tire and place the tool alongside the stem Table 5 1 2 Press Activate to test the TPM If test passes TPM data is briefly displayed for 3 seconds and then the solid spot on the vehicle icon moves around to prompt that the next wheel should be tested Or manually move around vehicle using UP DOWN arrow keys Figure 5 5 Sampl...

Page 15: ... the tool communicate with the car successfully Figure 5 6 Sample Sensor ID Menu 3 The sensor ID information will be displayed Press F2 button to save the sensor ID or F1 or N button to exit 1 Successful Sensor Read TPMS sensor was successfully activated and decoded The T2000 emits a series of tones and displays pressure at wheel location 2 Failed Sensor Read The search period expires without read...

Page 16: ... To Read Version Information 1 Select TPMS Diagnose from the available Menu 2 Choose Read Version Information after the tool communicate with car successfully Figure 5 8 Sample ECU Information Menu 3 The version information will be displayed Press F2 button to save the version information or F1 or N button to exit ...

Page 17: ...2 3 Read Codes To Read Codes 1 Select TPMS Diagnose from the available Menu 2 Choose Read Codes after the tool communicate with the car successfully Figure 5 10 Sample Read Codes Menu 3 The fault codes will be displayed if have Press F1 button to save the fault codes or F3 or N button to exit ...

Page 18: ...s after the tool communicate with the car successfully Figure 5 12 Sample Clear Codes Menu 3 There will be a notice displayed Press F3 button to continue the operation or F1 or N button to exit Figure 5 13 Sample Clear Codes Screen 5 2 5 Live Data To check Live Data 1 Select TPMS Diagnose from the available menu 2 Choose Live Data after the tool communicate with the car successfully ...

Page 19: ...1 button to Pause F2 button to enter graph screen F3 button to Save or N button to exit Figure 5 15 Sample Live Data Screen Figure 5 16 Sample Single Graph Screen 5 2 6 OBD Learning To enter OBD Learning 1 Select TPMS Diagnose from the available Menu 2 Choose OBD Learning after the tool communicate with the car successfully ...

Page 20: ...nput sensor ID manually and press F1 button to continue the operation Figure 5 18 Sample OBD Relearn Screen 4 If learning successfully please re activate the sensors and sensor pressure information will be displayed on the cluster If failed the cluster will not display the sensor pressure information and the TPMS MILs will turn on Figure 5 19 Sample OBD Relearn Screen ...

Page 21: ...s on the tool to continue the operation 5 3 TPMS Sensor Programming The TPMS Programming function lets users to program the sensor data to the Foxwell sensors and replace faulty sensor There are following four options available when doing programming Manual Create Copy By Activation Automatic Create Copy By OBD 5 3 1 Manual Create The Manual Create function lets users to input the sensor ID manual...

Page 22: ... in the dialog box and press Y to continue Figure 5 23 Sample Manual Create Screen 4 Place a new Foxwell sensor near the TPMS tool around 0 20 cm Figure 5 24 Sample Manual Create Screen 5 Press F3 to start the programming when the tool detect the sensor 6 Press F1 to exit after the programming successfully ...

Page 23: ... is used after the original sensor is triggered To Clone by activation 1 Highlight TPMS from the Main Menu and select the vehicle model as need 2 Select Programming Clone by Activation from the available menu 3 Place the tool near the original sensor to be copied and press Activate to continue 4 After trigger successfully press Y to continue Figure 5 25 Sample Activation Screen 5 Place a new Foxwe...

Page 24: ...ate 1 16 sensors The Automatic Create function is to program Foxwell sensors by applying random IDs created according to the test vehicle when it is unable to obtain the original sensor ID To create sensor ID automatically 1 Highlight TPMS from the Main Menu and select the vehicle model as need 2 Select Programming Automatic Create from the available menu Figure 5 28 Sample Automatic Create Menu 3...

Page 25: ... to exit after the programming successfully Figure 5 31 Sample Programming Success Screen 5 3 4 Clone By OBD This function lets users to write in the saved sensor information to Foxwell sensors after performing Read IDs from Vehicle in Learning function To create sensor ID manually 1 Highlight TPMS from the Main Menu and select the vehicle model as need 2 Select Programming Clone by OBD from the a...

Page 26: ...n on 4 Select the sensor ID to be copied after reading ID information successfully and press Y to continue Figure 5 33 Sample ID Copy Screen 5 Place a new Foxwell sensor near the TPMS tool around 0 20 cm Figure 5 33 Sample Programming Screen 6 Press F3 to start the programming when the tool detect the sensor 7 Press F1 to exit after the programming successfully ...

Page 27: ...ct option and then press the YES key Do this until the complete vehicle information is entered 3 Scroll with the UP DOWN arrow keys to highlight Sensor Learning Process and press the YES key to confirm 4 The detailed process information will be displayed Figure 5 35 Sample Sensor Learning Process Screen 6 RKE RF Monitor This section illustrates how to check RF Remote Keyless Entry key FOB with the...

Page 28: ...d the FOB is sending a signal the tool will beep and the following screen displays Figure 6 2 Sample RKE RF Monitor Screen 3 Press the NO key to exit 7 Latest Test Latest Test leads to screens for historic test records and can save 25 records at most To test the TPM sensors 1 Scroll with the UP DOWN arrow keys to highlight Latest Test from the Main Menu and press the YES key to start ...

Page 29: ...ample Vehicle Record Screen 3 Choose the function you need to start the operation 8 Settings This section illustrates how to program the TPMS Service Tool to meet your specific needs When Setup application is selected a menu with available service options displays Menu options typically include Language About Keypad Test Beep Set Display Test Automatic Power off ID Format Pressure Unit Temperature...

Page 30: ...e 8 1 Sample Language Setup Screen 2 Press the UP DOWN arrow key select a language and press the YES key to confirm and return Figure 8 2 Sample Language Selection Screen 8 2 About Selecting About option opens a screen that shows information about your scan tool such as serial number which may be required for product registration To view information of your scan tool 1 Scroll with the arrow keys t...

Page 31: ...ress ENTER key 2 Press any key to start test The virtue key corresponding with the key you pressed will be highlighted on the screen if it works correctly Figure 8 4 Sample Keypad Test Screen 3 To quit the test press N key twice 8 4 Beeper Set Selecting Beep Set opens a dialog box that allows you to turn on off the beeper To turn on off the beeper 1 Scroll with the UP DOWN arrow keys to highlight ...

Page 32: ...CD screen Figure 8 6 Sample LCD Test Screen 2 To quit the test press the Back key 8 6 Automatic Power off Interval Selecting Auto Power off opens a dialog box that allows you to set automatic power off interval of the trigger tool to save battery life Auto power off is not operational when charging The maximum interval is 20 minutes and the minimal is 1 minute To change auto power off interval 1 U...

Page 33: ...t ID Format from Setup menu and press the YES key 2 Press the UP DOWN arrow key select a format and press the YES key to save and return Figure 8 8 Sample ID Format Screen 8 8 Pressure Unit Selecting Pressure Unit opens a screen that allows you to set the pressure unit in kPa PSI or bar To configure pressure unit 1 Scroll with the UP DOWN arrow keys to highlight Pressure Unit from Setup menu and p...

Page 34: ... Temperature Unit from Setup menu and press the YES key 2 Press the UP DOWN arrow key select an item and press the YES key to save and return Figure 8 10 Sample Temperature Unit Selection Screen 8 10 Area Selecting Area opens a screen that allows you to select the area you work in To configure area 1 Scroll with the UP DOWN arrow keys to highlight Area from Settings menu and press the YES key 2 Hi...

Page 35: ...2 you can also go to our site with the link below Step 1 http www foxwelltech us support detail 216 html Step 2 http www foxwelltech us support detail 621 html 9 1 Create a Foxwell ID 9 1 1 Register through Website If you are new to FOXWELL please register on www foxwelltech us and create a FOXWELL ID first If you have installed the update application FoxAssist please refer to the registration gui...

Page 36: ...ories about our products Note Please always remember your FOXWELL ID and Password as it s important for your to manage your product and updates Figure 9 3 Sample Registration Form Filling Screen IMPORTANT User name is limited to Email address and please always find the Verification Code in your registered email 3 A Registration success message will appear if you registered successfully IMPORTANT P...

Page 37: ...assword Figure 9 6 Sample User ID and or Password Retrieve Screen IMPORTANT Before enter new password or confirm password please enter the correct Verification Code in your registered email 7 A Password reset succeeded message will appear if you rest password successfully Now you are able to log in with your ID and the new password If you want to change the password please sign in with your user n...

Page 38: ...ster and create a Foxwell ID with the update client FoxAssist To register through website 1 Visit our site www foxwelltech us and go the Product page Find your product model and click it to view the product profile Or Find the update tool under Tools in the Support page Select Download tab to download the PC application file 2 Unzip the application file Follow instructions on computer screen to in...

Page 39: ...s and click Send code to find the verification code in your mailbox Create a unique password confirm password and then click Free registration to complete Figure 9 12 Sample Register Screen 5 A Registered account is successful message will appear if you registered successfully Figure 9 13 Sample Registration Success Screen 6 Click OK It skips to the login page automatically You can input your FOXW...

Page 40: ...OXWELL ID registered email and password Figure 9 15 Sample Sign in Screen 2 When log in successfully the Member Center will show as below This platform enables you to review the registered products register new products modify personal information or reset the password Figure 9 16 Sample Member Center Screen 3 To register a product please click My Products New Registration Input correct serial num...

Page 41: ...ith FoxAssist 1 Launch the PC application FoxAssist Sign in with your Foxwell ID registered email and password Figure 9 18 Sample Sign in Screen 2 Select Activate and input serial number to complete product registration If you have multiple scanners to be registered please enter all serial numbers you wish to activate Or you can also connect the scanner with your PC via USB cable choose the Update...

Page 42: ...on System Windows 7 Windows 8 and Windows 10 CPU Intel PⅢ or better RAM 64MB or better Hard Disk Space 30MB or better Display 800 600 pixel 16 byte true color display or better Internet Explorer 4 0 or newer NOTE Before updating please make sure your network works correctly Before updating please make sure you have already created a Foxwell ID To update your scanner 1 Double click the desktop icon...

Page 43: ...pplicable to your scanner display Figure 9 21 Sample Download Screen 5 Click the check box es in front of the software s you wish to update and then click the Upgrade button on the top of the software s to download Figure 9 22 Sample Upgrade Check Screen 6 When Upgrade button is clicked it begins to download And you can check the Current Status If the Current Status shows Downloading please do not...

Page 44: ...9 23 Sample Updating Screen 7 When all the items are updated an All software downloads are successfully installed message displays Please click OK to confirm Figure 9 24 Sample Update Completed Screen 8 Please click Return to review all the software status ...

Page 45: ...local dealer for assistance 9 Should you have any questions regarding the product please click Complaint fill in all required information and click Submit to send us your issue Figure 9 26 Sample Complaint Screen 10 To uninstall a software or all software select them on the Uninstall tab and click the Uninstall button And the uninstalled items can be found in the Uninstall screen Figure 9 27 Sampl...

Page 46: ...ck User Information to view your personal information To modify your personal information just click the Edit and type in the message box and click Confirm To help us provide better sales please make sure that the telephone email and country are correctly entered Figure 9 29 Sample User Information Screen ...

Reviews: