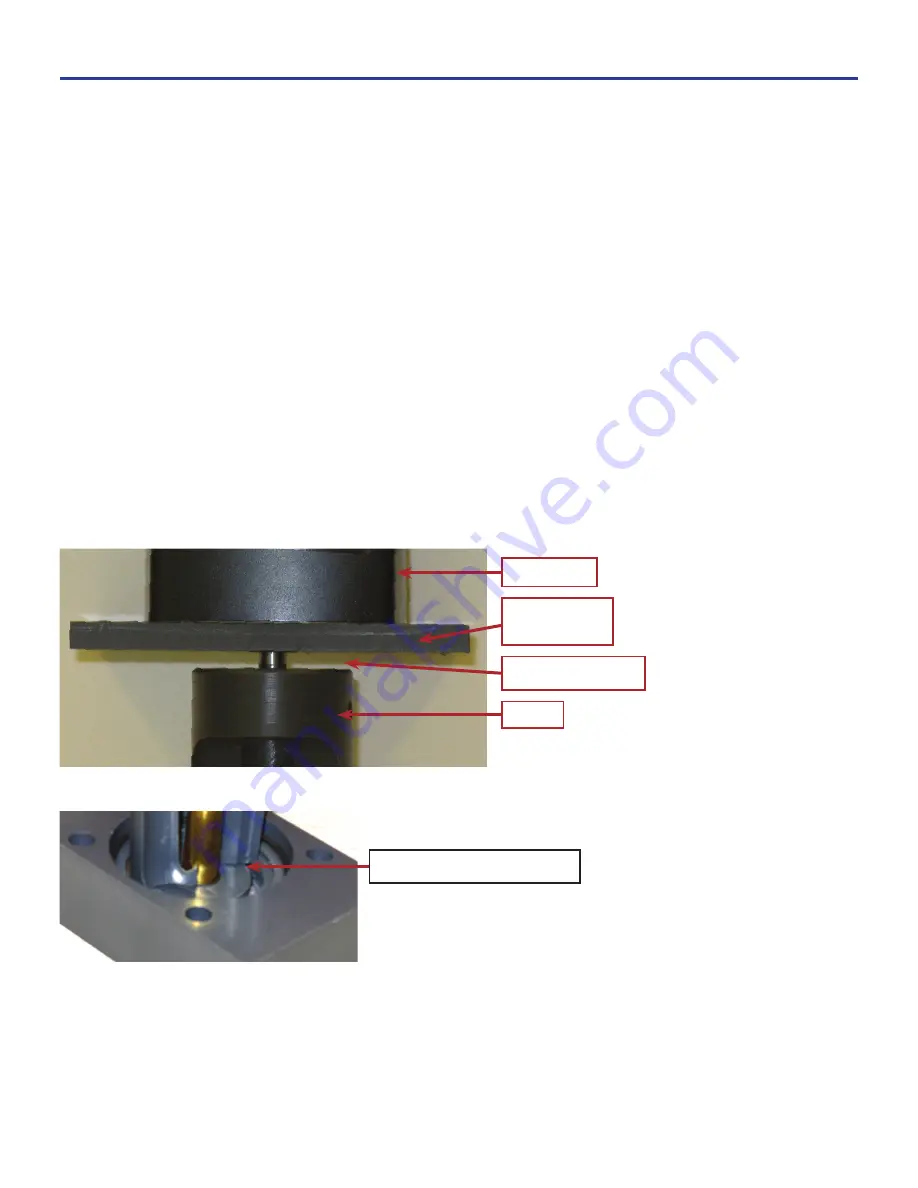
Mixer Gap Adjustment
Maintaining the proper clearance between the bottom tips of the mixer and the floor of the sample
cell is critical to prevent premature mixing motor failure.
If the gap is too high the mixing balls become jammed under the tips of the mixer, and/or come out
of the top of the cell through the sample water exit gap. If the mixer is set too low it will rub against
the floor of the sample cell. Either situation can damage the mixing motor. Intermittent mixer motor
stopping or reversal can be a symptom of these problems.
These same symptoms can also be caused by a worn copper ring, where the wall thickness has
diminished such that the mixing balls get jammed between the side of the mixer and the inside wall
of the copper ring. This latter condition would require replacement of the copper ring, in addition to
the gap adjustment described here.
The mixer clearance gap must be checked and adjusted to 5/32” whenever any integral part of the
sample cell has been replaced, such as the mixer motor, the copper ring, or the O-rings.
Tech Tip:
Use a 5/32” drill bit to set the gap between the mixer and mounting plate.
Proper Spacing 5/32”
Mixing Motor
Mixing Motor
Mounting Plate
Mixer
Lifted enough to prevent rubbing
Figure 48
Figure 49
Maintenance
40
FX-1000p


