background image

10. Turn Handwheel until Signature is printed on second check.

11. Located at the right end of the Imprint Cylinder shaft is the 

timing  collar.  Loosen  setscrew  and  align  timing  mark  on  Collar 

with  arrow  on  right  side  of  machine.  This  will  be  your  timing 

mark.

12. Position Ink Roller in front of Signature Saddle and tighten 

set screws.

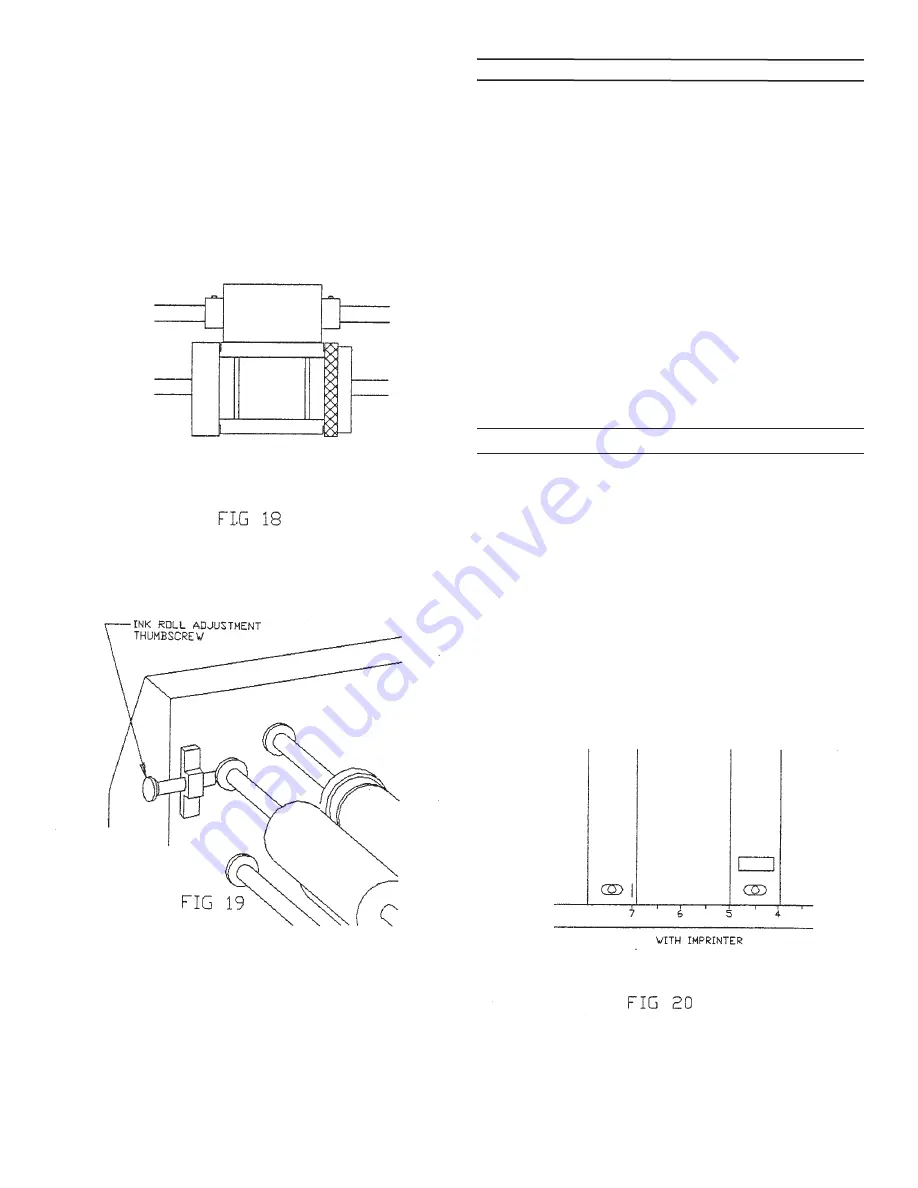
13. Adjust the tension of the Ink Roller so that it lightly 

touches Signature Saddle, by rotating Ink Roller Adjustment 

Thumbscrews uniformally. (Fig. 19)

14. To load checks after burster has been set up;

A. With handwheel, turn forward until timing mark of collar (step 

11) aligns with arrow on side of machine.

B. Place forms on tractors so leading edge is at top of tractors.

C., Rotate forms forward until they enter into the burster, set 

speed and turn on.

OPERATING HINTS

1. Some paper has a natural curve. Sometimes thia curve tends 

to catch air and sail. If this occurs try running them upside down.

2.  Perforations  vary  in  strength.  If  the  forms  are  bursting 

hard, tearing or breaking behind the tear bar, vary the Carriage 

Adjusting Knob setting up to 1/2” ahead or behind the actual form 

size setting.

3.  Multiple  part  forms  with  hard-glued  edge  can  be  burst  by 

positioning the tear point over the glued edge.

4. The Stacker Wheels should not stop the form until it clears the 

Snap Rollers.

5. Carbonized forms will generally stack better when ran with the 

coated side up.

7” FORMS IMPRINTING SET-UP

1

.

  7”


Forms  Imprinting  Set  Up  is  the  same  asfor  3-1/2”  forms, 

except that one saddle is used instead of two.

2. Set the form length adjustment to “7” w/imprint”.

3. Reposition the tear bar to the “7” w/imprint setting”.

4. To assure that the Burster rollers are timed, rotate the 

forms advance handwheel until the “timing marks” appear 

simultaneously through the slots in each roller cover. (See Fig. 

20).

12

Summary of Contents for FD 540

Page 1: ...FD 540 Burster OPERATOR MANUAL FIRST EDITION...

Page 2: ...LLATION Unpacking 2 Assembly 2 OPERATION General 4 Safety 4 Control Feature Function 5 Form Set up Procedure with Slitters 7 Form Set up Procedure with Tractor Slitters 9 Bursters with Imprinter Featu...

Page 3: ...y from underside of top surface Place Burster on table with infeed end of machine over large hole in table top The Burster should t ush with table on all sides Push J bolt up and turn so that J bolt h...

Page 4: ...hreaded inserts in the Burster Fig 2 3 Insert all four screws two 2 on underside of stacker tray without tightening them Once they are all in tighten with a medium Phillips screwdriver Fig 2 4 To inst...

Page 5: ...ver Parts Required 1 Infeed Brush Assembly Packed with Burster 4 6 32 Phillips Pan Head Screws Packed in Accessory Box 1 Unpack the infeed brush assembly and inspectfor damage 2 Place the infeed brush...

Page 6: ...machines Familiarity with these devices is very important in order to operate this machine properly SAFETY The machine has built in safety devices to protect the operator but these devices do not repl...

Page 7: ...p Button Stops Burster Paper Guides Restrict side to side movement of form while it is entering the burster Infeed Guide Brush Holds forms in place as they are fed over Infeed Table Blade Indicator Ma...

Page 8: ...the burst Safety Cover Interlock Switch Cuts power to the speed control when safety cover is opened Machine will not run with the cover open Jam Detection Switch Cuts power to the motor instantaneousl...

Page 9: ...orm length of the Form Setting Indicator Push the knob back in Fig 8 4 Push the paper guides apart 5 Thread the form under the infeed rod over the paper table and under the iinfeed brush 6 Lightly pre...

Page 10: ...that run the length of the form Fig 11 The Tear Bar height is adjustable to accommodate the characteristics of various forms To adjust the height the tear bar must be pushed to compress the spring and...

Page 11: ...you do not wish to slit push the Edge Slitters apart and out of the way To use Center Slitter position Slitters where cut is desired tighten thumbscrew and set screws 4 Continue with steps 10 thru 11...

Page 12: ...10...

Page 13: ...on the Ink Roller If the Setscrews are not in plain view use the Handwheel to bring them into view Slide the Ink Roller well away from the Signature area on the Check 6 Loosen Setscrews on Platen Cyl...

Page 14: ...paper has a natural curve Sometimes thia curve tends to catch air and sail If this occurs try running them upside down 2 Perforations vary in strength If the forms are bursting hard tearing or breaki...

Page 15: ...sed Jam detector not activating Jam Detection Switch Forms creep to one side Infeed guides not set properly Tension not uniform across the roller Edge of form not under roller Burster stalls tears for...

Page 16: ...ent Feed roller tension Uneven Inking Ink Roll not adjusted uniformly Ink Roll dried up or not turning freely Signature patch worn or installed improperly Uneven Signature Position Forms not in Tracto...

Page 17: ......

Reviews: