


Operation: Optical Media Destruction
WARNING: This unit completely destroys the disc, along with the information.
NOTE: Machine will not run, even in Manual mode, without sufficient vacuum suction.
1. Press main toggle switch to Optical Media.
2. Set power switch to ON (I) position. NOTE: If sufficient vacuum suction is not present, the internal vacuum sensor
will disable operation, and the red LED will light.
3. Remove any labels from the discs, if possible. Failure to do this may gum-up the cutter or drive roll. If you’re unable
to remove labels, insert the disc with the label facing you, which will reduce the chance of damage to the cutter.
4. Firmly insert the disc all the way into the slot. The motor will automatically start during the loading process.
Continue inserting until the disc is pulled downwards. The machine will stop automatically when finished.
5. If you’ve been processing a lot of discs, and the internal fan is running, allow the machine to cool down for about 5
minutes before switching the power OFF.
OPTICAL MEDIA MANUAL OPERATION
If you need to process part of a broken disc:
1. Set power switch to ON (I) position.
2. Insert the disc fragment and press the Manual Run button. This bypasses the internal disc-detection switch, which
might not be triggered if the disc fragment does not pass by it.
3. Press and hold the Manual Run button until destruction is complete. You will hear a change in sound when this
happens.
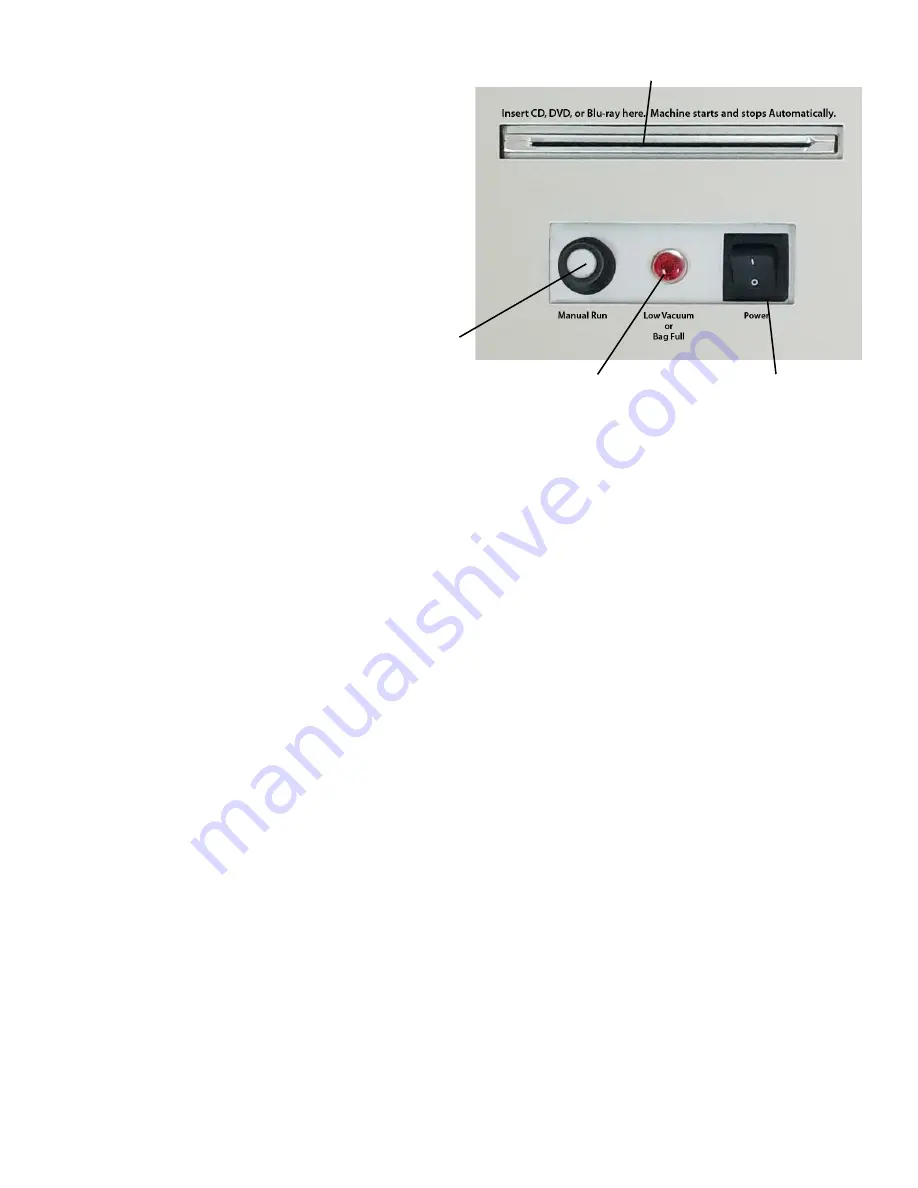
Control Panel: Optical Media Destruction
1. Power switch: Controls power to the optical media
unit.
2. Manual Operation button: Press this button to run
manually (see instructions below).
3.
Low Vacuum or Bag Full LED: Lights to indicate
there is insufficient vacuum suction or if the vacuum
is full.
NOTE: When the
Low Vacuum or Bag Full
LED is lit,
the unit will NOT process discs or run in Manual mode.
1
3
2
Optical Media Infeed