For-x XQ-48DSP User Manual Download Page 27

XQ-48DSPSpecial DSP amplifier

24

3. Software Operation

User Manual

Step2:

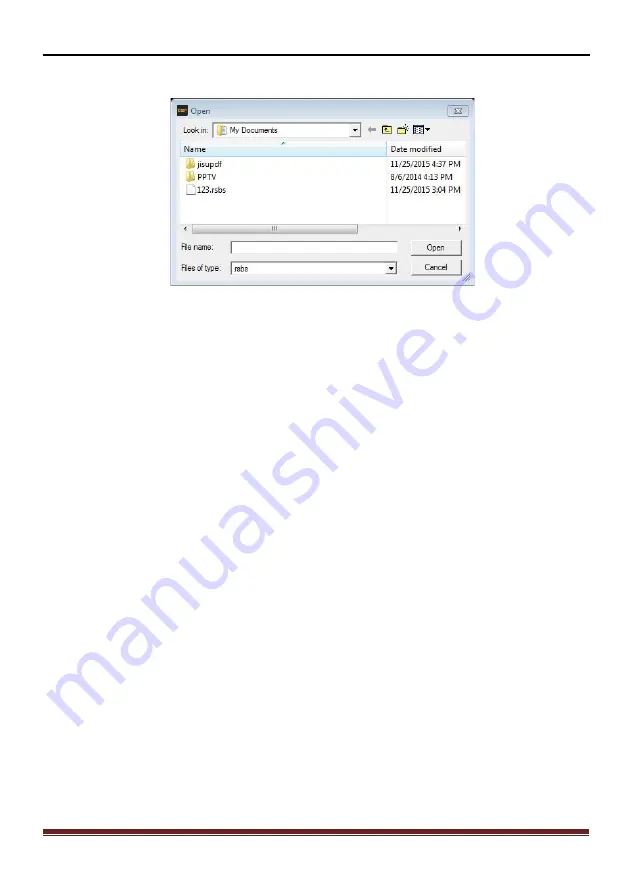
Click "Load PC preset File" after entry window will pop open file dialog box

(Figure 3.4.12).

Figure 3.4.12

step 3:

open the pop-up window, select the file name of the user you want to call,

point to open it.
3.4.2 Load and save the whole store a scene
1, save the whole store the scene

This function is to save all the data on the machine is now on-line for a computer

file data (data file of the whole machine, including the current job scenario, six groups
of all machine data preset scene, output channel configuration data and advanced
data and other options), to when copying machine call late the whole device. This
action does not change any data now on-line machine Specific methods of operation
and the "Save the scene file on the computer is" basically
the same, please refer to the operation on their own.

2, load the whole scene

This function is to load previously saved on the computer the whole machine to

machine data files (data file of the whole machine, including the current job
scenario, six groups of preset machine all the scenes, the output channel
configuration data scenario, six groups of preset machine all the scenes, the output
channel configuration data and advanced data and other options data). That is, the
previous overall good debugging machine data copied to now coupled machines.

We recommend similar models when making audio system, for the whole

replication functions.

The specific operation method is basically the same as "loading the scene file on

the computer", please refer to the operation by yourself.

Summary of Contents for XQ-48DSP

Page 1: ...User Manual XQ 48DSP SPECIAL DSP AMPLIFIER Please read this manual carefully before using this product and keep it for future reference...

Page 2: ...turn off power immediately and do not open cover by yourself Please contact with professional engineer for checking to avoid accident happen Packing List For every package including below items Please...

Page 3: ...is introduced 10 3 Software Operation 3 1 Software Installation 11 3 2 Run and turn off 11 3 3 Software interface 12 3 3 1 Input signal select 12 3 3 2 Output switch 13 3 3 3 Output voice delay type...

Page 4: ...ght flash alternately Open the bluetooth of your android mobile searching DSP to pairing it to finish the connected 1 User Operation Instruction Main Interface Main volume adjustment The main volume c...

Page 5: ...bwoofer volume The main volume is 0 60 subwoofer volume is 0 66 Click EQ to enter EQ interface Setting EQ Output channel 1 EQ curve gain Q value and frequency 2 Output EQ gain setting A total of 31 EQ...

Page 6: ...el high low pass crossover setting with high low pass independent filtering 2 Frequency Range 20Hz 20KHz Slope selection 6 dB Oct 12dB Oct 18dB Oct 24dB Oct 30dB Oct 36dB Oct 42dB Oct 48dB Oct OFF Out...

Page 7: ...ier 4 Mixer settings Click Mixer to enter Mixer interface It can Perform 8 Output Channel adjustment USB L USB R digital left and digital right Bluetooth left and Bluetooth right mix selection and adj...

Page 8: ...t high level input main voice choosing output input adaptor CH1 Output voice 1 8 each output channel is independent of the 31 segment equalizer Filter Slope choice Mute limiter RCA Low level Output 1...

Page 9: ...etooth port 6 USB2 0 port 7 Low level RCA output 8 RCA input 1 3 Software Introduction XQ 48DSP PC software control please check 3 Software Operation detail 1 Auotmetically detect whatever the hardwar...

Page 10: ...nd position and speaker type Output signal gain Gain range Mute 59 9dB to 6 0dB Output signal equalizer 1 8 Each output channel 31 band equalizer engine 1 Equalizer type 1st equalizer for Q and low pa...

Page 11: ...g method is for two units input please refer below 1 Please use Plug Play cable to connect original car unit and XQ 48DSP for upgrade audio system effects Please use OUT5 and OUT6 RCA output when Inst...

Page 12: ...high level input lines of FL FL are defined When there is original car or other high level input the machine will detect the audio signal to start the machine Note when do not use high level input on...

Page 13: ...ther functions 2 VOL LED Rotate the knob to increase or decrease Volume 3 SUB VOL LED Rotate the knob to increase or decrease SUB Volume 4 MEMORY LED Rotate the knob to switch to the memory 1 to 6 cha...

Page 14: ...d 3 2 Turn on and turn off Double click the XQ 48DSP icon to open the software and the main interface before online is shown in figure 3 2 1 the upper right corner refers to the unconnected state Figu...

Page 15: ...shown in figure 3 2 2 5 shows the setting of delay space 6 as shown in figure 3 2 2 6 output channel configuration and common parameter adjustment area 7 as shown in figure 3 2 2 7 shows the setting o...

Page 16: ...the output volume control volume control for each channel independently and the master volume pushing the volume fader below each channel label can be in OFF off adjust between 59dB to 6dB while on th...

Page 17: ...h output channel the specific methods of operation The first step Click on the right side of the Reset Output Configuration button in the dialog box select the Clear button return to the main interfac...

Page 18: ...eft super low right super low and super low The third step after the user has configured all of the output signal path click on the right side of Figure 3 3 4 Lock Output Configuration to lock the con...

Page 19: ...current real time equalizer is also updated value EQ parameters editing area 1 the output channel EQ editing method all 31 equalizer will work for the next parametric equalizer When the parametric equ...

Page 20: ...ion of frequency Q value is 1 2 a gain of 0dB 2 the output channel divider editing method Figure 3 3 9 In the column of frequency divider in figure 3 3 9 the parameter value of the device frequency di...

Page 21: ...value and the gain are restored to the initial value Restore All Equalizations button Switch between the currently designed equalizer state parameters and the pass through mode the gain of all equali...

Page 22: ...nter edit mode but the channel is not possible to select the sound field Link output Configure button Click this button a pop up dialog box select the synchronous mode option to copy from left to righ...

Page 23: ...on the machine is now running in the scene data is saved as a computer file or to load a previously saved scene computer files to the machine running Note the choice of input signal sources the output...

Page 24: ...shown in Figure 3 4 3 enter the scene name box If you select the number of the existing scene name it will overwrite the original data Step 4 Enter a name such as 4 abc named in the point you want as...

Page 25: ...interface to the top menu Memory button will pop up all the scenes action item see Figure 3 4 1 Step2 Click Load machine preset item will pop up after loading machine preset scene window dialog box F...

Page 26: ...uter 1 save as a scene file on the computer This function is to save the current machine working scene data to a computer in order to prepare the late call step 1 Click on the main interface to the to...

Page 27: ...ot change any data now on line machine Specific methods of operation and the Save the scene file on the computer is basically the same please refer to the operation on their own 2 load the whole scene...

Page 28: ...u can choose a language Simplified Chinese traditional Chinese English Figure 3 5 1 3 5 1 Noise Gate In the Options menu click on Noise Gate It can adjust the noise range 0 20 Figure 3 5 2 3 5 2 RESET...

Page 29: ...m will pop up a message Query dialog box in which you can query to SEQ ID letter version information of the device the software version information and device information 3 5 5 Encrypt Setting In the...

Page 30: ...r linking correct 2 pls check if REM IN if linking correct 2 No voice 1 pls check if turn on mute style 2 pls check if input channel is correct 3 cannot link USB 1 pls check if USB cable is setting co...

Page 31: ......

Reviews: