background image

23

Instructions for the user


1.14  Boiler operation

1.14.1  Switching on

 DANGER

It is presumed that the boiler has been installed by a qualified installer, it has been commissioned and is ready to operate correctly.

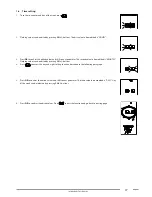
•  Open the gas shut-off cock.
•  Turn the master switch installed ahead of the boiler to ON.
•  The display turns on and indicates the function currently active (see 

Interpreting boiler status from display indications

 on page 

13

).

•  Select boiler operating mode by pressing 

 button on the touch-screen: OFF, SUMMER, WINTER, CH ONLY (see 

Selecting the operating 

mode

 on page 

14

).

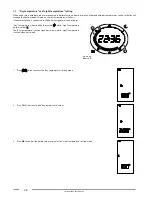
•  Set desired CH temperature (see 

CH function

 on page 

23

).

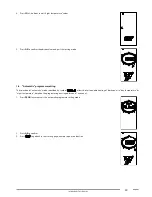
•  Set desired DHW temperature (see 

DHW function

 on page

24

).

•  If one or more ambient probes or a thermostat are present, set the desired ambient temperature value and the weekly programming.

 WARNING

Should the boiler be left inactive for a long time, particularly when boiler is propane-fired, ignition might be difficult.
Before starting the boiler switch on another gas powered device (e.g. kitchen range).
Beware that even by following this procedure, the boiler might still experience some starting difficulties and shut down once or 

twice. Press the RESET button to restore boiler operation.

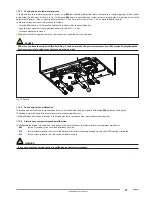
1.14.2  CH function
To set the heating water temperature, press +/- CH buttons.
Heating temperature adjustment range depends on the selected operating range.:

•  standard range: from 20°C to 78°C (pressing CH +/-);
•  reduced range: from 20°C to 45°C (pressing CH +/-).

Operation range selection is to be implemented by a installer or an authorized Service Centre (see par. 

Selecting the operating range in heating 

mode

 on page 

54

).

During temperature setting, the 

 symbol flashes on the screen and the CH current temperature setting is displayed.

When the CH system requests heat from the boiler, the LCD displays the CH symbol 

 and the current CH flow water temperature.

The waiting time between one boiler ignition and the following one, used to prevent boiler frequent turning on and off, ranges between 0 and 

10 minutes (default value: 4 minutes), and can be edited with the P11 parameter.
Should water temperature in the system fall below set minimum value, between 20°C and 78°C (default value 40°C for standard range, 20°C 

for reduced range) to be edited with the P27 parameter, the waiting time is reset and the boiler re-ignites.
The burner ON symbol   shows while the burner is operating.

Summary of Contents for ITACA KB 24

Page 1: ... ITACA KB 24 32 INSTALLATION USE AND MAINTENANCE EN Translation of the original instructions in Italian IST 03 845 01 ...

Page 2: ...equirements set forth by the prevailing rules We hereby inform you that certain models versions and or accessories relevant to the products this manual refers to might not be available in some countries Therefore it is recommended to contact the manufacturer or the importer in order to get the necessary information about the actual availability of such models versions and or accessories The manufa...

Page 3: ...specific waste management sites After removing the packaging make sure that its elements clips plastic bags foam polystyrene etc are note left within the reach of children as they are potential hazard sources In the event of failure and or faulty functioning switch off the boiler Do not attempt to make repairs contact qualified technicians Original parts must be used for all repairs to the boiler ...

Page 4: ...nd windows Contact a Service Centre a qualified installer or the gas supply company Never use a flame to locate a gas leak The boiler is designed for installation in the countries indicated on the technical data plate installation in any other country may be a source of danger for people animals and or property The manufacturer will bear no contractual and tortious liability for failure to comply ...

Page 5: ...er switch installed ahead of the boiler ON the boiler display turns on 3 If you do not wish to activate the CH function press the button until displaying the symbol only the DHW function will be enabled 4 If you wish to activate both the heating and DHW functions press the button until displaying the symbol 5 If you do not wish to activate the DHW function press the button until displaying the sym...

Page 6: ...s 34 2 5 Operating data 35 2 6 General characteristics 36 2 7 ERP and Labelling data 38 3 Instructions for the installer 40 3 1 Installation standards 40 3 2 Choosing where to install the boiler 41 3 3 Positioning the boiler 41 3 4 Installing the boiler 43 3 5 Boiler room ventilation 44 3 6 Air intake and flue gas venting system 44 3 7 Checking combustion efficiency 51 3 8 Connection to gas mains ...

Page 7: ...7 6 Decommissioning disassembly and disposal 75 7 Malfunctions possible causes and solutions 76 7 1 Troubleshooting 76 ...

Page 8: ...g 13 Plugs position 51 Fig 14 Hole position 51 Fig 15 Connection to gas mains 52 Fig 16 Thermoregulation curves 57 Fig 17 Available head KB 24 62 Fig 18 Available head KB 32 62 Fig 19 Wiring diagram 63 Fig 20 Multifunction relay connection diagram 64 Fig 21 Relay with remote control and TA2 65 Fig 22 Relay with interface and TA2 65 Fig 23 Relay with remote request P17 1 66 Fig 24 Relay with TA2 re...

Page 9: ...b 7 ERP and Labelling data KB 24 38 Tab 8 ERP and Labelling data KB 32 39 Tab 9 Boiler re ignition temperature 54 Tab 10 Limits to be set for TSP parameters and default values in relation to boiler type TSP0 55 Tab 11 Parameter setting 67 Tab 12 Relationship between Temperature and Nominal resistance for temperature probes 67 Tab 13 P0 TSP0 parameter values 71 Tab 14 Flue CO2 content 72 Tab 15 Dia...

Page 10: ...rogramme for temperature zones and manual programme selection C Time and ambient temperature setting D Set the domestic hot water DHW E Set the heating water and the CH settings F Alarm reset and back to the starting page during parameter selection G DHW comfort function setting and confirm button H Operating status selection Touch the display in order to activate it Unless an operation is perform...

Page 11: ...oon night Setting of the two temperatures associated with the day and the night 9 Display of current time fan revolutions Not used 10 Indicates if the unit is in time slot programming mode Not used 11 Manual mode operation Manual mode setting 12 Display of zone 1 heating programme Edit zone 1 heating programme 13 Current day of the week Edit day of the week 14 Display of zone 2 heating programme E...

Page 12: ... of the fictitious ambient temperature set point 21 Indication of the centigrade degrees Not used 22 During parameter setting the wrench symbol stays on until the value is confirmed Not used 23 Indication of system pressure measurement unit Not used 24 Percentage indication Not used ...

Page 13: ...the heating system pressure are displayed SUMMER WINTER CENTRAL HEATING ONLY Boiler switch in SUMMER or WINTER mode Water heater enabled DHW function active DHW temperature displayed water heater SUMMER WINTER Boiler switch in WINTER mode or CH ONLY CH function active The flow water temperature is displayed WINTER CENTRAL HEATING ONLY 1 2 2 Malfunction To identify any malfunctions refer to paragra...

Page 14: ...d 1 OFF operating status When the OFF mode is enabled no function is active 2 SUMMER operating status When the SUMMER mode is enabled only the DHW production function is active 3 WINTER operating status When the WINTER mode is enabled both DHW and CH functions are active 4 CH ONLY operating status When the CH ONLY mode is enabled only the heating water production function is active ...

Page 15: ...the boiler follows the set water heater hour programming see par Programming mode for heating and water heater on page 21 If comfort function is enabled comfort press OK button to disable it If comfort function is disabled comfort icon OFF press OK button to enable it Water heater heating through the COMFORT function or programming is carried out only if the boiler is in SUMMER or WINTER mode If t...

Page 16: ...ox 3 seconds and temperature value will flash as well After this time value is stored and display standard operation will be restored Press CH button to select the desired flow water temperature During selection icon will flash In the phase in which the icon is flashing only the buttons to adjust the temperature are enabled As soon as button is released icon will continue flashing for approx 3 sec...

Page 17: ...eter Thesecondvaluetobemodifiedis MINUTES Flashing values can be edited by pressing CH buttons 4 Press to access the day and night setting function described in the following paragraph 5 Press OK to confirm the edited values and shift to next parameter The third value to be modified is DAYS Day of the week can be selected by pressing CH buttons 6 Press OK to confirm the edited values Press to quit...

Page 18: ...follows If no ambient probe is connected to the boiler temperatures cannot be set Day temperature is identified by the symbol while night temperature by the symbol The day temperature is active when bars are on while night temperature is active when bars are off A B A bars on B bars off 1 Press twice to access the day temperature setting mode 2 Press CH buttons to edit day temperature values 3 Pre...

Page 19: ...gramme setting The selection of automatic mode identified by symbol allows boiler to enable heating of both zones in day temperature or night temperature based on the programming envisaged for zone 1 and zone 2 1 Press PROG twice to access the automatic programme setting mode 2 Press OK to confirm 3 Press to go back to the starting page namely to quit the function ...

Page 20: ...ction 24 hours a day in both zones at the day temperature disabling at the same time zone 1 and zone 2 programming External water heater if there is one is heated according to the specific programme 1 Press to access the manual programme setting mode 2 Press OK to confirm 3 Press to go back to the starting page namely to quit the function ...

Page 21: ...ress CH buttons to move inside the different times of the day 10 To program other days of the week or to program zone 2 and water heater press 11 You will go back to the starting page Whatever part of the programme can be quit by pressing the button twice The procedure to program zone 2 and water heater is very similar to the one followed to program zone 1 Press the prog button to access in sequen...

Page 22: ...fo button 1 12 Failures that cannot be reset The display shows the failure based on the corresponding error code see Troubleshooting on page 76 Some failures can be reset through the key while some others are self resettable refer to the following paragraph If failures cannot be reset but are of the self resettable type no key will be enabled and only the LCD backlighting will be on As soon as the...

Page 23: ... might still experience some starting difficulties and shut down once or twice Press the RESET button to restore boiler operation 1 14 2 CH function To set the heating water temperature press CH buttons Heating temperature adjustment range depends on the selected operating range standard range from 20 C to 78 C pressing CH reduced range from 20 C to 45 C pressing CH Operation range selection is to...

Page 24: ...utton on the display see Comfort function enable disable on page 15 1 14 5 Anti legionella function Every 15 days the anti legionella function is enabled It gets the water heater temperature to 65 C for 30 minutes regardless of any other setting in order to prevent or remove possible proliferation of bacteria inside the water heater 1 14 6 Freeze protection function This boiler is fitted with a fr...

Page 25: ...urs so as to avoid any shut down The same applies to the relay which can be freely programmed whenever this latter is used to power a recirculation pump or a deviating valve 1 14 8 Operation with external probe optional Boiler can be connected to a probe measuring the external temperature optional not compulsory supplied by the manufacturer Once the external temperature value is known the boiler w...

Page 26: ...ge 13 To determine the possible causes of malfunction see Troubleshooting on page 76 Below is a list of shut down types and the procedure to follow in each case 1 15 1 Burner shut down Fault code E01 is displayed flashing on the display in the event of burner shut down due to missing flame If this happens proceed as follows check that the gas cock is open and light a kitchen gas ring for example t...

Page 27: ...u close the cock carefully after filling If you do not when the pressure increases error E09 may be displayed and the heating system safety valve may activate and discharge water A Fig 2 Filler cock 1 15 4 Shut down for fan malfunction The fan operation is constantly monitored and in case of malfunction the burner goes off the code E40 flashes on the display This mode is maintained until the fan r...

Page 28: ...ified service engineer to carry out the maintenance The remote control can indicate faults or shutdown conditions and can also restore boiler operation after shutdown up to a maximum of 3 times in a 24 hour period If the maximum number of attempts is reached fault code E99 is shown on the boiler display To reset error E99 disconnect and re connect again boiler from to power mains 1 15 7 Alarm due ...

Page 29: ...nlyaccesspartsoftheboilerthatcanbereachedwithoutusingspecialequipmentortools Theuserisnotauthorised to remove the boiler casing or to operate on any internal parts No one including qualified personnel is authorised to modify the boiler The manufacturer shall not be held responsible in case of damage to people animals or property due to failure to follow the above mentioned instructions If the boil...

Page 30: ...iter and ionisation flame detection Stainless steel fully pre mixed burner Mono thermal high efficiency composite and stainless steel heat exchanger with air purging device Twin shutter modulating gas valve with constant air gas ratio Modulating electronically managed combustion fan High efficiency circulation pump with variable speed Heating circuit pressure sensor CH water flow probe Flue gas th...

Page 31: ...able Heating pump post circulation function in CH freeze protection and flue cleaning modes 30 seconds adjustable DHW post circulation function 30 seconds Post circulation function for heating temperature 78 C 30 seconds Post ventilation function after working 10 seconds Post ventilation function for CH temperature 95 C Circulation pump and deviating valve anti shut down function 30 seconds of ope...

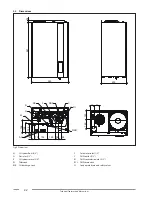
Page 32: ...0 38 402 143 145 61 88 RC F RSR M SC G R RSS C RI Fig 3 Dimensions M CH system flow 3 4 G Gas inlet 1 2 R CH system return 3 4 RC Filler cock RSR CH discharge cock F Cold water inlet 1 2 C DHW outlet 1 2 RI DHW recirculation inlet 1 2 RSS DHW drain cock SC Condensate drain and safety valves ...

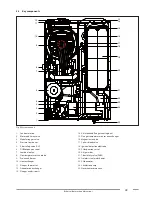
Page 33: ...7 Combustion fan 8 Flow temperature twin probe 9 Pre mixed burner 10 Heat exchanger 11 Flue gas thermostat 12 Deaerator on exchanger 13 Flue gas analysis ports 14 Air intake and flue gas venting duct 15 Flue gas temperature sensor on exchanger 16 Magnesium anode 17 Coil air bleed valve 18 Ignition detection electrode 19 CH expansion vessel 20 Air gas mixer 21 7 bar safety valve DHW 22 Stainless st...

Page 34: ...Flue gas temperature sensor on exchanger 12 DHW temperature probe 13 Ignition detection electrode 14 DHW expansion vessel 15 Magnesium anode 16 CH expansion vessel 17 Return temperature probe 18 7 bar safety valve DHW 19 3 bar safety valve CH 20 Pressure transducer 21 Circulation pump 22 CH system drain cock 23 Water heater drain cock 24 CH system filler cock 25 Motorised 3 way valve 26 Automatic ...

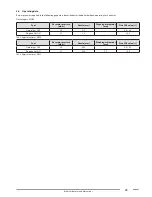
Page 35: ...3 minutes Gas category II2H3P Fuel Gas mains pressure mbar Nozzle mm Diaphragm diameter mm Flue CO2 value Natural gas G20 20 3 7 9 0 9 3 Propane Gas G31 37 3 0 10 0 Tab 2 Adjustment rates KB 24 Fuel Gas mains pressure mbar Nozzle mm Diaphragm diameter mm Flue CO2 value Natural gas G20 20 4 45 9 0 9 3 Propane Gas G31 37 3 55 7 2 10 0 Tab 3 Adjustment rates KB 32 ...

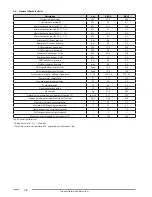
Page 36: ...cuit max pressure bar 6 0 6 0 DHW specific flow rate ΔT 25K l min 19 4 23 4 DHW specific flow rate Δt 30K l min 16 2 19 5 Electric power supply voltage frequency V Hz 230 50 230 50 Power mains supply fuse A 3 15 3 15 Maximum power consumption W 89 99 Pump absorption W 46 46 Electric protection rating IP X4D X4D Net weight kg 61 5 66 5 Natural gas consumption at maximum CH output cu m h 2 51 3 22 P...

Page 37: ... 50 30 C 105 4 105 4 30 heat output efficiency rating 106 9 NOx emission class 5 Tab 5 Combustion specifications KB 24 Description um Max output Min output 30 load Casing heat loss with burner on 0 96 5 98 Casing heat loss with burner off 0 19 Flue system heat loss with burner on 2 44 1 92 Flue system mass capacity g s 15 81 1 87 Flue gas temperature Air temperature C 60 40 5 Heat efficiency 80 60...

Page 38: ...Annual electricity consumption AEC 38 kWh Annual fuel consumption AFC 21 GJ A A 82 Contact details FONDITAL S p A Via Cerreto 40 I 25079 VOBARNO Brescia Italia Italy Declared load profile XL Water heating energy efficiency ηwh Seasonal space heating energy efficiency class Water heating energy efficiency class For combination heaters Model s ITACA KB 24 Condensing boiler yes Low temperature boiler...

Page 39: ...city consumption AEC 50 kWh Annual fuel consumption AFC 22 GJ A A 80 Contact details FONDITAL S p A Via Cerreto 40 I 25079 VOBARNO Brescia Italia Italy Declared load profile XL Water heating energy efficiency ηwh Seasonal space heating energy efficiency class Water heating energy efficiency class For combination heaters Model s ITACA KB 32 Condensing boiler yes Low temperature boiler yes B1 boiler...

Page 40: ...acking materials can be recycled Disposal must be managed via appropriate waste collection sites Keep packaging out of reach of children as it may be dangerous The manufacturer shall not be held responsible in case of damage to people animals or property due to failure in following the above mentioned information Packaging includes the hydraulic kit with copper pipes for boiler connection to gas m...

Page 41: ...boiler This template is made of heavy duty paper and must be fixed with the help of a level onto the wall where the boiler is to be mounted The template provides all the indications required to drill the boiler mounting holes to the wall procedure which is done using two screws and wall blocks The lower area of the template shows where to mark the exact point at which the couplings are to be posit...

Page 42: ...42 Instructions for the installer Fig 6 Paper template ...

Page 43: ...per template on the wall Drill two Ø 10 mm holes in the wall to accommodate the two boiler bracket wall blocks If necessary provide holes in the wall to allow air intake and or flue gas venting ducts to pass through it Fix the two brackets to the wall carrying out in sequence the following steps screw the first two M8 nuts fully home inside the double screw threads screw in the screws fully home i...

Page 44: ... the boiler repeatedly shut down it is necessary to have the boiler air intake flue gas venting ducts checked since they could be obstructed or incorrectly sized for flue gas discharge into the atmosphere DANGER For the air intake flue gas venting systems specific manufacturer approved condensate acid resistant pipes and systems must be used suitable for condensing boilers DANGER Flue gas venting ...

Page 45: ...45 Instructions for the installer Fig 8 Installation examples KEY A Air intake S Flue gas vent Condensate Rain ...

Page 46: ...the combustion chamber heat exchanger Type C33 Boiler intended for connection to vertical outlet and intake ducts connected to the outside by means of coaxial or split ducts The minimum distance between the air intake duct and the flue gas venting duct must be at least 250 mm whereas both terminals must be contained within a square measuring 500 x 500 mm The boiler is to be equipped with a fan mou...

Page 47: ...sible length is to be reduced by 0 5 meter The wall terminal reduces maximum permissible length by 1 5 meters The air intake duct is to be tilted down by 1 toward its exit in order to avoid rain water to enter it KB 32 Minimum permissible length of horizontal coaxial pipes is 1 meter without accounting for the first elbow connected to the boiler Maximum permissible length of Ø 100 60 mm horizontal...

Page 48: ...ngth is to be reduced by 0 5 meter The roof vent terminal reduces maximum permissible length by 1 5 meters KB 32 Minimum permissible length of vertical coaxial pipes is 1 meter Maximum permissible length of Ø 100 60 mm vertical coaxial pipes is 7 meters Maximum permissible length of Ø 125 80 mm vertical coaxial pipes is 10 5 meters For each additional 1 meter of straight pipe maximum permissible l...

Page 49: ...ength of air intake and flue gas venting pipe For each additional 1 meter of straight pipe maximum permissible length is to be reduced by 1 meter For each additional 90 elbow maximum permissible length is to be reduced by 1 5 meter For each additional 45 elbow maximum permissible length is to be reduced by 1 meter The roof terminal reduces maximum permissible length by 6 meters The wall terminal r...

Page 50: ...50 Instructions for the installer A A Fig 11 Type C43 C53 C83 split ducts A Gasket 580 61 88 143 289 146 402 Fig 12 Type C43 C53 C83 split pipes dimensione ...

Page 51: ...rner is on As soon as the DHW key is released the display will show fan current rpm value flow temperature system pressure the symbol the symbol to indicate that the flue cleaning function is active The flue cleaning function lasts 15 minutes To quit the flue cleaning function press button and you will go back to the standard operating mode 3 7 2 Measurement procedure The boiler is equipped with a...

Page 52: ...iately sized gasket A made from suitable material see Fig 15 Connection to gas mains The boiler gas inlet coupling is NOT suitable for hemp teflon tape or similarly made gaskets A Fig 15 Connection to gas mains 3 9 Hydraulic connections 3 9 1 Central heating Prior to installing the boiler the hydraulic system is to be cleaned in order to remove impurities they could be present in system components...

Page 53: ...ARNING It is advisable to convey the discharge flow of boiler safety valve to the sewer system Should the above precaution not be implemented and the safety valve be activated boiler room flooding may occur The manufacturer shall not be held responsible in case of damage to people animals or property due to failure to follow the above mentioned instructions 3 9 3 Condensate drain Comply with conde...

Page 54: ...he boiler is designed to be connected to an ambient thermostat optional not compulsory Ambient thermostat contacts must be properly sized in compliance with a load of 5 mA at 24 Vdc The ambient thermostat cables must be connected to terminals 1 and 2 of the electronic board see Fig 19Wiring diagram after eliminating the jumper supplied as a standard with the boiler The ambient thermostat cables ar...

Page 55: ...emote Control For complete instructions on how to program the Remote Control refer to the instruction manual included in the Remote Control kit Board and Remote Control communicate in each operating mode OFF SUMMER WINTER CH ONLY Boiler display layout corresponds to the setting made from the Remote Control as for the operating mode The remote control may be used to view and set a number of special...

Page 56: ... probe must be installed on an outside wall facing NORTH NORTH EAST in a position protected from weather Do not install near a window ventilation openings or sources of heat The external temperature probe automatically modifies the CH flow temperature in relation to Measured external temperature Selected thermoregulation curve Selected fictitious ambient temperature The fictitious ambient temperat...

Page 57: ...rves shift up or down respectively by the same amount With a fictitious ambient temperature setting of 20 C for example if you select the curve corresponding to parameter 1 and the outdoor temperature is 4 C the CH flow temperature will be 50 C 100 90 80 70 60 50 40 30 20 10 0 20 16 12 8 4 0 4 8 12 16 20 24 28 32 36 40 3 0 2 5 2 0 1 5 1 0 0 8 0 6 0 4 0 2 C C Fig 16 Thermoregulation curves Tm indic...

Page 58: ...mp time 0 30 1 10 sec 18 180 sec n a P10 TSP10 Heating output curves 0 3 1 5 Resolution 0 05 P11 TSP11 Heating thermostat timing 0 10 min 4 n a P12 TSP12 CH power rising ramp timer 0 10 min 1 n a P13 TSP13 Timer for CH post circulation freeze protection and flue cleaning function 30 180 sec 30 n a P15 TSP15 0 3 sec 0 n a P16 TSP16 Ambient remote control thermostat reading delay 0 199 sec 0 n a P17...

Page 59: ... on off 1 ambient probe modulation 2 external probe modulation 3 ambient probe and external probe modulation 4 no ambient probe connected P58 Ambient probe weight during modulation 0 20 C 8 C used for thermoregulation with P57 3 P59 Type of temperature visualization on display 0 1 2 3 4 0 0 flow temp 1 SA1 probe temp 2 SA2 probe temp 3 external temp 4 water heater temp P60 Number of additional boa...

Page 60: ...n the system properly work see Fig 2 Filler cock Close all radiator bleeding valves as soon as water starts coming out Check on boiler display that water pressure reaches the 1 1 3 bar reading Shut the filler cock and bleed any air out again by opening the air bleeding valves on radiators Start the boiler and bring the system to working temperature stop the pump and repeat air bleeding procedure A...

Page 61: ...pen the mains gas type is correct for the boiler calibration convert the boiler to the available gas if necessary see Adaptation to other gas types and burner adjustment on page 68 This operation is to be exclusively carried out by qualified personnel The gas supply cock is open There are no fuel gas leaks The main switch installed adjacent to the boiler is turned on the 3 bar CH system and 7 bar ...

Page 62: ...speed operation In the fixed speed operating mode circulation pump speed remains constant at a value set in the boiler parameters During DHW phase circulation pump works at a fixed speed set in the boiler parameters WARNING Circulation pump is set to constant ΔT operating mode during production For a correct operation of the boiler it is recommended not to change factory setting Should it be neces...

Page 63: ...1 2 7 1 CN_E CN_H CN_A ACC1 CN_I CN_M CN_L CN_J CN_D CN_B CN_C JP1 X14 1 2 3 4 VG MDV N bu Risc bk Sanit bn V X4 X3 X5 CN_L CN_I CN_M CN_A CN_E CN_C CN_D SF SR1 SR2 TF E SRT Conn_F Conn_E Conn_C Conn_B Conn_A Conn_D ygn CN_J 0SCHEMOD27 N Fn a Fn c 230V a c IN GND OUT DK CN_H pwm P 230Vac 50Hz SBC Fig 19 Wiring diagram ...

Page 64: ...ectrode V Fan CN_A CN_M Load signal connectors X2 X7 ground connectors Electrical connections to be made by the installer 1 2 TA2 Ambient thermostat 2 3 4 OT or TA1 Remote Control or ambient thermostat 5 6 external probe 10K Ohm B 3977 at 25 C 7 8 Not available 9 10 Not available 11 12 Not available 13 14 Ambient probe 1 10K Ohm B 3977 15 16 Ambient probe 2 10K Ohm B 3977 17 18 19 20 485 port for ...

Page 65: ... features a multifunction relay to be set through the parameter P17 TSP17 Solenoid valve with limit swich Solenoid valve coupled to Remote Control Fig 21 Relay with remote control and TA2 Solenoid valve with limit swich Solenoid valve coupled to Remote Control Fig 22 Relay with interface and TA2 ...

Page 66: ...66 Instructions for the installer CIRCULATION PUMP coupled to Remote Control Fig 23 Relay with remote request P17 1 CIRCULATION PUMP coupled to ambient thermostat TA Fig 24 Relay with TA2 request P17 3 ...

Page 67: ...11 Parameter setting 3 17 3 Relationship between temperature and nominal resistance of all NTC probes T C 0 2 4 6 8 0 27203 24979 22959 21122 19451 10 17928 16539 15271 14113 13054 20 12084 11196 10382 9634 8948 30 8317 7736 7202 6709 6254 40 5835 5448 5090 4758 4452 50 4168 3904 3660 3433 3222 60 3026 2844 2674 2516 2369 70 2232 2104 1984 1872 1767 80 1670 1578 1492 1412 1336 90 1266 1199 1137 10...

Page 68: ...r plastic body Using a 6 mm Allen wrench loosen the two mixer nozzles see Fig 28 Mixer plastic body Screw the new nozzles for propane listed in Tab 15 Diameter of nozzles diaphragms mm taking care to drive them fully home without tightening Only for the KB 32 model insert the 7 2 mm diaphragm on the outlet of the gas valve WARNING In case the nozzle idles when reaching the bottom of the nozzle thr...

Page 69: ...e them fully home without tightening Only for the KB 32 model remove the 7 2 mm diaphragm on the outlet of the gas valve WARNING In case the nozzle idles when reaching the bottom of the nozzle threaded seat it means that the thread is damaged and perfect sealing is not ensured The whole mixer shall be replaced To refit the plastic body Venturi insert it inside mixer and secure it in place with the...

Page 70: ... A C B Fig 26 Intake pipe Fig 27 Mixer E F G F Fig 28 Mixer plastic body G G H I Fig 29 Assembling direction A Gas valve B Mixer C Air intake D Gas pipe E O ring F Nozzles G Venturi to mixer retaining screws H Gas fitting I Direction tab ...

Page 71: ...symbol stops flashing The boiler starts operating at maximum heat output If a gas switching has been made access the programming page and set the parameter P0 based on the power and on the gas as specified in Tab 10 Limits to be set for TSP parameters and default values in relation to boiler type TSP0 Set flue gas CO2 content by turning the ratio adjuster B see Fig 30 Adjusting CO2 value and ensur...

Page 72: ...justing CO2 value Fuel CO2 value 24 kW Methane 9 0 9 3 24 kW Propane 10 32 kW Methane 9 0 9 3 32 kW Propane 10 Tab 14 Flue CO2 content Model Natural gas Propane 24 kW 3 70 3 00 32 kW 4 45 3 55 diaphragm Ø 7 2 Tab 15 Diameter of nozzles diaphragms mm ...

Page 73: ...correct for the boiler calibration convert the boiler to the available gas when necessary this operation must only be performed by qualified technical personnel the gas supply cock is open there are no fuel gas leaks the main switch installed ahead of the boiler is turned on the 3 bar CH and 7 bar DHW safety valves are not stuck there are no water leaks the condensate trap installed on the boiler ...

Page 74: ...water leaks and oxidised areas on the boiler s couplings сheck efficiency of the system safety valves Check boiler combustion parameters by flue gas analysis Check the state of combustion fan check expansion vessels filling pressure Check correct draining of condensate from the condensate trap installed on the boiler сheck wear state of water heater magnesium anode The following cleaning is to be ...

Page 75: ...al procedures carried out by qualified personnel only The user is not authorised to carry out such operations Decommissioning disassembly and disposal operations must be performed with boiler cold and disconnected from gas and power mains The materials the boiler is made of can all be recycled Once disassembled boiler must be disposed of in accordance with the national prevailing regulations ...

Page 76: ...Contact qualified personnel Replace the electrode Electronic board does not detect flame it is faulty Contact qualified personnel Replace electronic board Ignition heat input setting is too low Contact qualified personnel Increase it Minimum heat input is not set correctly Contact qualified personnel Check burner setting E02 Flow temperature exceeded the max allowed value Circulation pump is fault...

Page 77: ...nnection failure only shown on Remote Control display The Remote Control is not connected to boiler board Contact qualified personnel Reconnect it Remote control faulty Contact qualified personnel Replace it Boiler board is faulty Contact qualified personnel Replace it E35 Safety Thermostat triggering to protect the mixed zone 2 with zone kit 0KITZONE05 installed only Mixer valve is faulty Contact...

Page 78: ...ified personnel Restore bypass valve correct assembling Heat exchanger primary circuit is obstructed Contact qualified personnel Clean or replace the exchanger E86 Flow temperature increases too quickly Pump is seized Contact qualified personnel Unseize the pump Pump is faulty Contact qualified personnel Replace it Air present inside heating system Contact qualified personnel Bleed the air from th...

Page 79: ...79 ...
Page 80: ... 39 0365 878 304 e mail info fondital it www fondital com The manufacturer reserves the right to modify his her products as deemed necessary without altering the basic characteristics of the products themselves Uff Pubblicità Fondital IST 03 C 845 01 Luglio 2015 07 2014 0LIBMEEN26 ...

Reviews: