2
4.
Install La Fonera
4. Install La Fonera
Now that your La Fonera is installed and registered, you
only need to do one more thing to use your Internet
connection as usual. If you remember what we’ve seen
in the previous sections, you are currently connected to
the public network. You can continue using this network
at any time, but we recommend you use the private
connection as a default. The main reason for this is that
the private network is encrypted, offering greater security.
Let’s see how to switch from using the public network to
the private one.
1.
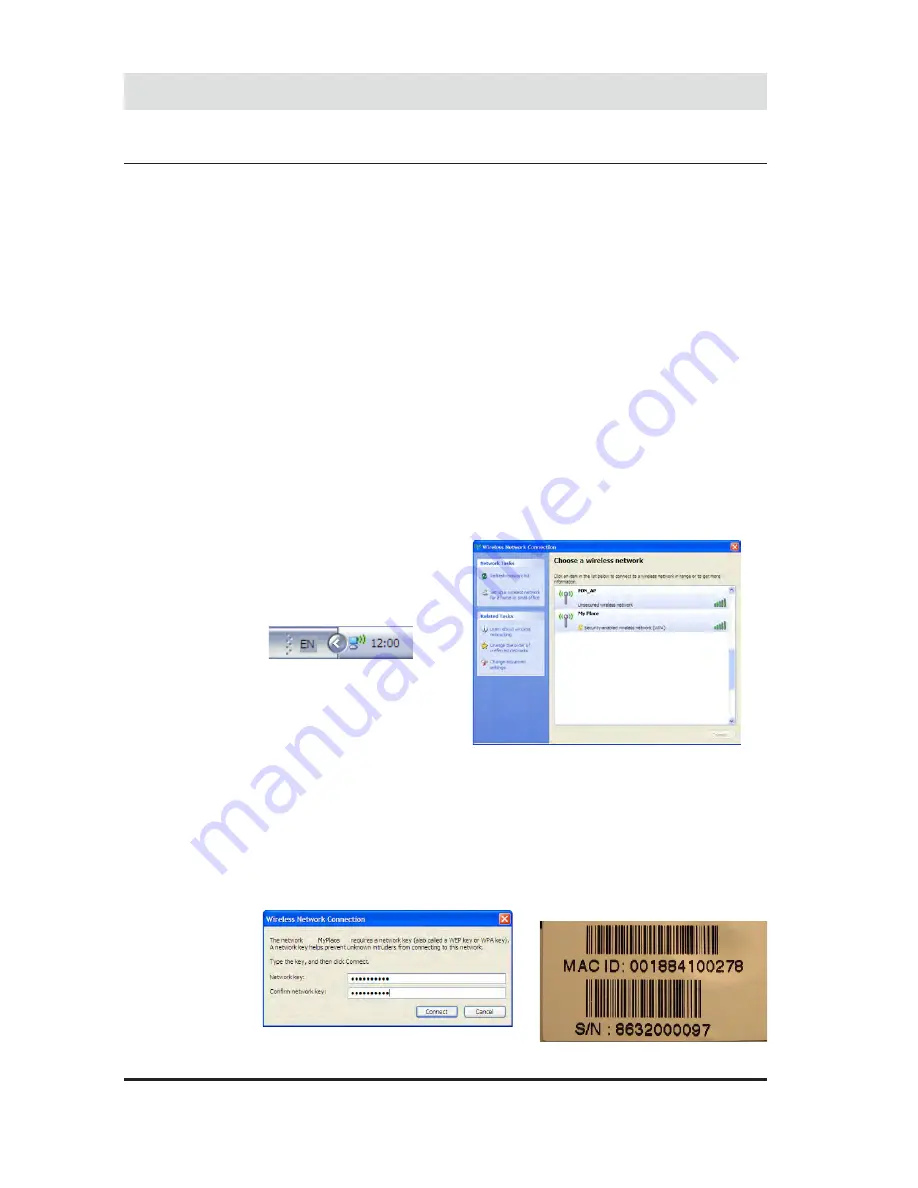
Locate and double click the icon you see in the
figure, found in the Windows task bar. Click the Refresh
network list button to make sure you’re only seeing your
La Fonera’s networks. This time, instead of connecting
to the public network (FON_AP), you will connect to the
private one (MyPlace). Remember that you just need to
double click the section marked on the image.
4.6. Enjoy a secure connection
2.
This time you won’t see the alert that was shown
before. The system will ask for the WPA key on a window
like the one shown in the figure. You can find this key on
a sticker in La Fonera’s base, as shown in the figure. To
avoid typos, you will need to enter it twice.
Summary of Contents for LA FONERA
Page 1: ...La Fonera User Manual ...
Page 6: ...What s FON 1 What s FON 1 1 ...
Page 8: ...2 Register in FON 2 Register in FON ...
Page 13: ...3 What s La Fonera 3 What s La Fonera ...
Page 16: ...4 Install La Fonera 4 Install La Fonera ...
Page 31: ...5 Your Fonero profile 5 Your Fonero profile ...
Page 37: ...37 5 Your Fonero profile 5 Your Fonero profile 5 5 Personalize your Access Portal ...
Page 43: ...A Configure La Fonera A Configure La Fonera ...
Page 58: ...B Troubleshooting B Troubleshooting ...
Page 87: ...C Glossary C Glossary ...
Page 102: ......


