<
Back Next
>
Introduction
Flybrix is designed for experimentation, creativity and learning. Trial and
error is the heart and soul of this kit. Why? That’s where the “a-ha” moments
happen, that’s where the learning happens, that’s where the lines between
fun and education get blurred. Flybrix is all about providing a safe, fun,
sometimes silly platform for asking and answering “how” and “why”
questions that take us on the journey of understanding how things work.
In this manual are three quadcopter designs and a basics lesson giving you
the fundamentals for building your own creations. We’re continually adding
more build instructions to the Flybrix site!
If you happen to get turned around in the process, we’re here for you! Visit
the forum on flybrix.com, or email [email protected] for help.
Taking to the skies:
Once you’ve built your airframe, it’s time to fly! Ask anyone
who flies drones, they’ll tell you flying is a skil.. It takes practice to do well. Some
people even go to special piloting schools to learn how to do it! Flybrix is the
perfect platform to learn how to become an ace pilot because the drones you
build are small, light and they collapse on hard crashes. They go back together
in a jiffy. The designs we’ve given you are stable, balanced frames that fly well.
Experiment with flying these designs first to get a feel for how to fly Flybrix. Or
not… You do you!
Exploring more:
Once you’re ready, take your kit to the next level by visit-
ing the user forum on flybrix.com. You’ll see other ways to use the parts you
already have, plus see some exciting new ones, learn how to tweak your air-
frames, share schematics, and meet the Flybrix community. On the last page of
these instructions we have a few game ideas that are fun to play, even with just
two people!
Leveling up:
Download the Flybrix Chrome extension from the Chrome Web
Store for access to our code, configuration tools, community, and more! The
Configurator visualizes the data that comes off your Flybrix and your controller.
Features like: sensor feedback, balance, thrust levels, motor positioning, bat-
tery output etc. When you start getting into new designs with different motor
placements and adding motors, The Configurator will be your go-to in order
to get your airframes adjusted to get them flying. Visit our GitHub page
www.
Github/Flybrix
for more programming). Flybrix is all open-source and hackable.
The BETA ZONE:
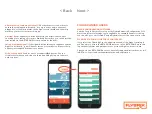
in the Flybrix app, if you touch the Flybrix logo in the upper
right hand corner, that will take you to the BETA ZONE where we are testing
new features. As the name suggests, these are in BETA form, so there aren’t any
instructions. Check out the features and let us know what you like and if you
have any questions in the Flybrix Forum.
www.flybrix/forum.
Summary of Contents for Angle Armed Quad
Page 20: ... Back Next 2 Attach 4 1x1 knobs 3 Attach 2 1x6 bricks ...
Page 21: ... Back Next Design Check In Side View 4 Attach your battery ...
Page 22: ... Back Next 5 Attach 2 1x4 bricks and 4 1x1 knobs to the 1x4 bricks 6 Attach 2 1x6 bricks ...
Page 30: ... Back Next 4 Attach the velcro tile to the 2x4 brick 5 Attach 2 1x4 bricks ...


