Users Manual
Setting Up the Tester: Advanced Functions
11
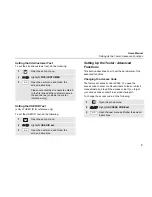
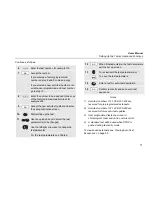
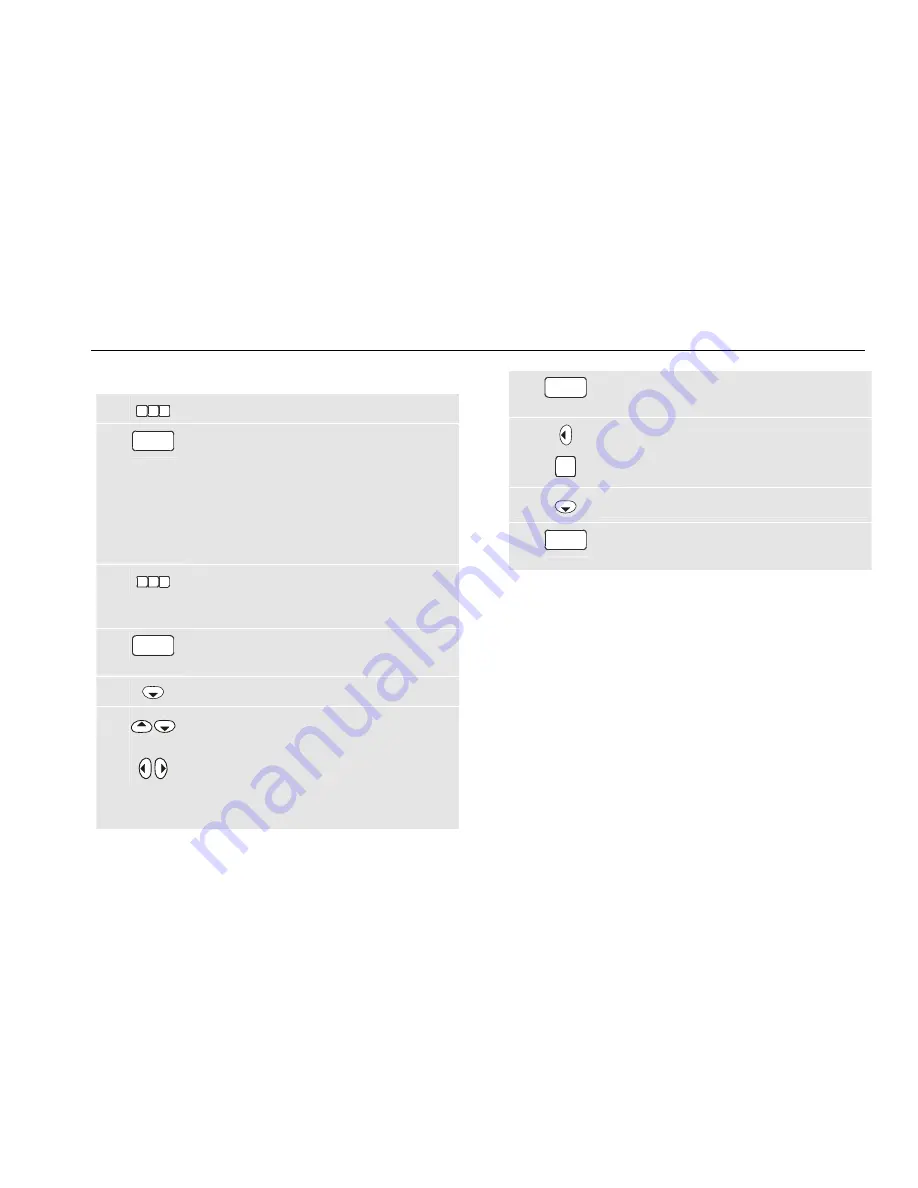
Continue as follows:
6
1 2 3
Enter the test number, for example 123.
7
GO
Accept the number.
If you entered a factory programmed
number do step 8 and 9 to make a copy.
If you entered a new auto-test number or an
existing user programmed auto-test number
go to step 10.
8
4 5 6
Enter the number to be assigned to the copy
of the factory programmed auto-test, for
example 456.
9
GO
Accept the new auto-test number and enter
the set-up/instruction screen.
10
Start setting up the test.
11
Use the up/down keys to select the test
parameter(s) to be changed.
Use the left/right arrow key to change the
test parameter
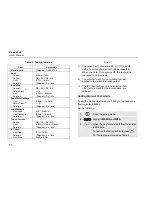
For the test parameters see Table 2.
12
GO
When finished entering the test parameters
exit the set up screen.
13
MEM
To review/edit the test parameters, or
To save the test parameters.
14
Enter a text for auto-test description.
15
GO
Confirm text entry and save auto-test
sequence.
Notes:
1) Auto-test numbers 131-136 & 231-234 are
reserved for pre-programmed auto-tests.
2) Auto-test numbers 137-142 & 235-240 are
reserved for future auto-test updates.
3) User programmed tests are stored in
chronological order and not in numeric order.
4) A standard text will be used when STOP is
pushed during text entry mode.
To view saved auto-tests see ‘Viewing Auto-Test
Sequences’ on page 30.
Summary of Contents for 6500
Page 6: ......

