14
MHCP Primary Cleaner
6.4 Blade Replacement Instructions
Section 6 – Maintenance
Physically lock out and tag the conveyor at the power source
before you begin cleaner installation.
Tools Needed:
• Tape measure
• (2) 19mm wrench or crescent wrench
• 17mm wrench or crescent wrench
• (1) 14mm wrench or crescent wrench
• Wire brush (for cleaning pole)
• Small putty knife (for cleaning pole)
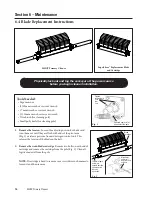
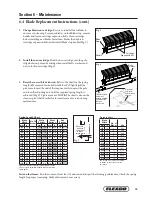
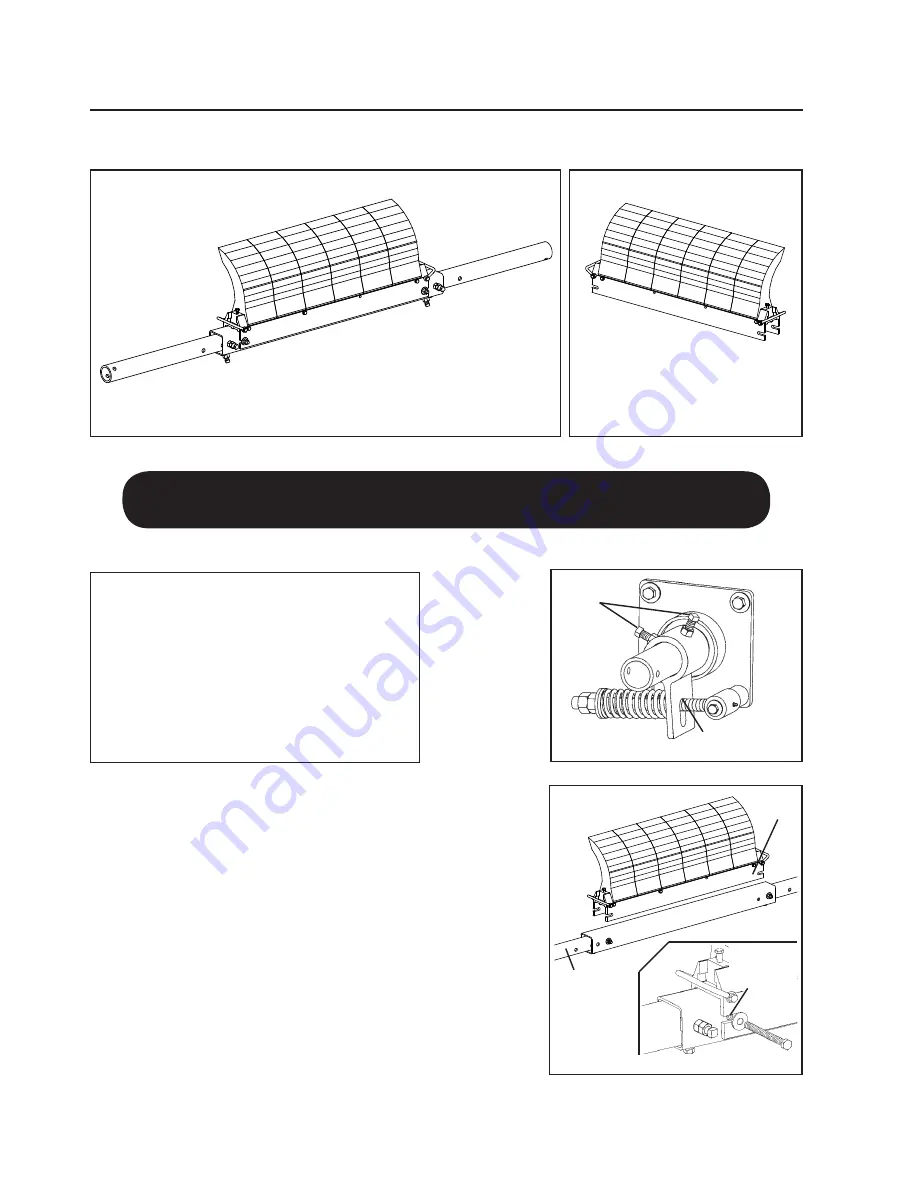
1. Remove the tension. Loosen the adjusting nuts on both sides and
turn them out until they are flush with ends of the pivot arm
(Fig. 1) or release pressure from air/nitrogen control unit. This
releases the tension of the blade on the belt.
2. Remove the worn blade cartridge. Remove two bolts on each end of
cartridge and remove the cartridge from the pole (Fig. 2). Clean all
fugitive material from the pole.
NOTE:
If cartridge is hard to remove use a screwdriver or hammer to
loosen it and then remove.
Slide pole to center
blades or cover
belt’s material path
Remove blade
stop to slide
blade(s) off if
necessary
Tighten locking bolts and
jam nuts (both ends)
Pivot Rod
Bushings
Adjusting
Nuts
Washer
Torque
Arm
Torque
Pivot Rod
Pivot Rod Base
Torque Pivot
Rod
Chute
Wall
(cut
away)
Pivot Rod
Mounting Bolt
Pivot rod against slot
end nearest the pole
Tighten
locking bolts
and
jam
nuts
Fig. 1
MHCP Primary Cleaner
SuperShear™ Replacement Blade
and Cartridge
Blade
Cartridge
6" of pole end
must extend
outside the
mounting base
on each side
Align holes
and install
bolts, washers
and nuts
Fig. 2
150mm of pole
end must
extend outside
the mounting
base on
each side


