background image

36


Controlli che gli elementi di fissaggio siano stretti bene.


Ispezioni con attenzione le parti che si usurano più facilmente.


Sostituisca immediatamente le parti difettose.


Non utilizzi l’apparato fino a che non viene riparato.


Per favore, controlli che tutte le etichette di sicurezza siano in buone condizioni e che possano essere lette. Se 
manca qualcuna o è rotta, contatti il suo fornitore per richiederne di nuove.

INDIVIDUAZIONE SOLUZIONE DEI PROBLEMI

NOTA: 

Se dopo aver controllato le regolazioni e l’impianto, non può usare il prodotto, chiami il 

Servizio Tecnico FITFIU.

TRASPORTO  

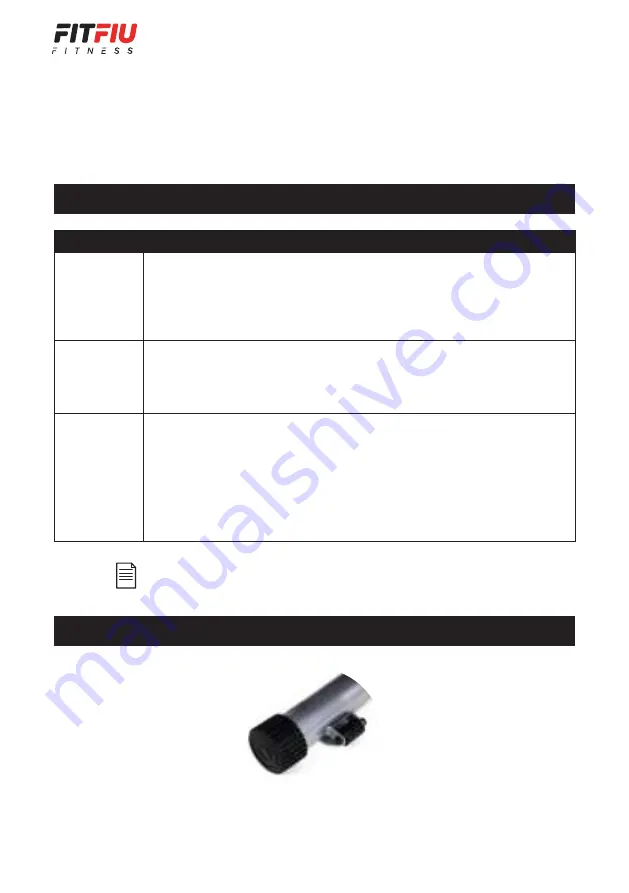
Il prodotto può essere spostato in modo facile grazie alle ruote incorporate alla sua base.

Problema

Soluzione

Non viene 

visualizzato nulla 

sul display

1.  Rimuovere il display e controllare che il cavo che esce dalla console del display sia collegato 

correttamente al cavo che esce dal telaio principale. 

2.  Controllare se le batterie sono inserite correttamente e se le molle delle batterie sono in 

contatto corretto.

3.  Le batterie del display potrebbero essere scariche. Sostituire le batterie con delle nuove.

L’impianto 

non funziona 

correttamente

1.  Se il computer non funziona correttamente, controlli se il cavo del sensore del computer 

è collegato.

2.  Se ha controllato il precedente punto e l’impianto continua a non funzionare, si assicuri che 

le pile funzionino tuttavia e che siano installate correttamente nel computer.

Non c’è 

resistenza

1.  Se non c’è resistenza alla tensione, giri la manopola di regolazione della tensione al suo 

livello più basso, e dopo afferri la fibbia del nastro di frizione che si trova nella parte superiore 
della ruota del ventilatore al di sotto della barra centrale.

2.  Allenti la cinghia di frizione, la tiri dalla fibbia fino a che senta una certa resistenza sul nastro 

e a continuazione, la blocchi di nuovo intorno alla fibbia.

3.  Ora salga sulla bicicletta ellittica e faccia girare i pedali.
4.  Se nota che è eccessivamente stretta, afferri nuovamente la fibbia del nastro di frizione e 

la allenti leggermente.

Summary of Contents for BELI-110

Page 1: ...ES FR IT EN DE Manual usuario Manuel d instructions Manuale dell utente Instruction manual Betriebsanleitung beli 110...

Page 2: ......

Page 3: ...s nos permite tonificar las piernas gl teos y la parte baja de las abdominales Esperamos que disfrute con el entrenamiento y que este producto FITFIU satisfaga plenamente sus expectativas PRECAUCIONES...

Page 4: ...to que no est n especificados en este manual Si tiene alguna incidencia con el aparato contacte con nuestro servicio t cnico Sustituya inmediatamente todas las piezas desgastadas o defectuosas No util...

Page 5: ...ero 3 en el bastidor principal con los tornillos 46 arandelas 49 y tuercas 3 8 47 PASO 2 Inserte la barra de husillo 12 a trav s del manillar derecho e izquierdo 4 5 y a trav s del bastidor principal...

Page 6: ...e sea c modo para el usuario y aseg rese de que ambas barras de sujeci n est n ajustadas a la misma altura Bloquee cada barra de sujeci n en su lugar con las perillas 17 y la tapa del extremo 54 PASO...

Page 7: ...el perno 17 Instale el poste del manillar 79 en la columna 74 utilizando la arandela 77 y el perno 78 PASO 6 Conecte el cable del display 37 41 con el cable del sensor 70 75 despu s fije el display 50...

Page 8: ...ste m s flojo A continuaci n vuelva a atar la correa en la hebilla en la parte superior de la rueda del ventilador justo debajo de la percha central Cuanta m s longitud en la cinta de fricci n menos f...

Page 9: ...de ejercitarlo calentando y estirando los m sculos incrementando las pulsaciones y la circulaci n y enviando m s oxigeno a los m sculos Cuando finalice la actividad repita estos ejercicios para no ten...

Page 10: ...ulse esta tecla para poner los valores a 0 Para ello deber seleccionar la funci n que desea modificar con el bot n MODE y pulsar RESET para poner a 0 las funci n deseada Tiempo distancia o calor as Si...

Page 11: ...ado trabajo anaer bico y trabajo en zona roja queda reservado a los atletas porque requiere una preparaci n adaptada VUELTA A LA CALMA Despu s de cada entrenamiento camine durante unos minutos a bajav...

Page 12: ...y est bien conectado al cable que del marco principal 2 Compruebe si las bater as est n correctamente colocadas y los resortes de las bater as est n en correcto contacto 3 Las pilas del display pueden...

Page 13: ...ant a de 2 a os a partir de la fecha de compra La garant a cubre las aver as y el mal funcionamiento del aparato siempre y cuando sea utilizado de acuerdo a los usos indicados y seg n las instruccione...

Page 14: ...las Directivas del Parlamento Europeo y del Consejo aplicables Directiva 2014 30 UE del Parlamento Europeo y del Consejo de 26 de febrero de 2014 sobre la armonizaci n de las legislaciones de los Esta...

Page 15: ...tructions Consultez votre m decin afin de faire le point sur votre tat de sant surtout si vous tes une personne de plus de 35 ans ou dans le cas o vous auriez eu des probl mes de sant dans le pass Cet...

Page 16: ...ment mentionn dans le manuel Si vous avez un quelconque probl me avec le produit contactez notre service technique Remplacez imm diatement toute pi ce us e ou en mauvais tat N utilisez pas d accessoir...

Page 17: ...cadre principal avec des boulons 46 des rondelles 49 et des crous 3 8 47 ETAPE 2 Ins rer la barre broche 12 dans les guidons droit et gauche 4 5 et dans le cadre principal 1 puis la fixer au moyen de...

Page 18: ...de la hauteur qui est confortable pour l utilisateur et assurez vous que les deux barres de serrage sont r gl es la m me hauteur Verrouillez chaque barre d appui avec les boutons 17 et l embout 54 ET...

Page 19: ...1 avec le boulon 17 Installez le poteau de la poign e 79 sur la colonne 74 l aide de la rondelle 77 et du boulon 78 ETAPE 6 Connectez le c ble de l cran 37 41 au c ble du capteur 70 75 puis fixez l cr...

Page 20: ...ment de tension jusqu arriver l ajustement le plus l che Ensuite recommencez attacher la courroie dans la boucle dans la partie sup rieure de la roue du ventilateur juste au dessous du cintre central...

Page 21: ...arce quevous pr parezvotre corps avant devous exercer en chauffant et tirant les muscles augmentant les pulsations et la circulation et en envoyant plus d oxyg ne aux muscles Quandvousfinissez l activ...

Page 22: ...es Reset appuyez sur cette touche pour remettre tout 0 Vous devez s lectionner la fonction que vous d sirez modifier avec le bouton MODE et vous devez appuyer sur RESET pour remettre 0 les fonctions...

Page 23: ...est r serv aux athl tes et n cessite une pr paration adapt e RETOUR AU CALME Apr s chaque entra nement marchez quelques minutes vitesse faible pour ramener progressivement l organisme au repos Cette...

Page 24: ...nt correctement ins r es et si les ressorts des piles sont en contact correct 3 Les piles de l cran peuvent tre d charg es Remplacez les piles par des neuves La machine ne fonctionne pas 1 Si l ordina...

Page 25: ...oduit a une garantie de 2 ans compter de la date d achat La garantie couvre les d fauts et dysfonctionnements de l appareil malgr une utilisation correcte selon les indications sur ce manuel d instruc...

Page 26: ...des directives applicables du Parlement europ en et du Conseil Directive 2014 30 UE du Parlement europ en et du Conseil du 26 f vrier 2014 concernant l harmonisation des l gislations des tats membres...

Page 27: ...icordi di consegnare questo manuale al nuovo proprietario Consulti un medico per verificare il suo stato di salute soprattutto nel caso di persone con et superiore a 35 anni e quelle che abbiano avuto...

Page 28: ...nessuna modifica o manutenzione che non sia specificata in questo manuale Se ha qualche incidente con l apparato contatti il nostro servizio tecnico Sostituisca immediatamente tutte le parti usurate o...

Page 29: ...e 3 al telaio principale con bulloni 46 rondelle 49 e dadi 3 8 47 PASSO 2 Inserire la barra del mandrino 12 attraverso i manubri destro e sinistro 4 5 e attraverso il telaio principale 1 quindi fissar...

Page 30: ...di altezza comoda per l utente e assicurarsi che entrambe le barre dei morsetti siano impostate alla stessa altezza Bloccare ogni maniglione in posizione con le manopole 17 e il tappo finale 54 PASSO...

Page 31: ...ondella 65 quindi coprire il tubo di prolunga 68 Inserire il tubo sella 67 nel telaio principale 1 quindi fissarlo con la manopola 70 PASSO 6 Collegare il cavo del display 37 41 al cavo del sensore 70...

Page 32: ...ione torni a legare la cinghia alla fibbia sulla parte superiore della ruota del ventilatore giusto al di sotto della barra centrale Quando pi sia lunga la cinghia di frizione meno frizione causer men...

Page 33: ...a il corpo prima di esercitarlo riscaldando e stirando i muscoli incrementando le pulsazioni e la circolazione ed inviando maggior ossigeno ai muscoli Quando termina l attivit ripeta questi esercizi p...

Page 34: ...SET prema questo bottone per azzerare i valori Per fare ci dovr selezionare la funzione che desidera modificare con il bottone MODE e premere RESET per portare a 0 la funzione desiderata Tempo distanz...

Page 35: ...adatta RITORNO ALLA CALMA Dopo ogni allenamento cammini per alcuni minuti a bassa velocit per portare progressivamente l organismo allo stato di riposo Questa fase di ritorno alla calma garantisce il...

Page 36: ...tterie sono inserite correttamente e se le molle delle batterie sono in contatto corretto 3 Le batterie del display potrebbero essere scariche Sostituire le batterie con delle nuove L impianto non fun...

Page 37: ...opre le avarie e il mal funzionamento dell apparecchio sempre e quando sia utilizzato in accordo agli utilizzi indicati e secondo le istruzioni del manuale Per far valera la garanzia necessario la ric...

Page 38: ...delle Direttive del Parlamento Europeo e del Consiglio applicabili Direttiva 2014 30 UE del Parlamento Europeo e del Consiglio del 26 febbraio del 2014 sull armonizzazione delle normative degli Stati...

Page 39: ...e using this product read the following important warnings and information in this manual Keep it for future reference and if you sell this machine remember to deliver this manual to the new owner Con...

Page 40: ...m moving parts Do not make any adjustments or maintenance which are not specified in this manual If you have any problems with the device contact our technical service Replace all worn or defective pa...

Page 41: ...2 and rear stabiliser 3 to the main frame with the bolts 46 washers 49 and 3 8 nuts 47 STEP 2 Insert the spindle bar 12 through the right and left handlebars 4 5 and through the main frame 1 then secu...

Page 42: ...a height setting that is comfortable for the user and ensure that both clamping bars are set to the same height Lock each grab bar in place with the knobs 17 and end cap 54 STEP 5 Secure the seat 64...

Page 43: ...me 1 with the bolt 17 Install the handle post 79 onto the column 74 using the washer 77 and bolt 78 STEP 6 Connect the display cable 37 41 to the sensor cable 70 75 then secure the display 50 to the h...

Page 44: ...tting Then re strap on the belt on the main frame just beneath the flat beam at the top centre The more length you allow for the friction belt to wrap around the wheel the less friction it will produc...

Page 45: ...prepare the body before workout warming and stretching the muscles increasing the pulsations and circulation and sending more oxygen to the muscles When you finish the workout repeat these exercises...

Page 46: ...y to reset the values to 0 Select the function you want to modify with the MODE button and press RESET to change the function you want to 0 time distance or calories If you press this key for 4 second...

Page 47: ...eed after each workout to bring the organism progressively to the resting state This phase of return to calm guarantees the return to the normal state of the cardiovascular and respiratory systems blo...

Page 48: ...ck if the batteries are correctly inserted and the battery springs are in correct contact 3 The display batteries may be exhausted Replace the batteries with new ones The equipment does not work corre...

Page 49: ...UARANTEE This product has a 2 year guarantee from the date of purchase This guarantee covers faults and malfunctions of the device only if the product has not been misused and all the instructions on...

Page 50: ...liament Directives and of the Council Directive 2014 30 EU of the European Parliament and of the Council of 26 February 2014 on the harmonisation of the laws of the Member States relating to electroma...

Page 51: ...ichtsma nahmen f r den Gebrauch sowie die Anweisungen in dieser Anleitung Bewahren Sie es zum sp teren Gebrauch auf und wenn Sie diese Maschine verkaufen denken Sie daran dieses Handbuch an den neuen...

Page 52: ...nicht im Freien Halten Sie F e und H nde von beweglichen Teilen fern F hren Sie keine Einstellungen oder Wartungsarbeiten durch die nicht in diesem Handbuch beschrieben sind Bei Problemen mit dem Ger...

Page 53: ...Stabilisator 2 und den hinteren Stabilisator 3 mit Schrauben 46 Unterlegscheiben 49 und 3 8 Muttern 47 am Hauptrahmen SCHRITT 2 F hren Sie die Spindelstange 12 durch den rechten und linken Lenker 4 5...

Page 54: ...r angenehme H heneinstellung und achten Sie darauf dass beide Klemmleisten auf die gleiche H he eingestellt sind Arretieren Sie jeden Haltegriff mit den Kn pfen 17 und der Endkappe 54 SCHRITT 5 Befest...

Page 55: ...trahmen 1 Montieren Sie die Griffs ule 79 mit Unterlegscheibe 77 und Schraube 78 an der S ule 74 SCHRITT 6 Verbinden Sie das Displaykabel 37 41 mit dem Sensorkabel 70 75 undbefestigenSiedanndasDisplay...

Page 56: ...die lockerste Einstellung Befestigen Sie dann den Gurt an der Schnalle oben am L fterrad direkt unter dem mittleren Hebeb gel wieder Je l nger das Reibband ist desto weniger Reibung verursacht es wen...

Page 57: ...hre Herzfrequenz und Ihren Kreislauf erh ht und mehr Sauerstoff zu Ihren Muskeln sendet Wenn Sie die Aktivit t beendet haben wiederholen Sie diese bungen um Muskelschmerzen zuvermeiden Wirempfehlen di...

Page 58: ...ie Werte auf 0 zu setzen W hlen Sie dazu mit der Taste MODE die Funktion die Sie ndern m chten und dr cken Sie RESET um die gew nschte Funktion Zeit Distanz oder Kalorien auf 0 zur ckzusetzen Wenn Sie...

Page 59: ...den Athleten vorbehalten da es eine angepasste Vorbereitung erfordert ZUR CK ZUR RUHE Gehen Sie nach jedem Training einige Minuten lang mit niedriger Geschwindigkeit um Ihren K rper schrittweise in ei...

Page 60: ...chtig mit dem aus dem Hauptrahmen kommenden Kabel verbunden ist 2 Pr fen Sie ob die Batterien richtig eingelegt sind und die Batteriefedern richtig anliegen 3 Die Batterien des Displays sind m glicher...

Page 61: ...n des Ger tes solange es entsprechend den angegebenenVerwendungszwecken und denAnweisungen in der Bedienungsanleitung verwendet wird Um die Garantie in Anspruch nehmen zu k nnen ist ein Kaufnachweis T...

Page 62: ...hen Parlaments und des Rates entspricht Richtlinie 2014 30 EU des Europ ischen Parlaments und des Rates vom 26 Februar 2014 zur Harmonisierung der Rechtsvorschriften der Mitgliedstaaten ber die elektr...

Page 63: ......

Page 64: ...fit your needs cardio Manual revisado en julio de 2021 www t u tness com...

Reviews: