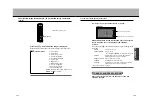


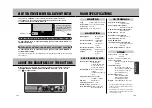

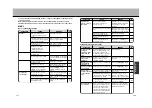


L LEVEL
COLOR
TINT
BLACK
DISPLAY
1
H LEVEL
27
DIMMER
AUTO
2
R13
0
FULL
BEEP
ON
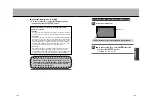
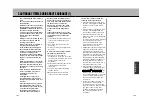
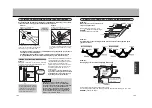
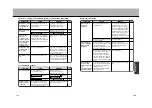
CONNECTING A VIDEO DECK/VIDEO CAMERA
Use the AUDIO and VIDEO RCA cords included with this unit to enable the playback of
images from your video deck or video camera.
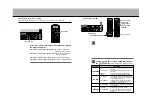
Connect your video deck/video camera to the unit.
* Prior to connecting, cut off the power supply to the video deck/video camera.
1
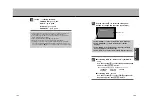
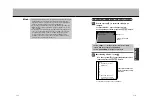
Turn the power supply ON for the video deck/video camera
”VIDEO” will be displayed on the screen for roughly 10 seconds.
*If the unit is in another mode, press the
Ü
button to return the unit to the VIDEO mode.
2
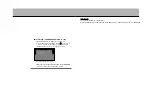
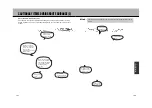
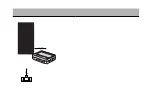
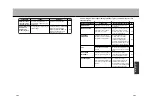
Video deck/video camera
Included RCA
cord (AUDIO)
Included RCA
cord (VIDEO)
Yellow
Red
White
If the audio output for the
video deck/video camera is
set to mono, connect only
the white plug.
Mini-plug
To video I/O terminal
Mini-plug
To audio I/O-optic digital audio
output terminal
Align the cord with the groove
in the large ferrite core and
make one turn.
Prior to connecting the video deck/video camera to the unit, mount the included large ferrite core to the
RCA cord (AUDIO).
AV output
Audio (R)
Audio (L)
Video
Please use the
large ferrite core
Start playback on the video deck/video camera.
* Refer to the video deck/video camera instruction manual for their respective operation
method.
3
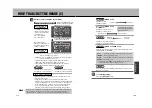
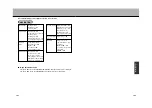
HOW TO ADJUST THE IMAGE (1)
Press the MENU button for at least 1.5 seconds.
The adjustment mode appears on the screen.
1
The adjustment mode
display will only appear for
roughly 10 seconds. Before
it disappears, perform step
.
Summary of Contents for NV-E7000
Page 10: ...17 ...
Page 19: ...34 33 ABOUT DISCS 2 ...
Page 21: ...37 38 COMPONENT NAMES AND FUNCTIONS 1 ...
Page 23: ...42 41 ...
Page 31: ......
Page 80: ...148 PLAYBACK FROM THE DESIRED POSITION DVD CD ...
Page 83: ......
Page 94: ...175 ...
Page 105: ...ABOUT UPGRADES ...
Page 108: ......