background image

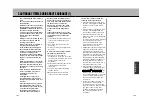
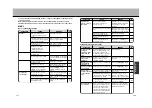
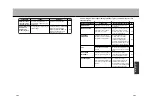
TROUBLESHOOTING (2)

SYMPTOM

Waypoints are not
included when re-
effectuating the
search.

Route data is not
displayed.

After the route
search is
complete, route
guidance symbols
are not displayed
even if driving
near toll road
entrances/exits.

Automatic search
re-effectuation is
impossible.

Waypoints are not
set.

Waypoints already passed, or,
the unit judged them as having
been passed.

Route search is not effectuated.

is stopped.

Vehicle mark not going along
recommended route. (Guidance
symbols displayed only for
vehicle mark corresponding with
recommended route content.)

Not recommended route.

5 waypoints are already set.

Route Guidance

If wanting to stop again at a
waypoint already passed, re-
effectuate a route search.

Set the destination point and
effectuate the route search.

Initiate .

Drive along the recommended
route.

Drive along the roads provided
by the search or manually re-
effectuate the search. However,
a search for the entire route is
conducted at this time.

Only a maximum of 5 waypoints
can be set. Divide your route into
several segments and effectuate
a search for each respectively.

Route Guidance

CAUSE

REMEDY

PAGE

NO.

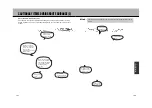
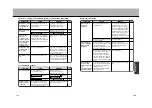
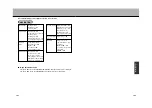
Selection or setting of destination/waypoints or menu items impossible.

SYMPTOM

No voice guidance.

Guidance differs
from actual road
conditions.

You have wandered off the
recommended route.

is turned

OFF.

is stopped.

Route guidance content may
vary depending on the turning
direction and the way adjoining
roads are interconnected.

Route Guidance

Voice Guidance

Either go back to the
recommended route or re-
effectuate the route search.

Place a check mark 

before

.

Initiate .

Continue on course following the
actual traffic conditions.

Route Guidance

Voice Guidance

CAUSE

REMEDY

PAGE

NO.

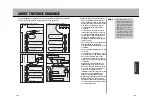
Voice guidance troubles

SYMPTOM

Recommended
route is not
displayed.

Recommended
route containing a
large detour is
displayed.

Recommended
route provided
points far from the
set
departure/waypoint/
destination points.

No roads available near the
destination point.

Departure and destination points
in close proximity.

A route containing a wide detour
may be provided whenever roads
near the departure and
destination points have restricted
access (one-way, etc.).

Because the route is made to go
in the direction of the heading
when the vehicle’s heading
(direction of the arrow) and the
direction towards the destination
point are opposite, the unit may
provide a route containing a wide
detour.

Route guide start/waypoint/end
points are far from the set points
because there is no road data
available near the
departure/waypoint/destination
points on the map.

Correct the destination point
positioning to the thick road
above the orange colored roads
near the destination point. Make
sure to set the waypoints and
destination points on a road with
careful consideration for your
heading especially on roads
where the two directions of traffic
are displayed as separate roads.

Lengthen distance.

Shift the departure and
destination points a bit and set.
Or, set a waypoint along the
desired route.

Not a malfunction.

Set the destination on a nearby
road.

CAUSE

REMEDY

PAGE

NO.

Route search troubles

199

200

O

T

H

E

R

91

104

57,
58

91,
107

91

119

104

Summary of Contents for NV-E7000

Page 1: ...to sincerely thank you for purchasing this product Read this manual and the warranty certificate carefully prior to using the unit After having completely read this manual store it in a safe place for easy reference Make sure to read the Safety precautions and Cautionary items for proper usage appearing within this manual ...

Page 2: ...IONS AND EXCLUSIONS MAY NOT APPLY TO YOU THIS WARRANTY GIVES YOU SPECIFIC LEGAL RIGHTS YOU MAY HAVE OTHER RIGHTS WHICH VARY FROM STATE TO STATE For your protection in the event of theft or loss of this product please fill in the information below for your own personal records Model No Serial No Located on back or bottom side of unit Date of Purchase Purchase Price Where Purchased SANYO MOBILE AUDI...

Page 3: ... SETTING ROUTES 85 SINGLE ROUTE MULTI ROUTE SEARCH 89 MODIFYING A ROUTE 96 DISPLAYING THE PRESENT ROUTE 99 STORING DELETING THE PRESENT ROUTE 100 VIEWING ROAD INFORMATION WITH THE PRESENT ROUTE 102 SEARCHING FOR A WAY HOME 103 STOPPING STARTING ROUTE GUIDANCE 104 MODIFYING ROUTE CONDITIONS 105 STRAYING OFF THE ROUTE REROUTE 107 THE ROAD AHEAD CANNOT BE TAKEN DETOUR SEARCH 108 SAVED ROUTES LIST 109...

Page 4: ... REDUCING THE IMAGE DISPLAY 160 CHANGING THE SLIDESHOW DISPLAY FORMAT 161 SELECTING PLAY MODE 162 ROTATING THE IMAGE 163 CHANGING THE INITIAL SETTINGS 164 TERMINOLOGY 174 OTHER 176 CONNECTING A VIDEO DECK VIDEO CAMERA 177 HOW TO ADJUST THE IMAGE 178 ABOUT THE AUTOMATIC BRIGHTNESS ADJUSTMENT FUNCTION 181 ABOUT THE BRIGHTNESS OF THE BUTTONS 181 MAIN SPECIFICATIONS 182 RECEIVING SIGNALS FROM THE GPS ...

Page 5: ... to render complex imaging such as videos impossible while driving Do not under any circumstance reconfigure the wiring or perform any improper conversions to the unit Hint z vAdvise É Moves the Joystick vertically and laterally and shows operation in 8 different directions Describes operation results This symbol denotes that the operation procedures are divided at the next step 8 The meaning of t...

Page 6: ...tion or connection ACCESSORIES 9 INSTALLATION MANUAL Parking brake connector cable GPS Exterior Antenna and Installation Parts 1 disc 1 core Map DVD ROM Self lock connector AC DC adapter 2 clips 2 cables 12V cigarette lighter connector cable 1 cable 1 cable Remote control and holder ...

Page 7: ...ibed in 3 onto the stand base Removing the portable DVD navigation unit from the stand base Adjust the vertical position Adjust the angle Remove the unit from the stand base Disc replacement is impossible once the unit has been mounted onto the stay Replace the disc after removing the unit from the mounting stay CAUTION HOW TO INSTALL THE UNIT 1 PREPARATIONS PRIOR TO INSTALLATION Press and hold do...

Page 8: ...ard and apply pressure Fix the cushion included with the unit where the unit mounting stay and the dashboard come into contact Example when using the mounting stay Cushioning material Portable DVD Navigation System Portable DVD Navigation System 4 Mounting the portable DVD navigation unit Tightly fasten the affixing screws for each part of the stand Not tightening enough may cause the unit to chan...

Page 9: ...Affix cord clips if necessary Install the GPS exterior antenna horizontally onto a flat metal surface of the vehicle s exterior chassis Taking the antenna out from the trunk Pull the wire through the vehicle interior and take it out from the driver s seat Affix cord clips if necessary Install the GPS exterior antenna horizontally onto a flat metal surface of the vehicle s exterior chassis If takin...

Page 10: ...17 ...

Page 11: ... USAGE 24 MAIN FEATURES 28 ABOUT DISCS 31 WHAT IS A NAVIGATION SYSTEM 34 ABOUT THE GPS EXTERIOR ANTENNA 36 COMPONENT NAMES AND FUNCTIONS 1 37 CHARACTER INPUT USING THE 10 KEY ON THE REMOTE CONTROL 45 HOW TO HANDLE THE REMOTE CONTROL 47 ABOUT THE POWER SOURCE 50 INSERTING REMOVING A DISC 52 ...

Page 12: ...ifting or breaking pose a danger to passengers or obstruct the deployment of the airbag system Otherwise traffic accidents or injury may result If using the unit as an automobile navigator use the included installation kit and securely affix the unit Otherwise traffic accidents or injury may result Do not operate the unit or replace discs while driving Do so only after having stopped the vehicle i...

Page 13: ...e unit The vehicle battery may weaken and die out While driving adjust the volume of the unit so that exterior sounds can be heard well Driving without being able to hear exterior sounds may lead to traffic accidents Should the instructions provided by the navigation unit differ from the actual traffic conditions proceed to drive in accordance with the actual traffic conditions Accidents may resul...

Page 14: ...hboard after having increased the temperature using the vehicle heater Adhere the unit after having cleaned off any dirt from the mounting surface using the cleaning solution included with the unit and let dry Once the double surface adhesive tape is peeled off it cannot be re adhered After installation periodically check if the tape is still holding well Tightly fasten the screws affixing each pa...

Page 15: ...t viewed from directly in front of the unit Watch the screen within a 45 angle vertically and a 90 angle laterally from the unit Red and blue points of light may appear in the display This is normal for a liquid crystal display and does not mean the display is damaged The display uses a small fluorescent tube as a backlight for liquid crystals If the screen goes black and does not light up consult...

Page 16: ...played as a guide These may differ from the actual conditions Do not use for an extended period on a blanket rug carpet cushion or other object that obstructs the proper release of heat Heat will get trapped in the unit and lead to damage ABOUT THE INSTALLATION AREA Do not let urethane or rubber made sheets or vinyl articles come into contact with the unit for extended periods This may lead to the...

Page 17: ...CALLY DVD VIDEO CD Dual battery format For the power source the unit uses either a 12V vehicle battery or a 120V AC 60Hz household power source TFT color liquid crystal display A high picture quality liquid crystal display enables beautiful and easy to view imaging Headphone output terminal provided The sound can be heard using commercially available headphones Extension output terminal provided A...

Page 18: ...ftware with corresponding region numbers This unit will not playback any DVD video disc whose region number is other than 1 or ALL This unit s region number is 1 1 Discs whose region number is ALL can be played back by DVD players with any region number regardless of the region Discs whose region number is not indicated has a region number even though it is not shown Contrary to discs that can onl...

Page 19: ...34 33 ABOUT DISCS 2 ...

Page 20: ... When meandering in curves When the vehicle s speed changes abruptly after exiting a toll booth and accelerating towards a tunnel On a loop bridge When using the unit for the first time After debarking a ferry After driving with the DVD screen After driving with the VIDEO screen During tire replacement During tire chain installation When taking the unit into a different vehicle When crisscrossing ...

Page 21: ...37 38 COMPONENT NAMES AND FUNCTIONS 1 ...

Page 22: ... display is incomplete on only one screen êbutton Ebutton This button displays the telephone number input screen when searching for a destination by telephone number ébutton Every time this button is pressed the screen toggles between double screen display and full screen display See p 115 Ñbutton Displays the present location map See p 62 Flip top opened Select a menu item on the screen Use the j...

Page 23: ...42 41 ...

Page 24: ...y format See p 161 PLAY PAUSE button q Press to start playback See p 143 Pressing while playing back will pause the image and sound Press again to resume playback See p 143 Fbutton Fast forwards the image at certain speeds See p 144 Pressing while the image is paused will fast forward slowly when in DVD video mode only See p 144 Ébutton Pressing while the DVD disc is playing back will move the dis...

Page 25: ...ch the character to be inputted is located and it will be displayed on the screen 1 Press the button to confirm the character selection If the character desired is not allocated on the same button it is not necessary to press the button Pressing the next desired button will automatically confirm the previous character selection 2 When having made an error inputting characters press the ç button an...

Page 26: ... remote control may cause damage Exercise caution Press down on the tab and pull the cover outward 1 The battery inserted on the left has its minus terminal pointing upwards and the right battery has its plus terminal pointing upwards 2 Align the bottom tab of the cover with the groove on the remote control and close 3 The remote control uses two AAA batteries INSERT BATTERIES IN THE REMOTE CONTRO...

Page 27: ...y from the infrared receiver 60 Infrared transmitter Remote control Main unit When connecting the unit to the cigarette lighter the vehicle battery will be drained of its power as long as the lighter s power supply is turned ON If your vehicle s cigarette lighter power supply does not cut off when turning OFF the engine make sure to pull the 12V cigarette lighter connector cable from the vehicle s...

Page 28: ...E AC 120V 60Hz Use the AC DC adaptor included with the unit Connect to the household power source AC 120V 60Hz AC DC adaptor Connect to the DC input 9V terminal INSERTING A DISC Disc insert aperture cover Button for opening the cover Place your finger here and lift the disc cover Printed surface When playing back the disc rotates at a high speed Make sure to insert the disc and press down until a ...

Page 29: ...pearing on the cover and close the cover completely The disc will not playback if the cover is not completely closed Hint Disc insert aperture cover REMOVING THE DISC During playback if cutting the power OFF or switching to VIDEO mode before opening the disc cover it may take a moment before the disc stops rotating Make sure to remove the disc only after it stops rotating Not doing so may result i...

Page 30: ...NCE 104 MODIFYING ROUTE CONDITIONS 105 STRAYING OFF THE ROUTE REROUTE 107 THE ROAD AHEAD CANNOT BE TAKEN DETOUR SEARCH 108 SAVED ROUTES LIST 109 ROUTE SIMULATION 112 CHANGING THE MAIN SCREEN SETTINGS 113 SETTING THE 2 SCREEN DISPLAY 115 CHANGING THE ROUTE GUIDANCE SCREEN SETTINGS 118 INDICATING THE STREET NAME 122 CHANGING THE UNIT OF DISTANCE THE COLOR OF THE MAP AND THE PRESENT LOCATION MARK 123...

Page 31: ......

Page 32: ...ee p 120 Select the set route color Toll roads are shown in red Estimated time to destination and distance remaining When effectuating route guidance the estimated time to destination and the distance remaining are indicated Indicator denoting your vehicle This shows the position of your vehicle present location and the heading Reduction scale This shows the map scale Road Road types are classifie...

Page 33: ...ll stop at that reduction scale level Lift your finger when the desired reduction level appears ENLARGEMENT REDUCTION OF THE MAP CHANGING THE MAP DISPLAY 1 Planimetric screen This map screen appears as if looking directly down from above 3D View Map screen showing a view looking down and forward from above Planimetric map screen showing an urban area 3D View of an urban area Press the à button Pre...

Page 34: ...ication in yellow once over to the next item Selecting an item and pressing the Ä button will execute that function or go to the next menu The illustration shows the remote control device When moving the map screen move the Joystick Pressing down the Joystick to the desired direction will scroll the map in that direction MOVING THE MAP scroll The Joystick can move in 8 directions u To return to th...

Page 35: ...owing displays appear as per the conditions zSee p 85 About setting routes for route searching methods About geographic point registration Scroll the map and press the Ä button to display the next screen ABOUT DISPLAYS DURING ROUTE SEARCH Registering the name Select the item Name TEL Memo Mark to register and press the Ä button 1 Name input screen Name ...

Page 36: ...e search is complete wait a moment until the route guidance screen appears YES 4 When pressing the button and a confirmation message appears to set highways select to register highways or to register local roads and press the Ä button NO YES Q ROUTE Align the cursor on the destination and press the Ç button SEARCHING FOR A ROUTE FROM YOUR PRESENT LOCATION TO THE DESTINATION You can interrupt searc...

Page 37: ...ation display 2 Select and press the Ä button This initiates a reference route search When the search is complete wait a moment until the route guidance screen appears You can interrupt searches by pressing the É button YES 3 SEARCHING FOR A ROUTE FROM THE PRESENT LOCATION TO YOUR HOME If this mark is yellow the positioning is O K To search for a route home it is necessary to register the location...

Page 38: ...hange or Day Mode zSee p 123 Select the map color Day Night Auto Select Stopping Starting Route Guidance zSee p 104 No display is provided if the present route does not exist in the map disc Geographical point registering effectuated About geographic point registration zSee p 63 to 65 Geographical point registered as the location of your home Registering your home zSee p 84 Select either Night Mod...

Page 39: ...Input the street name select an item from the corresponding list and press the Ä button A map of the surrounding area will be displayed 5 For returning to the present location press the Ñ button 6 N A V I 71 72 SELECT THE REGION Region The Region can also be selected by the or items in the drop down menu Point of Interest Address Hint SEARCHING FOR A GEOGRAPHICAL POINT BY THE ADDRESS Address If th...

Page 40: ...will be displayed Search 7 For returning to the present location press the Ñ button 8 SEARCHING A GEOGRAPHICAL POINT BY INTERSECTION Intersection SEARCHING FOR A GEOGRAPHICAL POINT 2 A geographic point can be searched from the present location or from a point of interest in the area being scrolled to The distance to the POI and its position can be verified This operation is helpful when looking fo...

Page 41: ...the drop down menu and press the Ä button Point of Interest Press the É button Input the POI name When inputting the first few characters a corresponding list will appear 2 Select a corresponding item from the list and press the Ä button Press the Ä button again to display the map screen 3 If inputting the POI name Select and press the Ä button All City POI Name Input 1 N A V I 75 76 SEARCHING FOR...

Page 42: ...GEOGRAPHICAL POINT BY TELEPHONE NUMBER Phone Number A geographical point can be searched for by inputting the telephone number Input the telephone number Input the entire telephone number including the area code max 10 digits 3 If inputting the number using the Joystick move the cursor and select numbers to from the keyboard and press the Ä button If having made an input error move the cursor to s...

Page 43: ... coordinates Input the latitude north lat first and then the longitude east long When inputting is complete the cursor will automatically move to Search 3 If inputting the number using the joystick move the cursor and select numbers to from the keyboard and press the Ä button When having made an inputting error the selection by pressing Delete on the screen or the ç button on the remote control De...

Page 44: ...press the Ä button Delete Point q Select the point to be deleted and press the Ä button Deleting ROMAINE ST e Select and press the Ä button The selected point is deleted and the display returns to the list of recent destinations r After completing press the Ñ button to return the screen to the present location map Press the É button to return to the menu screen Yes DISPLAYING THE CORRESPONDING MAP...

Page 45: ... HOME ADDRESS Selecting the most detailed map reduces the positioning error If you select will be displayed Select Item to Edit Now 4 Some areas may not contain all categories FOOD TYPE American Austrian Belgian British Canadian Chinese Dutch Filipino French German Greek Hungarian Indian Italian Japanese Korean Mexican Polish Portuguese Russian Spanish Swiss Thai Turkish Vietnamese Fast food Sandw...

Page 46: ...ds Quick route search Align the cursor with the destination and press the Ç button to display a reference route from your present location to the destination When displaying the present location press the Ç button to display a reference route from your present location to your home Registering the location of your home in advance is required zSee p 70 About the quick menu zSee p 84 Registering you...

Page 47: ... 87 Because the search data stored in the map disc varies the reference routes provided will differ depending on the disc used even if the departure waypoint destination points and search conditions are the same ...

Page 48: ...gister the departure point Registration is required if the departure point is different from the present location Register the waypoints you want to go to on the way and roads you want to take on your trip Up to 5 items Select either or zSee p 91 New route See p 93 Settable search conditions Select either 1 reference route is searched for or 3 reference routes are searched for select the best one ...

Page 49: ...p 57 How to view the map screen The duration of your trip is an estimation based on a speed of 50mph for highways 30mph on national state roads 25mph on local roads and 10mph on other roads This time does not correspond with your vehicle s actual speed Save the desired route in the memory See p 100 Saving the present route Multiple route searches take more time to effectuate than single route sear...

Page 50: ...arch for geographic points from a list of recently set destination points and waypoints The unit automatically stores up to 20 set destination and waypoints in the memory in the order of newest to oldest Recent Destination Yes Delete this point Hint 6 6 1 5 Settable search conditions Search for a route prioritizing highways Search for a route prioritizing the shortest driving distance possible The...

Page 51: ...s page ADDING WAYPOINTS r Display the waypoint map align the cursor with the waypoint and press the Ä button To modify or delete this waypoint select it and press the Ä button t Set additional waypoints as per the steps above y Go to step p 92 Selecting the most detailed map will minimize the positioning error If having set a waypoint s will not appear If the distance to your destination is great ...

Page 52: ...s the É button 2 q Select and press the Ä button w Register the new departure point See p 94 for the registration method MODIFYING A ROUTE 1 CHANGE THE SET DESTINATION OR DEPARTURE CHANGE ADD OR DELETE WAYPOINTS OR CHANGE THE SEARCH CONDITIONS Current Route CHANGING THE DEPARTURE POINT REGISTERING A DEPARTURE POINT OTHER THAN THE PRESENT LOCATION q Select and press the Ä button w Register the new ...

Page 53: ...button effectuates a search condition modification display the search conditions you want to set To make a search condition modification press the Ä button again Example for Faster Route e Select or and press the Ä button If having selected the route guidance screen appears and route guidance is initiated when the route search is complete If having selected 3 route selection screens appear Select ...

Page 54: ... stored route Store the route you want to save in the memory If at step there are already 20 set route geographical points and search conditions the message Full data will appear Press the Ä button and select of the item and delete unnecessary data zSee p 111 Delete a rigistered route Saved Routes List Hint 3 DISPLAYING THE PRESENT ROUTE Press the É button 1 Select from the drop down menu and pres...

Page 55: ...ys Route Information will not appear To verify highway information search for a route that includes highways zSee p 105 Modifying route search conditions There may be instances when no information about the highways contained in the route is not displayed Hint The presently set route can be deleted DELETING THE PRESENT ROUTE Delete The following instances will result in the automatic deletion of t...

Page 56: ...emory START ROUTE GUIDANCE Start Route Guidance Press the É button 1 Select from the drop down menu and press the Ä button Start Route Guidance 2 During route guidance if the É button is pressed will appear Stop Route Guidance d h Start Route Guidance Press the Ä button on the present location display screen QUICK MENU SEARCHING FOR A WAY HOME Reference routes from the present location to the pre ...

Page 57: ...tination is near highways a verification message will appesr To change press the Ä button again to erase the mark Check Highway To complete setting press the Ñ button to return the screen to the present location map Press the É button to return to the menu screen 4 Settable search conditions Search for a route prioritizing highways Search for a route prioritizing the shortest driving distance poss...

Page 58: ...o long a detour you may leave the present route displayed as is If having set a waypoint s the unit will search for a route passing through it them This excludes already passed waypoints Hint Example for an 8 mile detour selection STRAYING OFF THE ROUTE REROUTE If having strayed from the set route while route guidance is in progress a reference route search from the present location to the destina...

Page 59: ... having selected a stored route To retrieve a stored route zsee p 109 Retrieve stored routes Hint SAVED ROUTES LIST 1 RETRIEVE STORED ROUTES Saved Routes List Stored routes can be retrieved route search If the present route is displayed that route will be deleted and the retrieved route will appear Store the route in advance zSee p 100 Saving the present route Press the É button 1 Select from the ...

Page 60: ...ture Press the É button 2 Select from the drop down menu and press the Ä button Route Simulation 3 If performing a route simulation for a route stored in the memory it is necessary to retrieve that route The retrieved route becomes the Current Route zSee p 109 Retrieve stored routes 1 The simulation is initiated During route simulation intersections may not enlarge the voice guide may lag or the p...

Page 61: ...set Heading Up you can change for the North Up map temporarily while scrolling Returning to the present location display screen will bring back the Heading Up map See p 59 to 61 Changing the map display for the characteristics of each map display Hint CHANGING THE MAIN SCREEN SETTINGS Example of a screen whose upper part represents the heading Example of a screen whose upper part represents north ...

Page 62: ...owing you the way to turn zSee p 28 Junction guide DISPLAY INTERSECTION ENLARGEMENTS SETTING THE 2 SCREEN DISPLAY 1 When displaying the present location you can split the screen in two and show on the right side of the display maps with varying reduction scale levels intersection enlargement illustrations route information and other information screens The type of right screen information screen f...

Page 63: ... disabled Even if having placed a mark in the display will not appear without having approached the intersection Because the display is based on the data stored on the map disc intersection enlargement display and junction view will not be effectuated at intersections and junctions not available in the stored data depending on the intersection the intersection name may not be indicated Crossing En...

Page 64: ...te a reference route search automatically from your present location to the destination in the event you stray off the set route while route guidance is in progress Route Guidance Auto Reroute SETTING AUTO REROUTE Route Guidance q Select Auto Reroute w Press the Ä button to place a mark Indicates that this condition is set To change press the Ä button again to delete the mark If a waypoint s is se...

Page 65: ...e screen along with the checkered flag mark Hint 119 The unit can tell you vocally when you are arriving at destinations or waypoints and in what direction to turn while route guidance or route simulation is in progress SETTING VOICE GUIDANCE Route Guidance Select and press the Ä button to indicate a mark Voice Guidance Indicates that this condition is set To change press the Ä button again to del...

Page 66: ...the present location map Press the É button to return to the menu screen 4 w Press the Ä button Indicates that this condition is set To change press the Ä button again to delete the mark Example of setting enable q Select Dsplay Est Time To Destination Highways appear red even if having selected purple green for the route color setting Placing a mark for will enable a display indicating the distan...

Page 67: ...RESENT LOCATION MARK Example of setting auto Example of setting yellow Press the É button 1 Select from the drop down menu and press the Ä button System Setting 2 Change the settings 3 CHANGING THE COLOR OF THE MAP AND THE PRESENT LOCATION MARK System Setting You can select the color of the map day night auto and the present location mark red yellow Select the desired color day night auto and pres...

Page 68: ...em Setting 2 Press the É button 1 Select from the drop down menu and press the Ä button Clock Setting 2 Select Display Lat Long 3 DISPLAYING LATITUDINAL AND LONGITUDINAL COORDINATES System Setting SELECT THE Clock Mode and Clock Size Clock Setting Latitudinal and longitudinal coordinates can be displayed on the map screen excluding present location display Press the Å button twice to return to the...

Page 69: ...yed at a time Also only displaying a track doesn t record it q Proceed as described in step to p 127 to select the desired group and press the Ä button Track Memory 3 Track Memory 2 Track Memory 1 DISPLAY THE DESIRED TRACK 1 3 127 USING TRACKS 1 Place markers along the road already followed and record them This function is helpful when wanting to verify a road already traveled on or when wanting t...

Page 70: ...ute Track DELETING TRACKS 1 2 3 129 When the tracks in memory 3 are displayed on the map a mark appears here w Select and press the Ä button twice The present map is displayed Display ON Example of selecting memory 3 Select Display ON The tracks disappear from the map Disabling the display doesn t erase the tracks from the memory q Proceed as described in step and p 127 select and press the Ä butt...

Page 71: ... 4 Cursor Position correction screen Bearing correction screen Even if correcting the present location while the unit is presently positioning your vehicle after having connected the GPS exterior antenna the present location will change to the position determined by the GPS Depending on the driving conditions and the GPS satellite the position bearing of the present location mark may differ from t...

Page 72: ...tered point and press the Ä button 3 Go to step p 135 if only to view information Pressing down on the Joystick d will display the continuation Press the Joystick s or the buttons to go to the next previous page Select the item Name TEL Memo Mark to change register and press the Ä button 4 Presently registered information Name input screen Press the É button 1 Select from the drop down menu and pr...

Page 73: ...buttons to go to the next previous page Select and press the Ä button Display Map 4 Select a geographic point and press the Ä button The registered point information screen is displayed 3 Press the É button 1 Select from the drop down menu and press the Ä button Edit Saved Location 2 RETRIEVING REGISTERED POINT MAPS Edit Saved Location ...

Page 74: ...tons to go to the next previous page Select the point desired for deletion and press the Ä button 3 Press the É button 1 2 Select and press the Ä button Delete Point 4 To complete setting press the Ñ button to return the screen to the present location map Press the É button to return to the menu screen 6 Select and press the Ä button Yes 5 About the unit s memory By effectuating registration editi...

Page 75: ...he Ä button Sensor Information 2 If well connected ON will appear when the parking brake is set and OFF will appear when it is released PARKING BRAKE If the unit is not well connected to your vehicle it will not function properly After having completed the connection check the parking brake connection at the connection verification screen VERIFYING UNIT CONNECTION Sensor Information VERIFYING UNIT...

Page 76: ...NGUAGE 149 SWITCHING THE SUBTITLE LANGUAGE 150 CHANGING THE ANGLE 151 ENLARGING THE SCREEN 152 SWITCHING THE AUDIO 153 SHUFFLED PLAYBACK 154 PLAYING BACK TRACK INTROS 155 REPEAT PLAYBACK 156 SWITCHING THE TIME DISPLAY 157 VIEWING JPEG IMAGES 158 ENLARGING REDUCING THE IMAGE DISPLAY 160 CHANGING THE SLIDESHOW DISPLAY FORMAT 161 SELECTING PLAY MODE 162 ROTATING THE IMAGE 163 CHANGING THE INITIAL SET...

Page 77: ...indication will disappear after about 1 second If a video deck video camera is connected to the unit VIDEO VIDEO mode is added Because vibrations while driving cause sound and image disturbance avoid playback while driving Normal operation returns when vibrations cease If the unit s power source is the vehicle s 12V battery for enhanced safety images cannot be viewed unless the parking brake is se...

Page 78: ...o 4 speed levels Pressing the F buttons while the DVD video is paused rewinds fast forwards the image up to 3 slow speed levels Press the Q button The sound is muted and MUTE appears on the screen Press the button again to return the sound and clear the MUTE display Press the PLAY PAUSE button q Operable only with the remote control device D V D C D J P E G 143 144 TO STOP PLAYBACK Press the PLAY ...

Page 79: ...le depending on the disc Refer to the instruction manual that came with the disc being played back for details FINISH STOP TITLE MENU OPERATION Operable only with the remote control device 2 Depending on the disc a DVD menu may not be programmed Because the DVD menu is programmed in the stored data of the disc its content varies depending on the disc For example some discs enable the playback of t...

Page 80: ...148 PLAYBACK FROM THE DESIRED POSITION DVD CD ...

Page 81: ...o languages programmed depending on the disc If so select the desired language as per the instructions below Press the å button during playback Every time the button is pressed the listed audio languages programmed in the disc are switched Audio language list example ...

Page 82: ...deo Press the Ω button during playback Every time the button is pressed the screen switches ENLARGING THE SCREEN ZOOM x 1 5 ZOOM x 2 ZOOM x 4 ZOOM OFF DVD Inoperable from the unit D V D C D J P E G 151 152 The angle cannot be selected if the disc has not been programmed with multi angle imaging The total number of angles programmed varies depending on the disc and the recorded scene Hint Use the J...

Page 83: ......

Page 84: ...e for roughly 10 seconds PLAYING BACK TRACK INTROS CD 1 Press the N button and press 1 INTRO on the 10 key Press the N button to display NUM and then press Intro playback is initiated To end this operation press the stop button w or execute steps and above to display NUM and press 4 EXIT 2 ...

Page 85: ...LAPSED TITLE REMAIN CHAPTER ELAPSED CHAPTER REMAIN and NO DISPLAY For CDs Select from SINGLE ELAPSED SINGLE REMAIN TOTAL ELAPSED TOTAL REMAIN and OFF For DVD videos SWITCHING THE TIME DISPLAY During playback press the button to select the type of time display Repeatedly pressing the button changes the type ...

Page 86: ... to select the JPG directory and press the Ä button 2 With t and y appearing on the screen press the Joystick d to display the rest of the file s content VIEWING JPEG IMAGES 2 You can enlarge reduce the image displayed on the screen Press the Ω button while the image is displayed ZOOM ON will then appear for roughly 3 seconds During a slideshow the image will stop the moment when the ZOOM button i...

Page 87: ...layed press the Joystick g to move the cursor to the play mode selection position Press the Joystick d repeatedly to switch among the following list in that order SINGLE Display only one file REPEAT SINGLE Repeat one file The skip buttons r e are disabled in this mode FOLDER Display entire folder content and when finished displaying the disc data screen appears REPEAT FOLDER Repeat entire folder c...

Page 88: ...the Ä button The selected item will light up yellow 2 SELECTED ITEM LANGUAGE AUDIO switch audio language during DVD video playback SUBTITLE switch subtitle language during DVD video playback MENU switch DVD menu display language OSD switch initial settings display language D RANGE sharp sound quality enabled during DVD video playback even at a low volume only with Dolby Digital sound AUDIO OUT set...

Page 89: ... Select SUBTITLE to switch the DVD video subtitle language Select MENU to switch the display language of the DVD menu programmed in the DVD video Select OSD to switch the initial settings display language Settings list D V D C D J P E G 166 165 The parental control settings for DVD videos can be programmed only while playback is stopped with no resume playback function The settings stay the same u...

Page 90: ...ar the standard register ON Select to enjoy a sharp sound quality even at a low volume D V D C D J P E G 168 167 If having selected a language not programmed in the disc playback will start with one of the languages programmed in the disc Depending on the disc only one language may be programmed The AUDIO SUBTITLE settings can be switched at the DVD menu zsee p 146 or the title menu zsee p 145 usi...

Page 91: ...rogrammed with Dolby Digital the sound is changed into a 48kHz 16 bit PCM 2ch and outputted Also discs programmed with linear PCM will be played back with linear PCM There is no output from the unit s speakers headphones or audio I O terminal If having connected a digital audio device with no built in DTS decoder or Dolby Digital decoder make sure to set OPT PCM for the AUDIO SETTING Setting OPT R...

Page 92: ...EP P 164 2 If having selected an aspect ratio not programmed in the disc the unit will playback using one of the aspect ratios programmed in the disc Also depending on the disc there may be only one aspect ratio programmed Verify the instruction manual for the disc being played back If connecting a normal monitor to the video I O terminal and setting 16 9 WIDE the image may look unnatural If using...

Page 93: ...and input the number using the 10 key while NUM is displayed on the screen roughly 5 seconds When the 3 items have been inputted press the Ä button to return to the screen shown in step CHANGING THE INITIAL SETTINGS 6 Title chapter The content programmed in DVD videos may be divided into large segments c921 l 4346 58 945 61r 617 949 Tf 0 08i0p 5 re2onte ra6ECr245w2 134 65 re W n q ...

Page 94: ...175 ...

Page 95: ...HTNESS OF THE BUTTONS 181 MAIN SPECIFICATIONS 182 RECEIVING SIGNALS FROM THE GPS SATELLITE 183 CAUTIONARY ITEMS DURING ROUTE GUIDANCE 185 ABOUT THE VOICE GUIDANCE 189 ABOUT THE MAP DVD ROM 191 SETTING THE DEPARTURE WAYPOINT DESTINATION POINTS 193 ABOUT UPGRADES 195 TROUBLESHOOTING 197 WHEN THIS MESSAGE APPEARS 204 NAVIGATION SYSTEM DEFAULT SETTINGS LIST 205 ...

Page 96: ...CA cord VIDEO Yellow Red White If the audio output for the video deck video camera is set to mono connect only the white plug Mini plug To video I O terminal Mini plug To audio I O optic digital audio output terminal Align the cord with the groove in the large ferrite core and make one turn Prior to connecting the video deck video camera to the unit mount the included large ferrite core to the RCA...

Page 97: ...reases The H LEVEL cannot be adjusted towards the f side from the L LEVEL value adjustment towards the g side possible The L LEVEL cannot be adjusted towards the g side from the H LEVEL value adjustment towards the f side possible Dimmer adjustment is a function that enables the adjustment of the brightness of the screen Using the Joystick s to set the dimmer to AUTO the unit s brightness sensor d...

Page 98: ...sign of this unit are subject to change for improvements without prior notification The V type monitor screen size 7V type is a standard based on the dimensions necessary for an effective screen OTHER GPS antenna Micro strip flat antenna Reception frequency 1575 42MHz C A cord Reception system 18 channels parallel Reception sensitivity 130dBm Updating Interval About 1 second Format Original DVD fo...

Page 99: ... antenna to the unit Mount it horizontally on the exterior chassis of the vehicle or in your vehicle dashboard on a flat surface where any part of your vehicle will not obstruct signal reception Signals may not be properly received if installing within the vehicle Try your best to install it on the exterior of your vehicle The included GPS antenna mounting plate is required if installing within yo...

Page 100: ...e to drive your vehicle as per the actual traffic conditions During a route search the map does not shift in accordance with the running of your vehicle After a route search is complete it may take a moment until the recommended route is displayed There may be instances when the route does not disappear from the screen when arriving at your destination or at waypoints Either search for a new route...

Page 101: ...appearing on the map screen on roads that were recently constructed or that have been modified When the vehicle was rotated on a turntable after turning the ignition OFF or when exiting a multilevel parking structure Driving along a grid When having repeatedly turned and veered about Driving on long straight roads or smooth curves Driving along a fork in the road Driving a loop beltway Driving on ...

Page 102: ...until the voice guide for the next segment begins When approaching the destination the guide will announce Approaching destination and end From that point on refer to the map and drive towards your destination point The unit will guide you all the way to your destination by automatic voice outputs announcing upcoming turns or intersections Voice guidance ABOUT THE VOICE GUIDANCE Intersection of a ...

Page 103: ...his unit is the North America MAP 1 0 DVD ROM North America Version 1 Refer to the instruction manual that comes with the disc for details pertaining to its maps data content display icons etc ABOUT THE MAP DVD ROM 191 192 O T H E R ...

Page 104: ...e Bad example Waypoint1 Waypoint3 Waypoint1 Waypoint3 Waypoint4 Waypoint4 Waypoint2 Waypoint2 Destination Destination Departure Departure Highway To Destination Departure Highway Undesired interchange Desired interchange Set the waypoint at the desired interchange entrance exit Waypoint Local road 1 8mi Aquarium RIVER I really wanted to take this road Example A map with Aquarium is selected from S...

Page 105: ...ABOUT UPGRADES ...

Page 106: ...the map screen remains gray Inaccurate vehicle is positioning Character interspacing narrowed to prevent data cluttering on the screen Also there may be multiple indications of the same roads and geographic names Display error occurred due to driving conditions or GPS satellite positioning Present location is not displayed Present location is not displayed GPS signal reception is obstructed by wal...

Page 107: ...e Voice Guidance Either go back to the recommended route or re effectuate the route search Place a check mark before Initiate Continue on course following the actual traffic conditions Route Guidance Voice Guidance CAUSE REMEDY PAGE NO Voice guidance troubles SYMPTOM Recommended route is not displayed Recommended route containing a large detour is displayed Recommended route provided points far fr...

Page 108: ......

Page 109: ... playback of DVD videos Unreadable disc inserted Included map DVD ROM inserted Inputted password is different from the registered password Attempting to playback a DVD video while driving with the unit power source being the vehicle battery Close the disc insert cover completely The unit s region number is 1 DVD videos with any region number other than 1 or ALL cannot be played back Verify the par...

Page 110: ... ON Voice Guidance ON Route Color Purple Simple Right Left Turn ON Eliminate Goal Mark OFF Display Est Time to Destination ON System Setting Display Road Name ON Display Saved Location ON Display Lat Long ON Unit of Distance mi Car Mark Color Red Map Color Day Night Auto Auto Record Display Display Tracks ON Tracks OTHER Volume set on the midpoint between and 30 60 AUDIO VIDEO ON Beep sound key op...

Reviews: