| Start-up
24
|
50145736
Fisherbrand
Chapter 5
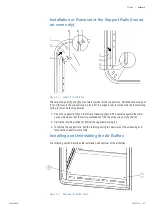
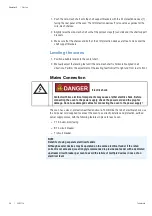
1. Push the wire-mesh
shelf onto the shelf support brackets with the tilt protection devices [1]
facing the rear panel of the oven. The tilt protection devices [1] also serve as guides for the
wire-mesh shelves.
2. Slightly raise the wire-mesh shelf so that the pull-out stops [2] can slide over the shelf support
brackets.
3. Make sure that the shelves and both of their tilt protection devices are free to move over the
shelf support brackets.
Leveling the ovens
1. Position a bubble level onto the center shelf.
2. Manually adjust the leveling feet until the wire-mesh shelf is horizontally aligned in all
directions. Perform the adjustment of the leveling feet from left to right and from rear to front.
Mains Connection
The oven has a class I, protection-earthed enclosure. To minimize the risk of electrical shock, use
the AC power cord supplied to connect the oven to a correctly installed and protection-earthed
power supply source, with the following features in place for each oven:
T 16 A slow-blow fusing
B 16 circuit breaker
FI circuit breaker
Electric shock
Contact with live electrical components may cause a lethal electric shock. Before
connecting the oven to the power supply, check the power cord and the plug for
damage. Do not use damaged cables for connecting the oven to the power supply!
NOTE
Benefits of using separate electrical feeders
Although several devices may be operated on the same electrical feeder if the rated
current is not exceeded, we strongly recommended to provide one feeder with a dedicated
upstream circuit breaker per oven to avoid the failure of multiple devices in case of an
electrical fault.
Summary of Contents for Fisher Sei 100L Gravty
Page 1: ......
Page 5: ...Fisherbrand 50145736 3 Chapter 15 Spare Parts and Accessories 51 Chapter 16 Device Log 53 ...
Page 6: ...4 50145736 Fisherbrand ...
Page 8: ...2 50145736 Fisherbrand ...
Page 14: ... Safety Notes 6 50145736 Fisherbrand Chapter 1 ...
Page 34: ... Start up 26 50145736 Fisherbrand Chapter 5 ...
Page 40: ... Handling and Control 32 50145736 Fisherbrand Chapter 7 ...
Page 42: ... Shut down 34 50145736 Fisherbrand Chapter 8 ...
Page 46: ... Cleaning and Disinfection 38 50145736 Fisherbrand Chapter 9 ...
Page 52: ... Disposal 44 50145736 Fisherbrand Chapter 11 ...
Page 54: ... Error Codes 46 50145736 Fisherbrand Chapter 12 ...
Page 60: ... Spare Parts and Accessories 52 50145736 Fisherbrand Chapter 14 ...
Page 62: ... Device Log 54 50145736 Fisherbrand Chapter 15 ...


