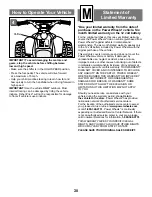
Fisher-Price Power Wheels C7478 Owner'S Manual With Assembly Instructions Download Page 7

Battery Charging

E

About Thermal Fuses

Your Power Wheels

®

12 volt battery is equipped with a

built-in thermal fuse. The thermal fuse is a self-resetting
safety device which automatically “trips” and shuts down
operation of the vehicle if the vehicle is overloaded or the
driving conditions too severe. Once a fuse has “tripped”, 
it will automatically reset itself after approximately 25
seconds and allow the vehicle to resume normal
operations. To avoid repeated automatic shutdowns, 
do not overload the vehicle by exceeding the 65 lbs. 
(30 kg) maximum weight capacity or by towing anything
behind the vehicle. Avoid severe driving conditions, such
as driving up very steep slopes or running into fixed
objects, which can cause the wheels to stop spinning
while power is still being supplied to the motors. Make
sure your child stops the vehicle before switching speeds
or direction.

CAUTION

Use the charger in dry locations only.

WARNING

• Battery can fall out and injure a 

child if vehicle tips over. Always use
battery clamp.

• PREVENT FIRE

- Never modify the electrical system.

Alterations could cause a fire resulting
in serious injury and could also ruin the 
electrical system.

- Use of the wrong type battery or 

charger could cause a fire or explosion
resulting in serious injury.

- Use of Power Wheels

®

components in

products other than Power Wheels

®

vehicles could cause overheating, 
fire or explosion.

• The battery must be handled by adults

only. The battery is heavy and contains
sulfuric acid (electrolyte). Dropping the
battery could result in serious injury.

• Never allow children to charge the battery.

Battery charging must be done by adults
only. A child could be injured by the 
electricity involved in charging the battery.

• Read the safety instructions on 

the battery.

• Examine the battery, charger and their

connectors for excessive wear or damage
each time you charge the battery. If
damage or excessive wear is detected, do
not use the charger or the battery until you
have replaced the worn or damaged part.
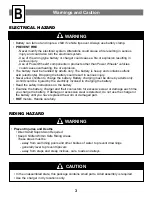
ELECTRICAL HAZARD

7

Summary of Contents for Power Wheels C7478

Page 1: ...is a U S trademark owned by and used under license from Kawasaki Motors Corp U S A Kawasaki Motors Corp U S A All Rights Reserved This product is neither manufactured nor distributed by Kawasaki Motor...

Page 2: ...ear shoes only 1 one rider at a time To prevent damaging the motors and gears teach your child to stop the vehicle before switching between forward and reverse Do not tow anything behind the vehicle o...

Page 3: ...of the wrong type battery or charger could cause a fire or explosion resulting in serious injury Use of Power Wheels components in products other than Power Wheels vehicles could cause overheating fir...

Page 4: ...y is complete to ensure that no parts are discarded Some parts were placed under the seat for shipment Press the tab under the back of the seat and lift to access the battery compartment Metal parts h...

Page 5: ...2 Volt Battery Cap Nut Assembly Tool Microphone 12 VOLT CHARGER 12 Volt Charger Pb 10 32 Lock Nut 2 For your convenience extra fasteners are included Parts 5 Steering Bushing Handlebar Assembly Front...

Page 6: ...t 15 Handlebar Back 16 Steering Bushing 17 Handlebar 18 Rear Axle 19 Round Bushing 2 20 10 32 Lock Nut 2 21 10 x 15 8 Screw 2 22 6 x 1 Screw 6 23 6 x 1 2 Screw 2 24 7 16 Washer 4 Not Shown Label Sheet...

Page 7: ...locations only WARNING Battery can fall out and injure a child if vehicle tips over Always use battery clamp PREVENT FIRE Never modify the electrical system Alterations could cause a fire resulting in...

Page 8: ...urs before you use it in your vehicle for the first time We recommend that you start charging your battery before beginning assembly of your new vehicle You do not need to remove the battery from your...

Page 9: ...e a rear wheel driver ring side down onto the rear axle Fit the grooves on the rear wheel driver onto the ribs on the wheel Slide a washer onto the rear axle Rib Wheel Rear Wheel Driver Hubcap Washer...

Page 10: ...cap nut on the end of the rear axle Assembly 10 4 Motor Assembly Rear Axle 437 437 Cap Nut Face the front end of the vehicle body Slide a washer onto one of the front axles Slide a round bushing ring...

Page 11: ...e slots in the vehicle body Make sure the side and rear tabs stay aligned with the slots Note Pull up on the front of the vehicle body while pressing down on the cowling to make sure the front tabs sn...

Page 12: ...screws Make sure the rounded side of the lock nut is down While holding a lock nut steady with pliers tighten the screw with a Phillips screwdriver Do not over tighten Repeat this procedure to tighten...

Page 13: ...steering column Pull up on the handlebar to make sure the handlebar assembly is secure Cap Nut Steering Column Handlebar Assembly 437 437 Cap Nut 14 15 Insert six 6 x 1 screws through the back handleb...

Page 14: ...cure in the handlebar Hang the microphone on the handlebar Fit a hand grip onto each end of the handlebar If it is difficult to slide the hand grips onto the handlebar moisten the hand grips with warm...

Page 15: ...e with a clean dry cloth to remove any dust or oils Place the labels exactly as shown in the illustrations For best results avoid repositioning a label once it has been applied to the vehicle After ap...

Page 16: ...the battery Fit the battery clamp arms down into the slots in the vehicle body Press the battery clamp arms out over the lock tabs to snap and secure the battery clamp arms in the slots Re assemble th...

Page 17: ...n your regular household trash The incineration landfilling or mixing of sealed lead acid batteries with household trash is prohibited by law in most areas Do not dispose of a lead acid battery in a f...

Page 18: ...Restrict your child s driving to generally level ground ONLY 8 Do not allow your child to drive down or across a steep slope The vehicle may gain unsafe speed even if the pedal is released to stop Th...

Page 19: ...PEED OPERATION REMOVE LOCK OUT SCREW ON SIDE OF SHIFTER FOR HIGH SPEED OPERATION Shifter Shifter How to Operate Your Vehicle L As assembled your vehicle is ready to roll in low speed 21 2 mph maximum...

Page 20: ...of the vehicle This warranty covers normal use and does not cover the Power Wheels vehicle or battery if damaged by unreasonable use neglect accident abuse misuse improper service or other causes not...

Page 21: ...or run into fixed objects which can cause the wheels to stop spinning while power is still being supplied to the motors If a thermal fuse continually trips contact your local Power Wheels authorized...

Page 22: ...n into fixed objects which can cause the wheels to stop spinning while power is still being supplied to the motors If a thermal fuse continually trips contact your local Power Wheels authorized servic...

Page 23: ...er for diagnosis and repair When the foot pedal is pressed Loose wire or connector Check all wires around the motors and all connectors the vehicle won t run without to make sure they are tight a push...

Page 24: ...section in this manual for more information Over 400 Authorized Service Centers Visit us on line at www powerwheels com for the location nearest you Or contact your local independently owned and oper...

Reviews: