FW-120-M
Featuring the First Water 40
TM
water treatment system
Operation Manual
First Water Systems
770-442-8257
www.firstwaterinc.com
Page 1: ...FW 120 M Featuring the First Water 40TM water treatment system Operation Manual First Water Systems 770 442 8257 www firstwaterinc com...
Page 2: ...are 8 4 1 Flushing System 8 4 2 Removing Filters 8 4 3 Cleaning System 8 4 4 Preparing for Storage 9 5 Special Procedures 10 5 1 Maintenance Intervals 10 5 2 Charging Battery 10 5 3 Replacing Filters...
Page 3: ...tment experts to assist you in your water operation plans You may contact us at any time to discuss your needs The FW 120 M is designed to provide microbiologically safe water for human consumption fr...
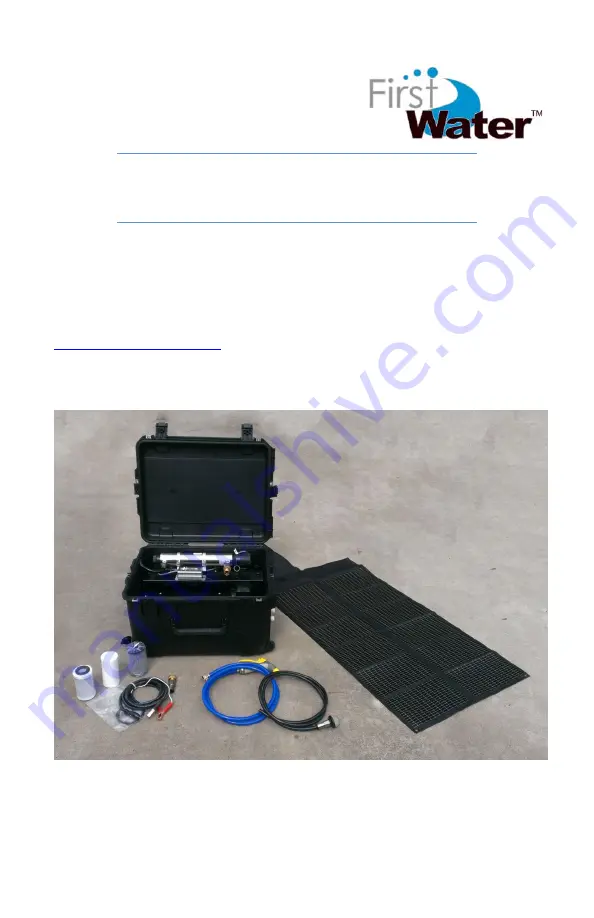
Page 4: ...W 120 M includes the following components 1 Water Purification Unit 1 Operation Manual 1 Maintenance Kit 0 5oz silicone grease 3 x Canister O Rings 2 Filter Sets one may be installed 2 UV Quartz Sleev...
Page 5: ...stored ready for deployment The following checklist will ensure that your FW 120 M is properly stored Used filters discarded New filters installed Unit clean and dry Canister O Rings lubricated and i...
Page 6: ...scope of an event escalates less ideal water sources may be utilized Example water sources from most ideal to least ideal 1 Facility plumbing under boil water advisory 2 Swimming or therapy pools 3 Ir...
Page 7: ...into charge port FW 120 MS only 3 4 Startup Ensure filters are installed Place Source Water hose in water source Attach Clean Water hose to system outlet Plug unit into 120 volt power source and sele...
Page 8: ...not deplete Clean water storage does not overflow Water flow does not stop Filters needing to be changed Pausing Operation The FW 120 M may be turned off and on throughout an event To stop the flow o...
Page 9: ...ble drops in water flow When you notice the flow rate decrease follow the steps below to check filters Disconnect all power from the unit Check Silt Screen for debris Replace the Sediment Filter in ho...
Page 10: ...Removing Filters Remove Filter Housing UV assembly from the case Detach power cord tether Unscrew each Canister Retain Canister O Ring Remove and discard used Filters Drain water from Canisters and dr...
Page 11: ...Canister O Rings with Silicone Grease or other food grade lubricant Place new filters in each Canister and screw the Canisters back on the unit o Tighten Canisters hand tight only Coil and store all h...
Page 12: ...Months Charge battery 5 2 Charging Battery Connect Solar Panel and expose to sunlight or Connect to 120 v outlet Allow unit to charge for approximately 6 hours 5 3 Replacing Filters Disconnect power...
Page 13: ...g Quartz Sleeve Disconnect power from the Filtration Unit Shut off water supply Follow steps in Replacing the UV Lamp to remove lamp Unscrew Chamber Cap from each end of Chamber Remove Washer from bot...
Page 14: ...ual distance past each threaded nipple Tighten End Caps firmly by hand only DO NOT USE HAND TOOLS Tightening with hand tools is likely to cause Quartz Sleeve to break Slowly restore water supply and c...
Page 15: ...not move water Check that downstream valves are open Check power source to Purification Unit Check Silt Screen for excessive debris Check filters 6 3 Water leaks from top of Canisters Check that each...