13
V. Troubleshooting
•
My hard drive isn’t recognized
Check the cables and connections. Ensure the USB 3.0 cable is properly oriented to the
connector on the computer and the external enclosure. Ensure the enclosure is properly
powered. If several USB devices are connected to the computer, remove all of them and just
try connecting the miniSwap/U3. USB 3.0 ports provide up to
900mA of power. USB 2.0
ports provide up to 500mA of power.
If the drive inserted in the miniSwap/U3 requires 12v it
is not compatible and will not power up.
Make sure the hard drive has been initialized for use
with the OS you have selected. Disk Utility completes this task with Mac OS X. Disk
Manager provides this service in Windows.
•
Does the miniSwap/U3 work with all PPC and Intel based Macintosh computers?
Yes, the miniSwap/U3 works with all computers with at least one available USB 3.0 or USB
2.0 port. For support of devices over 2TB Mac OS X 10.5.x or higher is required
•
Is a power adapter available?
Yes, an optional miniSwap/U3 power adapter is available. FirmTek was able to successfully
mount two miniSwap/U3 enclosures at the same time with 2.5” SATA HDDs installed while
only using Bus power on the 2012 MacBook Pro. If you have several additional USB devices
connected at the same time it’s possible a power adapter may be needed. Simply
unplugging excess USB devices will usually allow Bus power to support the miniSwap/U3.
Please contact FirmTek if you wish to order a miniSwap/U3 power adapter.
•
Drive is difficult to eject or insert?
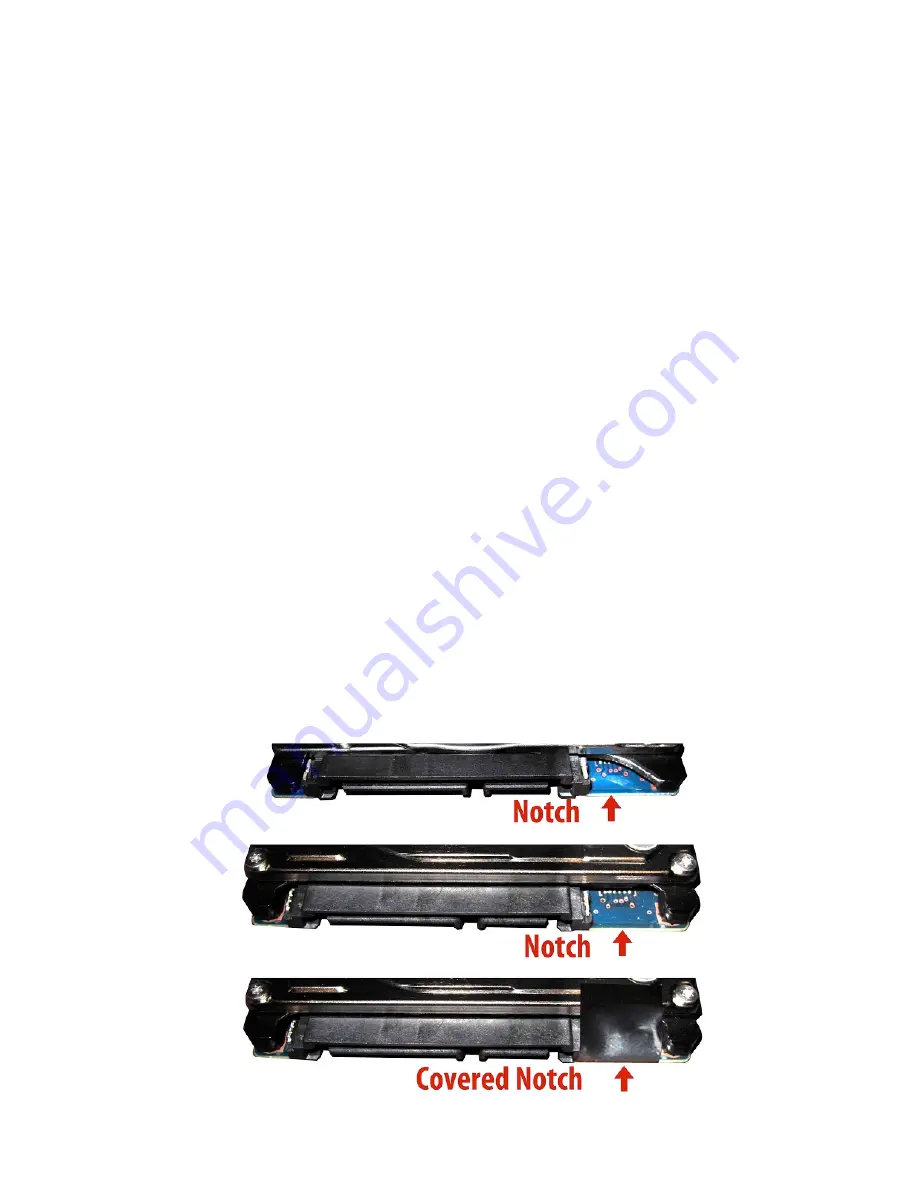
If the selected 2.5”
SATA HDD has a notch in the rear, it may cause the disk eject arm to
become stuck and the bay door difficult to open
.
DO NOT force the door open
as this
may damage the miniSwap. If the drive is difficult to eject, take the three screws off of each
side of the miniSwap and remove the top. Next, push the drive forward with your finger to
eject the drive.
You can fill the notch if you wish to continue to use the drive with the miniSwap. One option
is to use a knife to cut a small section of wood from a wooden paint stick to fill the gap. Black
electrical tape can be used to hold the wood in place. With this modification completed the
drive will eject properly. Do not fill the gap with any substance that conducts electricity, as
this can damage the HDD.


