10
3. Attach the USB 3.0 cable
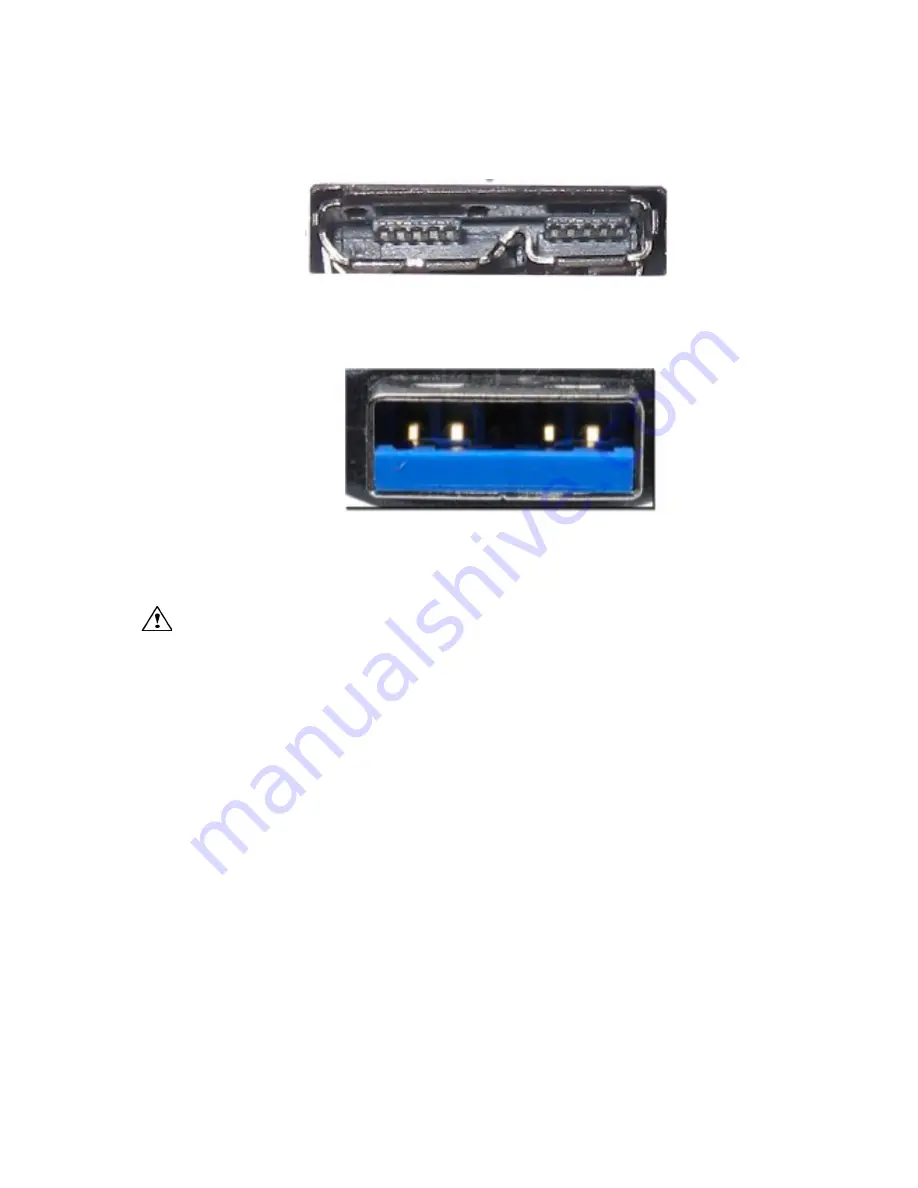
Install the USB 3.0 data cable on the rear of the miniSwap/U3 enclosure. Do NOT force the
USB connector. The USB 3.0 Micro-B connector can only fit in one direction.
The notch
in the Micro-B connector found on one end of the USB 3.0 cable must be pointed
down
to properly insert the USB connector into the rear of the miniSwap/U3.
USB 3.0 Micro-B Connector
Attach the USB A male connector found on the other end of the USB 3.0 cable to the
computer. The blue area inside the connector must be down for the connector to properly
slide into place.
USB 3.0 A Connector
Making the USB 3.0 Connection:
Caution
: Be sure to connect the cable using the proper orientation to your computer and
external enclosure. It should easily snap into place. Please do not force the USB
connector into the computer USB port or the miniSwap/U3.
Use of excessive force may
damage the computer or the miniSwap/U3 and is not covered by warranty service.
Power Operation
Once the USB cable is connected and the computer is running, the power LED will glow and the
drive mounted in the miniSwap/U3 can be accessed by the computer.
The miniSwap/U3 will
operate on bus power provided the USB power limits of the computer are not saturated. USB 2.0
computer connections offer up to 500mA of power while USB 3.0 ports provide up to 900mA. If too
many USB devices are connected at the same time an optional miniSwap/U3 power adapter may
be required.
Front Panel Status & Activity LED Light
On the front of the miniSwap/U3 enclosure are two multi-color (Green & Blue) status/activity LED
lights. These lights appear on the right side of the bay door. The lights will be off if the power is off.
When a USB cable is attached to the miniSwap/U3, the LED will normally glow green if no drive is
detected. When a hard disk is installed a blue LED will glow. Once the drive is being accessed the
blue LED will blink.


