5
®
ADJUSTMENTS/COMMISIONING
Adjustments
Before the servo motor is opened or commissioned the Safety Information on Page 2 and safety
advice Section 2 must have been read.
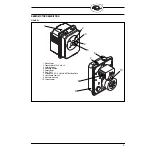
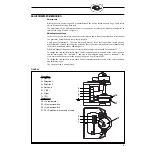
The adjustment of the limit miscroswitches is carried out by turning the white adjusting discs to
rotate black cams. S1 and S2 (Figure 1)
Adjusting the end stops
In the case of a servo motor which has the cover removed and is ready to operate there is the risk that
live parts may be touched and thus a shock received.
Apply power to terminal 2 – the servo motor will move as far as the stop position switch given by
microswitch S1. If when adjusting stop positions, the servo motor runs up against a mechanical stop,
the motor will stall and make a humming noise.
When this happens the power supply for this direction of operation should be switched off.
To change the stop position, rotate cam S1 until it actuates the microswitch. at the correct position,
and the motor stops. The “direction 1” end stop is now adjusted.Apply power to terminal 3 – the
servo motor will move as far as the stop position given by microswitch S2.
To change the stop position, rotate cam S2 until it actuates the microswitch. at the correct position,
and the motor stops.
The open end stop is now adjusted.
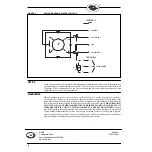
FIGURE 3.
Connections
1 = Neutral
2 = Direction 1
3 = Direction 2
4 = Not used
5 = + (S2)
6 = Wiper
7 = (S1)
Components
R1 = Potentiometer
S1 = Limit microswitch
S2 = Limit microswitch
F1, F2 = Potentiometer security screws
4
3
2
1
R1
S1
S2
5
6
7


