background image


3


®


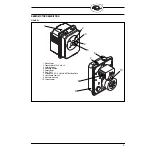
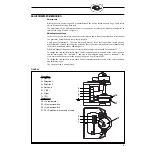
SERVO MOTOR DESCRIPTION


FIGURE 1.

1. Plastic Cover
2. Tapped Holes M6 x 4, M8 x 4
3. Locating Spigot
4. Mounting Surface
5. Output Shaft
6. Plug -PG11

8. Limit Switch Cams x 2
9. Aluminum Housing

10. Potentiometer

7. Screw Entry - PG11 with 3/8”NPT Backing Plate

1

2

3

6

4

5

8

7

9

10

Summary of Contents for NEXUS NX20-1

Page 1: ...engineers or personnel qualified by training and experience After installation is complete check the product operation is as described in these instructions The manufacturer of this equipment accepts...

Page 2: ...taneously to the terminals for open and close Fig 3 uncontrollable move ment of the output drive shaft may occur depending on the load on the shaft This situation must be prevented by the user by an e...

Page 3: ...1 Plastic Cover 2 Tapped Holes M6 x 4 M8 x 4 3 Locating Spigot 4 Mounting Surface 5 Output Shaft 6 Plug PG11 8 Limit Switch Cams x 2 9 Aluminum Housing 10 Potentiometer 7 Screw Entry PG11 with 3 8 NPT...

Page 4: ...potentiometer protective earth and control cables by suitably removing sheaths and insulation Feed cables through screwed cable entry via suitable conduit and glands and place the stripped ends of the...

Page 5: ...ns the servo motor runs up against a mechanical stop the motor will stall and make a humming noise When this happens the power supply for this direction of operation should be switched off To change t...

Page 6: ...rvo motor the Safety Information on Page 2 and Safety advice in Section 2 must have been read Switch on the power supply to the servo motor Drive the servo motor via the controller or by hand and chec...

Page 7: ...7 FIGURE 4 DIMENSIONS NX20 SERVO MOTOR...

Page 8: ...in material or workmanship or which otherwise fails to conform to the description of the product on the face of its sales order THE FOREGOING IS IN LIEU OF ALL OTHER WARRANTIES AND FIREYE MAKES NO WAR...

Reviews: