


English
- 27 -
Customer Helpline 0845 459 5282
If available networks are found, they will be listed
•
on this screen.
Select media server or network that you want to
•
connect by using “ ” or “ ” buttons and press
OK
button.
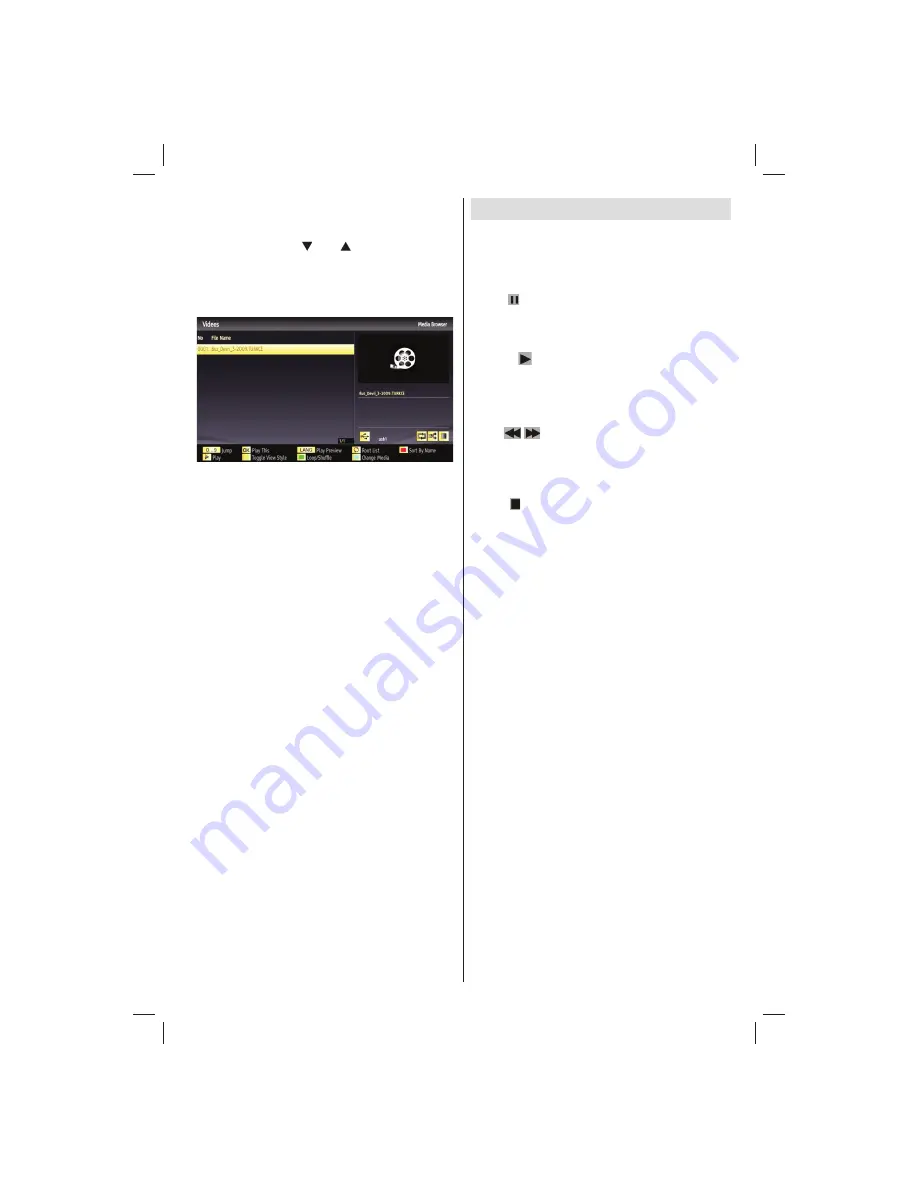
If you select media type as
•
Video
and choose a
device from the selection menu, a new menu screen
will appear on the screen as below:
Select
•
Videos
from this screen to list all the available
video
fi
les from the selected network.
To play other media types from this screen, you must
•
go back to main Media Browser screen and select
media type as desired and then perform the network
selection again (See Step 3).
Refer to Media Browser USB Playback section for
•
further information on
fi
le playback.
Subtitle
fi
les do not work if you watch video from
•
network through DLNA.
You can connect only one television with DLNA to
•
same network.
If a problem occurs with DLNA network, please
•
switch on/off your television.
Trick mode and jump are not supported with DLNA
•
function.
CAUTION
:
There may be some PC’s which may not be able to
•
utilize the DLNA function due to administrator and
security settings. (such as business PC’s).
For best home network streaming with this set, the
•
supplied Nero software should be installed.
Timeshift Recording
IMPORTANT: To record a programme, you should
fi
rst connect a USB disk to your TV while the TV is
switched off. You should then switch on the TV to
enable the recording feature. Otherwise, the recording
feature will not be available.
• Press (PAUSE) button while watching a broadcast
for switching to timeshifting mode.
• In timeshifting mode, the programme is paused and
simultaneously recorded to the connected USB disk
(*). Press
(PLAY) button again to watch the paused
programme from the stopped moment.
• This playback is performed in x1 playback speed.
You will see the timeshift gap between the real and
the timeshifted programme in the info bar.
• Use
/
(PREVIOUS/NEXT) buttons to move
forward or backward on timeshift playback. When
the timeshift is reached, timeshifting mode will be
quitted and you will switch back to watching normal
broadcast.
• Press (STOP) button to quit timeshifting mode.
(*) Continuous time shift recording’s duration depends
on your connected USB disk’s
fi
le size and de
fi
ned
Max. Timeshift in the Recordings Con
fi
guration menu.
See the section, “Recordings” for more information on
setting Max. Timeshift.
Note:
Switching to a different broadcast or source;
and viewing the main menu are not available during
the timeshifting.
01_[GB]_MB70_5112UK_IDTV_T_DLNA_MMH_IPLAYER_32965LED_GOLD11_10077102_50209143.indd 27
01_[GB]_MB70_5112UK_IDTV_T_DLNA_MMH_IPLAYER_32965LED_GOLD11_10077102_50209143.indd 27
06.01.2012 10:57:28
06.01.2012 10:57:28


