


22
take it to a mechanic immediately.
Riding with loose spokes may
cause the wheel to be unbalanced
and affect riding performance.
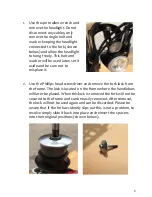
Tires
It is recommended that your
tire pressure is at least 40 psi.
Before every ride, make sure that
the tires are inflated according to
the pressure on the sidewall.
Improper tire pressure will make
riding more difficult, cause
excessive wear, and will result in
the premature failure of the tire.
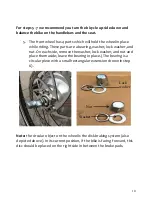
The tires should be property
seated on
the rim. The fitting of
the tire bead and rim bead should
be checked regularly. If the tube is
pinched between the rim and the
tire, the tube will pop and create a
hole in your tire.
Make sure that the tire is not
cracked or worn unevenly and that
it is without bulges. Also be sure to
check the valve stem to see if it is
straight in the rim. Irregular tires
should be replaced immediately.
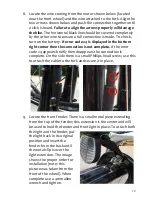
Handlebar
To straighten the handlebar,
turn the stem binder bolt to loosen,
and align with the front wheel. Be
sure to tighten it when it is straight
to keep it in place. Loose or
damaged grips should also always
be properly in place; if your grips
come off you could lose control of
your bicycle.
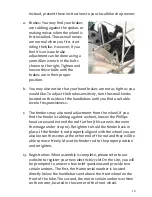
Brakes
Riding with brakes and cables
that are worn or damaged, or
wheels in poor condition, may
result in losing control of your
bicycle. Wet weather may hinder
the brake performance. Be sure
you allow for more distance to
safely stop in the wet or icy
conditions. Check before each ride
that your brakes are free of
obstacles, not leaking fluids, and
working properly before operating
your bicycle.
Battery
Never attempt to open the Lithium
battery in any way.
If you are having any issues with
the battery, please bring the bike
to your local bike mechanic for
repairs.
General maintenance
Change the lubricating grease
of the front axle, back-shaft, and
pivot once every three months.
Pour a small amount of mineral oil
every half a year into the brake
pipe. Be sure to oil the chains and
sprockets to keep from rusting and
Summary of Contents for Bonfire
Page 6: ...2...
Page 29: ...Welcome to the family...


