MULTIMEDIA
181
N
AVIGATING
A R
OUTE
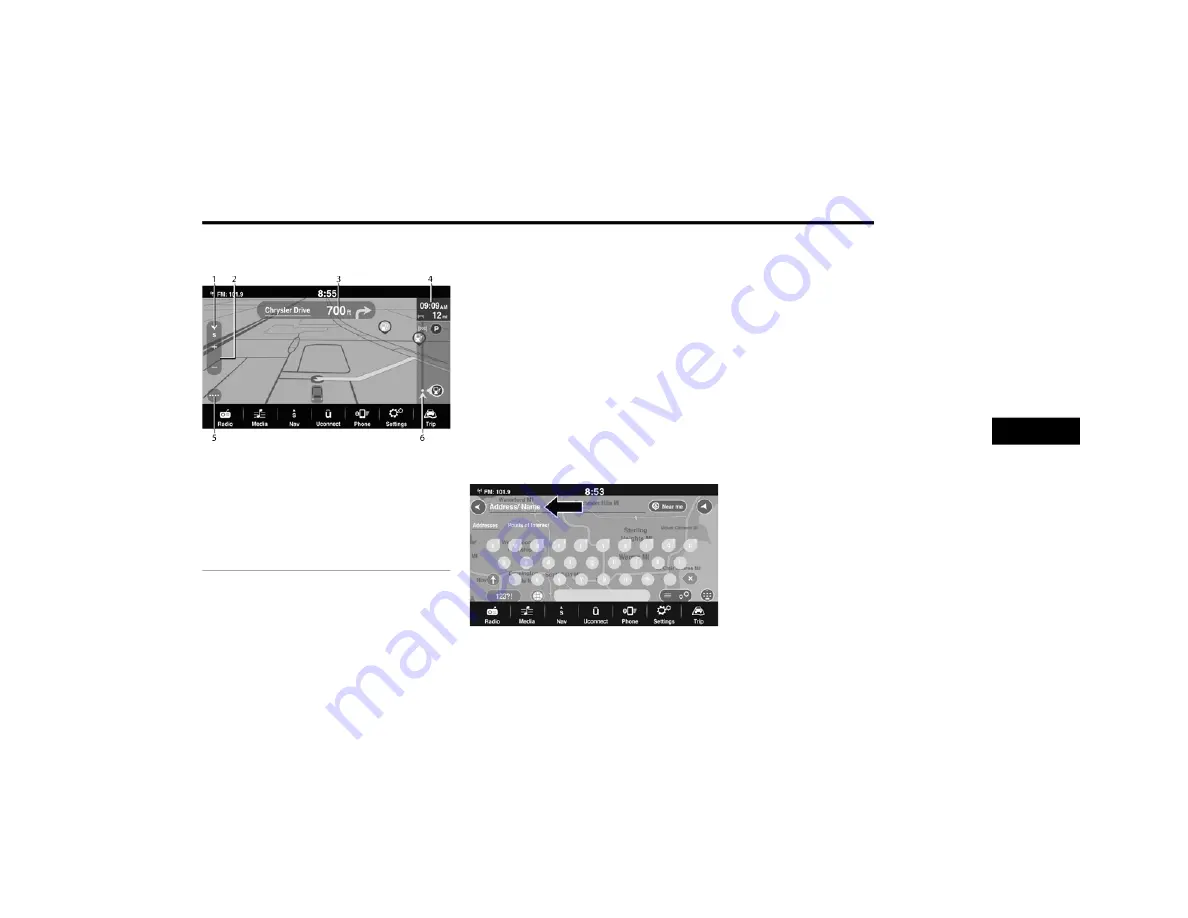
Navigation Route View
Once a route is programmed, the map view will
be displayed and highlight the route as a light
blue bar. The route tracker is on the right side of
the screen and shows the time and distance to
the final destination. It also indicates stops and
other points of interest along the way with icons
that move closer as you near them. The
direction distance is displayed at the top of the
screen, and the main menu can be accessed at
any time by pressing the Menu button: the four
white dots in the bottom left-hand corner of the
screen. The route will continue to display behind
the menu as you travel along it.
S
EARCH
Search
To search for a destination and start navigation,
follow these steps:
1. While in the Navigation Main Menu, press
the Search button.
2. If searching using an address, begin typing
the address on the keyboard. If searching
the name of a destination, press “Point of
Interest” first before typing.
3. Select the location from the list. The display
will switch to the map view and will show the
location of the selected destination.
4. Press the Navigate button — the red
steering wheel icon — to begin navigating to
the selected location.
NOTE:
Pressing the More button, the three dot icon,
next to the Navigate button brings up the
options to add the destination to the My Places
menu, add the destination to the current route,
and more. Within More, you can use the desti
-
nation as a starting point and view information
about the location.
1 — Navigation View Button
2 — Zoom Button
3 — Next Turn Instructions
4 — Arrival Time and Distance
5 — Main Menu Button
6 — Points Of Interest On Route
5
21_FD_OM_EN_USC_t.book Page 181


