


Devices
ST16-XXXXXX
ST16-XXXXXX
ST16-XXXXXX
02
FESIA WALK DEVICE
20
INSTRUCTIONS FOR USE |
Fesia
Walk
INSTRUCTIONS FOR USE |
Fesia
Walk
21
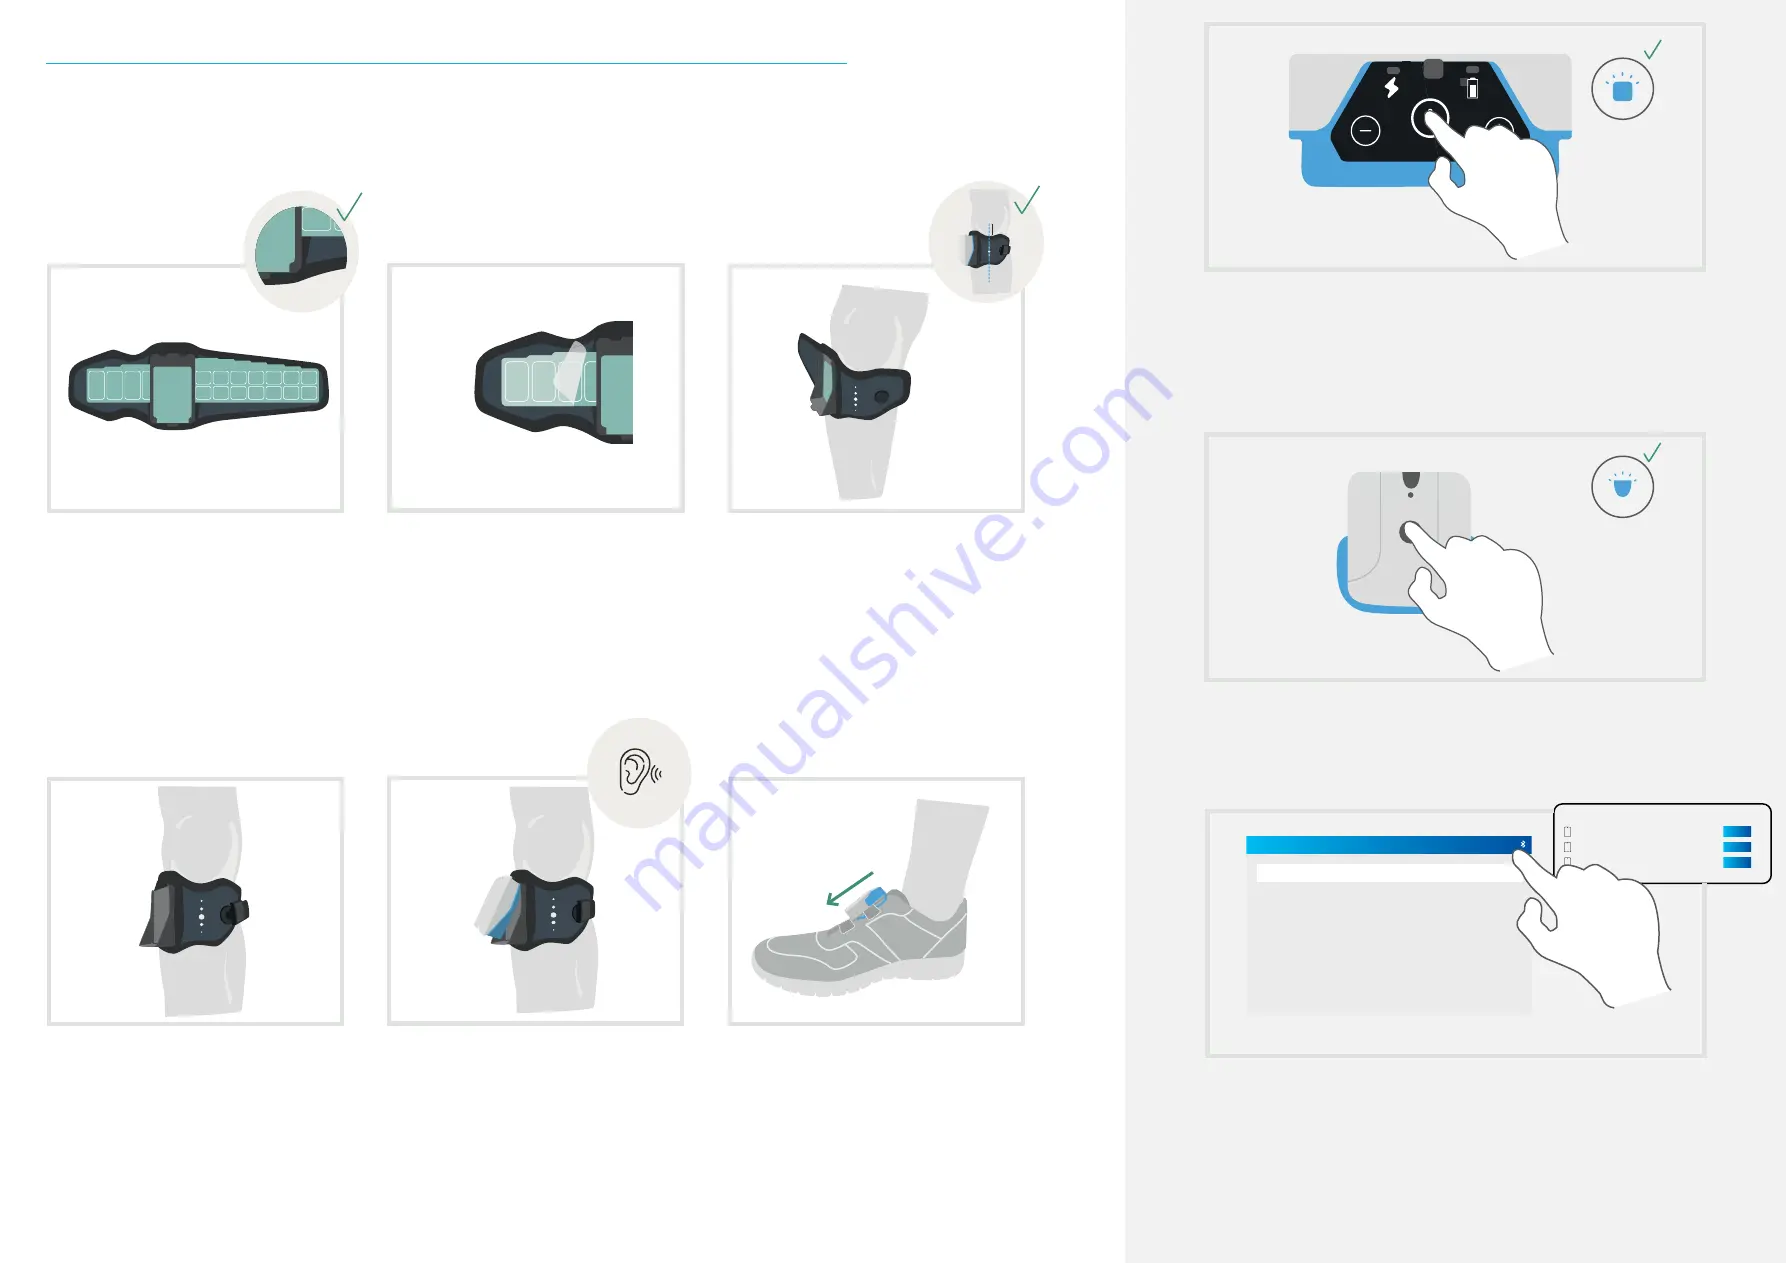
click!
Insert the electrode in the garment match-
ing the short ends together and the long
ends together. In order to assure proper
placement, make sure that the textile gar
-
ment and electrode indicators match each
other: right indicator of textile garment (R)
should match with right indicator of elec-
trode (R) and left indicator of textile gar
-
ment (L) should match with left indicator of
electrode (L).
Carefully remove the electrode gel protec-
tive layer. Keep this protective layer as you
will need it to store it at the end of its use.
This layer protects the gel from dirt and
dust.
Place the reference of central axis of the
garment three or four centimeters below
the patella.
Insert the stimulator into the base of the
electrode. Tighten until it clicks and make
sure it is properly inserted.
R R
Close the garment using the magnetic fas
-
tener and adjust it to suit.
DEVICE PLACEMENT
1
2
3
4
5
6
SWITCH ON THE STIMULATOR
To switch the stimulator on, press and hold the On/Off button for two seconds. When the stimulator
has been switched on, the blue LED will start flashing. It will remain flashing until it is paired with
the sensor.
7
SWITCH ON THE SENSOR
To switch on the sensor, press and hold the On/Off button for two seconds. When the sensor has
been switched on, the blue LED will start flashing.
8
SWITCH ON THE TABLET AND CONNECT TO THE APP
Once all the components are properly placed and turned on, open the
Fesia
Pro app and search the
device serial number to connect it by Bluetooth. You can find the information regarding
Fesia
Pro
app in chapter 3.
9
R
R
3-4 cm
Place the sensor in the shoe by inserting
the collet of the sensor between the laces
or velcro of the shoe.
Summary of Contents for F0X6-XM
Page 1: ...INSTRUCTIONS FOR USE FESIA WALK FESIA FW01 IFU EN 2021 11...
Page 4: ...GENERAL INFORMATION 01...
Page 7: ...02 FESIA WALK DEVICE...
Page 13: ...FESIA PRO APPLICATION 03...
Page 22: ...TECHNICAL SUPPORT 04...
Page 24: ...05 TECHNICAL INFORMATION...


