MACHINES AND
ACCESSORIES
Page 36 of 41
11.2Checking / Replacing the drive belt
1. Remove the belt protection guard screw, using a screwdriver, then remove the guard
(Figure 25).
2. Loosen the 3 screws to allow the belt to be removed from the two pulleys (figure 25)
3. Insert the new toothed belt, lightly tighten the three screws.
4. Adjust the tension of the belt, using a screwdriver, inserted into the adjustment hole.
Push upwards to increase the tension (Figure 25).
5. Tighten the locking screws, and not knock the belt;
6. To check the tension, tighten the belt between two fingers, it should yield about 5/6
mm (Figure 25)
If the belt is loose or too tight it can cause excessive noise, motor overload or premature
ageing of the belt.
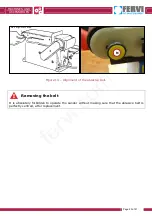
Figure 24 - Checking and replacing the drive belt.
Entanglement
Before removing the belt protection guard, turn off the machine and ALWAYS unplug the plug
from the power outlet.
Guide
Pulley
Belt tension
adjustment screws
Motor pulley
Belt
Pulley
cover
Checking belt tension
Belt tension
adjustment hole
Flathead
screwdrive
r
fervi.com


