background image


Troubleshooting guide 

December 10, 2019, 


FELIX

 Pro series 

www.FELIXprinters.com  

Felix Pro L/XL 

4


Step by step troubleshooting: 

The next chapters show step by step how to resolve the issue. Beginning with the most likely and simple solution 
first. 

4.1


Check if the machine is able to home again after heating both nozzles. 

In  some  cases  cooled  down  filament  in  the  (not)-used  extruder  pulls  the  hot-ends  slightly  upwards,  causing  a 
(sometimes constant) false trigger. To check if this is the case, heat both extruders to at least 180°C. Check if you 
can home again once both extruders have reached their target temperature. 

On the touch screen you can type 

in m119 into the console to check if a probe is stated high, thi

s means it’s not making a good enough contact.


The latest firmware releases automatically heat the extruders to 185°C when performing probing actions,  

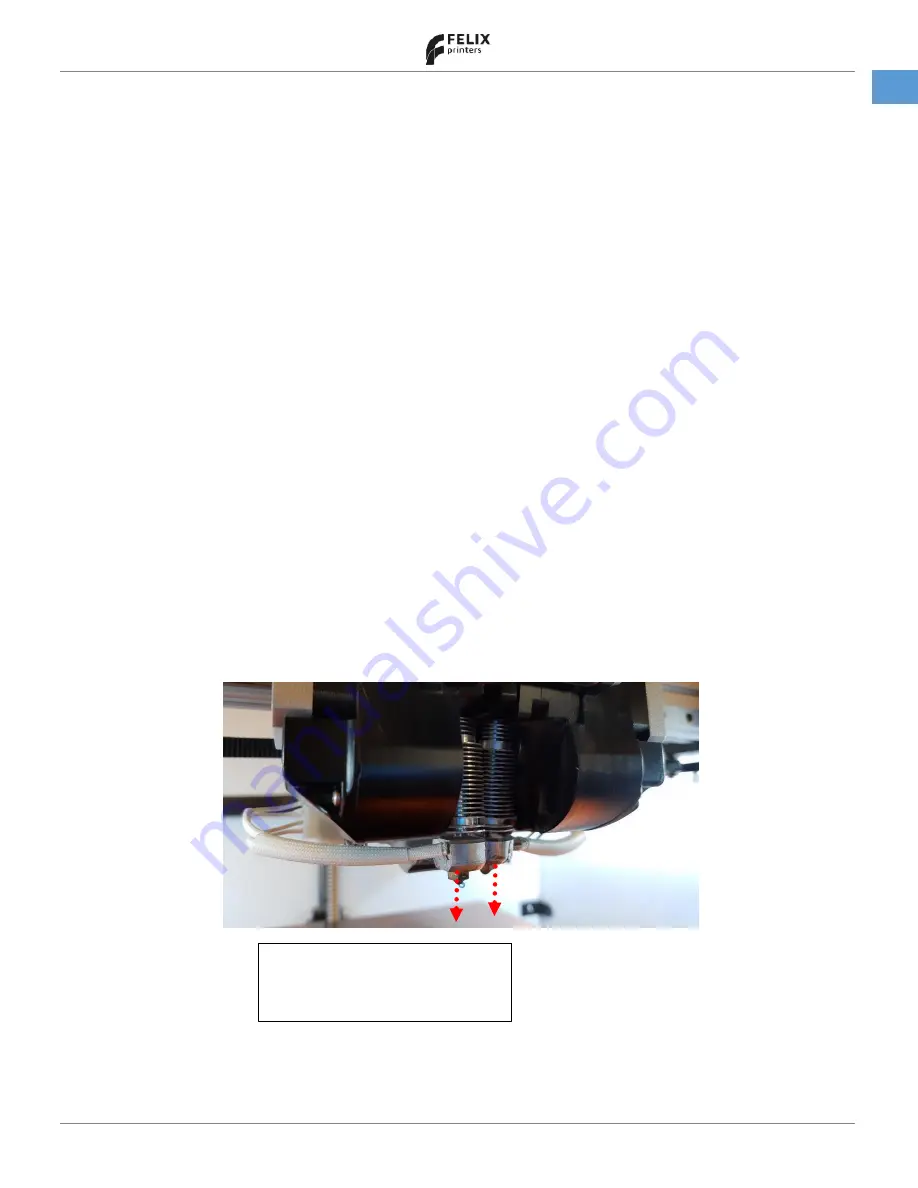
Are  the  hot-ends  fully  pushed  downwards  against the  contact  points?  During  transport  or  after  pulling  out  the 
filament  by  hand  sometimes  the  hot-ends  can  be  detached  from  one  of  the  magnetic  contact  points. 

You  can 

usually reset the probe by pushing some filament through by hand

.  


4.2


Use the latest and correct slicing settings. 

Using sliced files not optimized for the FELIX Pro series can result in bad prints. To ensure proper probe action, in 
the startup g-code we have implemented some commands which force the hot-ends on their contacts prior to the 
start of a print job.  

4.3


Detect which hot-end gives problems 


If the message does not go away, please check next step. 


Pull down  both  hot-ends (while 
cold) and check if the 

machine 

is able to home again


Summary of Contents for Pro Series

Page 1: ...Troubleshooting guide 7 April 2020 Revision 7 FELIX Pro L XL...

Page 2: ...4 4 4 Dirt between contact points 5 4 5 Check if hot end disc is properly fastened 6 4 6 Make sure the hot end cabling is properly guided 6 4 7 Hot end does not automatically move towards it s contact...

Page 3: ...lso show you what to do when an error occurs 3 Inner workings of the probe mechanism In short The probe mechanism basically consists of a disc on top of the hot end which is the switch When the hot en...

Page 4: ...a in a defined position Reliable electrical connection to enable probe function When touching the bed the hot end including the disc moves upwards to the extruder housing The disc moves away from the...

Page 5: ...this means it s not making a good enough contact The latest firmware releases automatically heat the extruders to 185 C when performing probing actions Are the hot ends fully pushed downwards against...

Page 6: ...an be attempted 1 Remove the hot ends see the manual for the procedure 2 Clean the metal disc Especially the faces that make contact with the magnets Recommended to use detergent like blue spirit acet...

Page 7: ...operly fix it Note Also the bearing on the bottom should be properly fastened This does not prevent z sensor triggered message but ensures proper operation of the printer 4 6 Make sure the hot end cab...

Page 8: ...between the disc and cooling ribs and between bearing and cooling ribs 4 7 3 Production error with too tight tolerances in either extruder or hot end The hot end must comply to these measurements In...

Page 9: ...are properly seated in their sockets If cables are properly placed in their sockets wiggle the cables to see if the message z sensor triggered appears or disappears Inspect the flat cables if there a...

Page 10: ...r 10 2019 9 FELIX Pro series www FELIXprinters com Felix Pro L XL Also check these probe wires if you see any breakage here then the probing wire needs to be replaced Please contact our support depart...

Page 11: ...the fatal G32 leveling failed Printer stopped and heaters disabled due to this error Fix error and restart with M999 error Follow this guide to fix it First print these they come included with the ma...

Page 12: ...o series www FELIXprinters com Felix Pro L XL Remove these panels as well they are held by 4 bolts Loosen these 2 screws and move it towards you to take the tension of the belt then check if all pulli...

Page 13: ...ng guide December 10 2019 12 FELIX Pro series www FELIXprinters com Felix Pro L XL Now place the calibration tools for the reference height place these on all 3 points Now push the bed down on the ref...

Page 14: ...ing guide December 10 2019 13 FELIX Pro series www FELIXprinters com Felix Pro L XL Push it forward to tension the belt again and retighten it Make sure the belt is properly seated on each pully befor...

Page 15: ...the bed down a bit but because the reference blocks are still under it it will press it down making a clicking noise this is normal and intended Now the bed is calibrated again check the bottom belt...

Page 16: ...ruder or just to clean it This is also recommended when switching materials Setting the temperature First we need to set the temperature of the extruder to the of the material that s currently in it f...

Page 17: ...ember 10 2019 16 FELIX Pro series www FELIXprinters com Felix Pro L XL Press the start button Filament coming out but with some sputtering or you can hear the motor click Then it s a good idea to do t...

Page 18: ...comes out of it if that doesn t help try this method anyhow if you still can t get some material through you might have to change the nozzle Set the extruder temp to 90 C 194 F and the fan to 100 you...

Page 19: ...o the middle of the bed manually so you can reach it better also take of the top cover After that grab the filament with one hand and press in the spring with the other now pull out the filament with...

Page 20: ...extrude properly again this method is also useful when switching materials If you are unable to continue or have any questions you can check at the support section of our website or you can contact u...

Page 21: ...Troubleshooting guide December 10 2019 20 FELIX Pro series www FELIXprinters com Felix Pro L XL...

Reviews: