background image

ORIGINAL INSTRUCTION >EN

TO START AND STOP DRYWALL SANDER

Make sure power circuit voltage is the same as shown on the specification plate on the
Sander, and that the sander switch is OFF. Connect Sander to power circuit.
The Drywall Sander is equipped with finger touch switch. Please see as below picture
shown:
To connect with electric power by press power key, then press ON/OFF key to turn on the
machine. And press again ON/OFF key to turn off machine. And Power cut by pressing
POWER key.

SPEED CONTROL

The Drywall Sander is equipped with a variable speed control. The speed is adjusted by

+

,

-

from numbered "1" through "7" with "1" being the slowest speed (approximately

900 RPM)and "7" being the fastest speed {approximately 2100 RPM).Use the higher speed
settings for fast stock removal. Use the lower speed selling to reduce removal rate for
more precise control

BRUSH-TYPE SKIRT

A brush-type skirt surrounds the abrasive pad. This skirt serves two purposes: (1) the skirt
extends below the surface of the abrasive pad so that it contacts the work surface first.
This position the sanding head parallel to the work surface before the abrasive contacts
the work, preventing the abrasive from "gouging" the work. (2) The skirt also helps contain
the drywall dust until the vacuum cleaner pulls it away.

CAUTION:

DISCONNECT SANDER FROM POWER CIRCUIT.

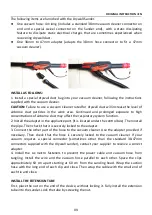
To replace skirt: (1) Remove abrasive pad (see ABRASIVE PAD REPLACEMENT). (2) Use
Phillips screwdriver to remove the six retaining screws (3) Lift the skirt out of housing. (4)
Position new skirt to housing and install the six retaining screws. (5) Replace the abrasive
pad.

10

Summary of Contents for FPG-INDUCTION-1

Page 1: ...EN INSTRUCTION MANUAL MODEL FPG INDUCTION 1 WARNING Please read all safety instructions and advises to lower the risk of injuries BUILDER SAS ZI 32 rue Aristide Bergès 31270 Cugnaux France Made in P R C 2021 PLASTER SANDER ...

Page 2: ... of electric shock if your body is earthed or grounded c Do not expose power tools to rain or wet conditions Water entering a power tool will increase the risk of electric shock d Do not abuse the cord Never use the cord for carrying pulling or unplugging the power tool Keep cord away from heat oil sharp edges or moving parts Damaged or entangled cords increase the risk of electric shock e When op...

Page 3: ...ff Any power tool that cannot be controlled with the switch is dangerous and must be repaired c Disconnect the plug from the power source before making any adjustments changing accessories or storing power tools Such preventive safety measures reduce the risk of starting the power tool accidentally d Store idle power tools out of the reach of children and do not allow persons unfamiliar with the p...

Page 4: ...the mounting hardware of the power tool will run out of balance vibrate excessively and may cause loss of control g Do not use a damaged accessory Before each use inspect the accessory such as abrasive wheels for chips and cracks backing pad for cracks tear or excess wear wire brush for loose or cracked wires If power tool or accessory is dropped inspect for damage or install an undamaged accessor...

Page 5: ...ry which in turn causes the uncontrolled power tool to be forced in the direction opposite of the accessory s rotation at the point of the binding For example if an abrasive wheel is snagged or pinched by the workpiece the edge of the wheel that is entering into the pinch point can dig into the surface of the material causing the wheel to climb out or kick out The wheel may either jump toward or a...

Page 6: ... approved by NIOSH for Dust and Mist Ventilate work area and or use a dust collector Continued and prolonged exposure to high concentrations of airborne dust may affect the respiratory system function 2 MANINTAIN FIRM FOOTING AND BALANCE Use appropriate scaffolding Do not overreach 3 SANDING OF LEAD BASED PANINT IS NOT RECOMMENDED Lead based paint should only be removed by a professional 4 SANDING...

Page 7: ... thread hole M6 Disc Diameter Ø225mm N W 4 07 kg Sound pressure level Lpa 89 5 dB A KpA 3 dB A Sound power level Lwa 100 5 dB A KwA 3 dB A Vibration Main handle 4 684m s K 1 5 m s Auxiliary handle 3 358 m s K 1 5 m s 3 TECHNICAL SPECIFICATIONS Voltage supply 230 240V Power 400W 07 ...

Page 8: ...Sander is designed for sanding walls and ceilings that are made of drywall or plaster The Sander provides a superior finish and is faster than conventional finishing methods for both new construction and renovation work Clean up time is minimized by the use of an external Vacuum Cleaner attached to the Sander ABRASIVE DISC SELECTION The Drywall Sander is shipped with a set of 80 100 120 150 180 24...

Page 9: ...ll the adapter in the appliance port it is located under the control box Then install the pipe Then check that it is securely locked to the adapter 3 Connect the other part of the hose to the vacuum cleaner Use the adapter provided if necessary Then check that the hose is securely locked to the vacuum cleaner If your vacuum requires a special connector sometimes other than the standard 38 47mm con...

Page 10: ...speed approximately 2100 RPM Use the higher speed settings for fast stock removal Use the lower speed selling to reduce removal rate for more precise control BRUSH TYPE SKIRT A brush type skirt surrounds the abrasive pad This skirt serves two purposes 1 the skirt extends below the surface of the abrasive pad so that it contacts the work surface first This position the sanding head parallel to the ...

Page 11: ... cause unacceptable swirl marks and unevenness in the work surface Keep the Sander in constant motion while abrasive pad is in contact with the work surface Use a steady sweeping motion Stopping the Sander on the work or moving the Sander erratically can cause unacceptable swirl marks and unevenness in the work surface NOTE Do not allow rotating abrasive pad to contact sharp protrusions Contact wi...

Page 12: ...check the power cord plugs switches etc the tool in good condition This tool passed rigorous quality inspection if the machine is still a failure occurs please send it to an authorized customer service SWAP for repair If the replacement of the supply cord is necessary this has to be done by the manufacturer or his agent in order to avoid a safety hazard Store the tool and accessories in a dry plac...

Page 13: ... 2014 A12 2014 A13 2015 EN55014 1 2017 EN55014 2 2015 EN61000 3 2 2014 EN61000 3 3 2013 Philippe MARIE PDG BUILDER SAS ZI 32 rue Aristide Bergès 31270 Cugnaux France Tel 33 0 5 34 502 502 Fax 33 0 5 34 502 503 States that the designated below machine Cugnaux 05 08 2021 13 Product Plaster sander Model FPG INDUCTION 1 Serial number 20210863391 20210863640 is in conformity with the essential requirem...

Page 14: ...he user manual Due to our policy of continuous product improvement we reserve the right to alter or change specifications without notice Consequently the product may be different from the information contained therein but a modification will be undertaken without notice if it is recognized as an improvement of the preceding characteristic READ THE MANUAL CAREFULLY BEFORE USING THE MACHINE When ord...

Page 15: ...before dropping off the machine Go to the repair station with the complete machine packed accompanied by the purchase invoice and the station support sheet downloadable after the service request is completed on the SWAP Europe site For machines with engine failure from manufacturers BRIGGS STRATTON HONDA and RATO please refer to the following instructions Repairs will be done by approved engine ma...

Page 16: ...essary for repairs and more generally the costs related to the immobilization of the product The costs of a second opinion established by a third party following an estimate by a SWAP Europe repair station The use of a product which would show a defect or a breakage which was not the subject of an immediate report and or repair with the services of SWAP Europe Deterioration linked to transport and...

Reviews: