

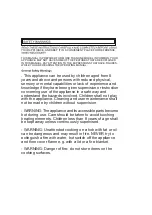


7
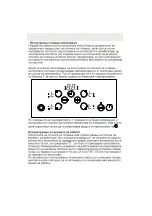
The electrical connection of this hob should be carried out by an
authorised service personal or a qualified electrician, according to the
instructions in this guide and in compliance with the current regulations.
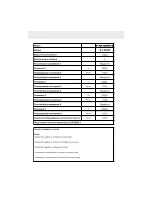
· Before connecting your appliance to the mains at home, make sure to
check the conformity of voltage settings, which are specified on the information
sticker attached to the appliance and/or packaking, with the usage conditions
available.
· The laws, ordinances, directives and standards in force in the country of
use are to be followed (safety regulations, proper recycling in accordance
with the regulations, etc.)
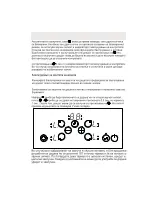
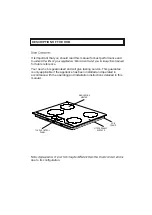
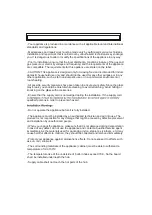
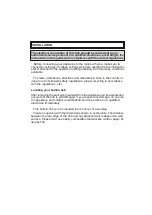
Locating your built-in hob
After removing the packaging material from the appliance and its accessories,
ensure that the hob is not damaged. If you suspect any damage, do not use
the appliance and contact an authorised service personal or a qualified
electrician immediately.
· This built-in hob is to be inserted into a cut out of a worktop.
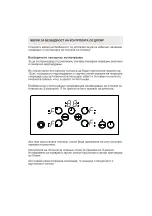
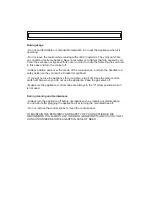
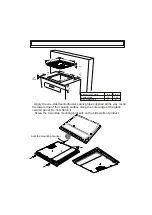
INSTALLATION
· Create an opening with the dimensions shown in next picture. The distance
between the rear edge of the hob and any adjacent wall is depend on wall
surface. Please don’t use easily combustible material like curtain, paper at
nearby hob.
Summary of Contents for 4-J INOX
Page 1: ...MK 4 J INOX ...
Page 2: ......
Page 3: ......
Page 7: ......
Page 8: ...520mm 590mm 41mm 560mm 490mm Min 60mm Min 150mm Min 130mm Min 25mm ...
Page 10: ......
Page 11: ......
Page 12: ......
Page 13: ......
Page 14: ......
Page 15: ......
Page 16: ......
Page 17: ......
Page 18: ......
Page 19: ......
Page 20: ......
Page 21: ...69 ...
Page 22: ......
Page 23: ......
Page 24: ......
Page 25: ...OPERATING AND INSTALLATION INSTRUCTIONS BUILT IN VITROCERAMIC HOB 4 J INOX EN ...
Page 49: ......
Page 50: ...UPUTSTVO ZA UPOTREBU I INSTALACIJU UGRADNE STAKLENO KERAMI KE PLO E BO 4 J INOX ...
Page 75: ...52208777 ...
Page 76: ...4 J INOX EN ...
Page 77: ......
Page 78: ......
Page 79: ......
Page 84: ......
Page 85: ...Figure 2 ...
Page 86: ...Figure 3 3 ...
Page 87: ...50 200 Max 250 100 150 50 200 Max 250 100 150 Figure 4 Figure 5 Figure 6 Figure 5 Figure 6 ...
Page 90: ......
Page 91: ......
Page 92: ......
Page 93: ......
Page 94: ......
Page 95: ......
Page 96: ......
Page 97: ...MK 4 J INOX ...
Page 98: ......
Page 99: ......
Page 100: ......
Page 101: ......
Page 102: ......
Page 103: ......
Page 104: ......
Page 105: ......
Page 107: ...3 3 ...
Page 108: ...50 200 Max 250 100 150 50 200 Max 250 100 150 4 5 6 5 6 ...
Page 109: ......
Page 111: ......
Page 112: ......
Page 113: ......
Page 114: ......
Page 115: ......
Page 117: ...SR 4 J INOX ...
Page 118: ......
Page 119: ......
Page 120: ......
Page 124: ...1 ...
Page 126: ...Slika 3 3 ...
Page 127: ...50 200 Max 250 100 150 50 200 Max 250 100 150 Slika 4 Slika 5 Slika 6 Slika 4 Slika 5 ...
Page 128: ...12 4 KORIŠÆENJE PROIZVODA Funkcije rerne ...
Page 130: ......
Page 131: ......
Page 132: ...Slika 7 ...
Page 133: ......
Page 134: ......
Page 135: ...52265653 ...