


59
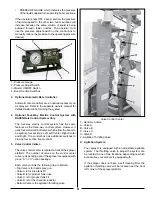
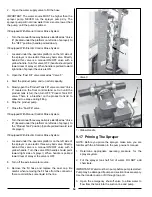
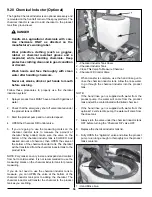
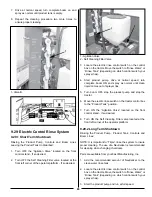
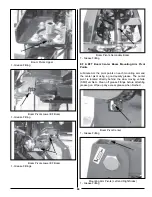
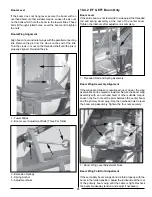
1 - Chemical Inductor Tank Cover
2 - Chemical Inductor Tank
3 - Chemical Inductor Venturi
4 - Valve At Bottom Of Inductor Tank
5 - Agitation Control Valve
6 - Chemical Fill Control Valve
7 - Hand Rinse Gun
NOTE: Some chemicals tend to foam when agitated. If
foaming occurs, throttle back the agitation valve until the
foaming stops. If you change the agitation valve setting, you
may have to adjust the pressure on the tractor control box.
This adjustment would not be necessary with a RAVEN rate
controller.
NOTE: There are anti foaming agents available:
• Part No. 07.06881 Shakedown, Liquid - 1 Pint
• Part No. 07.06880 Shakedown, Dry - 1/2 lb. jar
• Part No. 07.06879 Shakedown, Water Soluble Packets
- 30 per case
10.
If you are mixing more than one chemical into the
product tank, you should check with your chemical
supplier to make sure you add the chemicals in the
correct sequence to insure proper mixing.
11.
Be certain to clean and dispose of empty chemical
containers properly. Follow the instructions on the
container.
NOTE: DO NOT use the chemical inductor system for
powder type chemicals. Flowable granular chemicals are
acceptable.
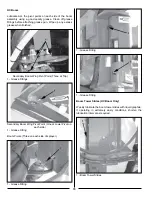
IMPORTANT: The “Tee” fitting at the bottom of the chemical
inductor is a special fitting with a venturi nozzle on the
inside. NEVER operate the chemical inductor without the
venturi nozzle installed.
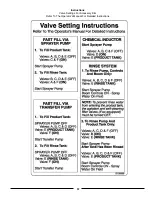
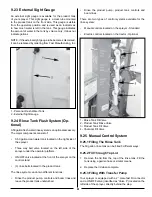
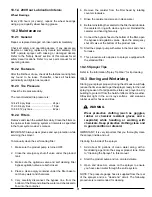
Control Box
1 - Pressure Gauge
2 - Pressure Adjust Switch
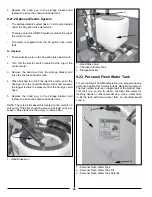
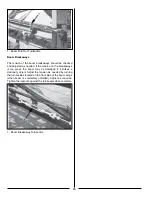
9.21 Hand Rinse Gun for Chemical
Inductor (Optional)
The chemical inductor is supplied with a hand gun with
approximately 5 feet of hose to rinse the chemical inductor
tank.
There are two ways the hand gun can be supplied with
water:
• Standard system via the product pump
• Optional electric system via a 12 volt electric pump
9.21.1 Standard System
•
The standard system supplies water from the sprayer
tank via the product pump and has an ON/OFF valve
located at the top of the control center. The control
center is located at the front of the sprayer.
•
The water supplied will be contaminated with diluted
mixed chemical.
To Operate:
1. Start the product pump. Be certain to have water in the
product tank and the emergency shut off valve under
the product tank is open.
2. Open the ON/OFF valve located at the top of the control
center.
3. Remove the hand gun from the storage bracket and
rinse the chemical inductor tank.
4.
When finished close the ON/OFF valve, point the hand
gun into the chemical inductor tank and squeeze the
trigger to drain the pressure from the hand gun and
hose.
Summary of Contents for BW750
Page 18: ...18...
Page 19: ...19 Decal A Decal B Decal C Decal D...
Page 20: ...20 Decal E Decal F Decal G Decal H Decal I Decal J...
Page 21: ...21 Decal K Decal L...
Page 36: ...36 9 6 Spray Tip Wear...
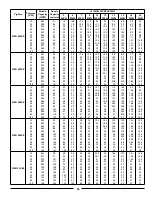
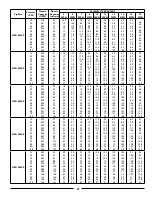
Page 43: ...43 9 8 TeeJet Air Induction Spray Tips 9 8 1 20 Inch Spacing At Various Speeds And Pressures...
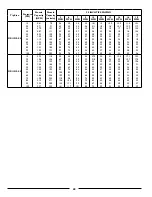
Page 81: ...81 12 3 Raven Console Calibration Information...
Page 83: ...83 Notes...