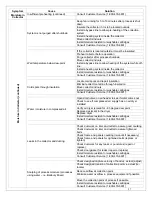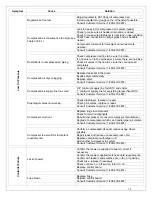
Programming Example
STEP 1 – ON TIME – Press the “Select” button until the “ON TIME” LED indicator is
illuminated, then press the “Adjust” button until the required ON TIME in milliseconds is
shown on the Digital Readout (100 milliseconds illustrated).
STEP 2 – OFF TIME – Press the “Select” button until the “OFF TIME” LED indicator is
illuminated, then press the “Adjust” button until the required OFF TIME in seconds is shown
on the Digital Readout (15 seconds illustrated).
STEP 3 – NUMBER OF VALVES CONNECTED – Press the “Select” button until the “#
VALVE” LED indicator is illuminated, then press the “Adjust” button until the required
NUMBER OF VALVES CONNECTED is shown on the Digital Readout (30 valves illustrated).
STEP 4 – BLOWDOWN CYCLES – Press the “Select” button until the “# OFF’S” LED
indicator is illuminated, then press the “Adjust” button until the required number of
BLOWDOWN CYCLES is shown on the Digital Readout (6 cycles illustrated). Note:
Blowdown will not occur if the collector is operating at below the high-pressure drop setting
unless the controller is in the continuous cleaning mode.
STEP 5 – SETTINGS LOCKED – Press the “Select” button until the “LOCKED” LED indicator
is illuminated. All settings are now locked in and the Digital Readout will display the last
setting, which is the number of blowdown cycles programmed (6 cycles illustrated).
43
ON TIME #OFF'S
OFF TIME LOCKED
#VALVE
1 0 0
0
5
1
ON TIME #OFF'S
OFF TIME LOCKED
#VALVE
0
3
0
ON TIME #OFF'S
OFF TIME LOCKED
#VALVE
6
0
0
ON TIME #OFF'S
OFF TIME LOCKED
#VALVE
6
0
0
ON TIME #OFF'S
OFF TIME LOCKED
#VALVE
Summary of Contents for Gold GS10
Page 75: ...75 ...


