background image

1

Revision date: 02.17.16

©2016 Growers Supply

All Rights Reserved. Reproduction 

is prohibited without permission.
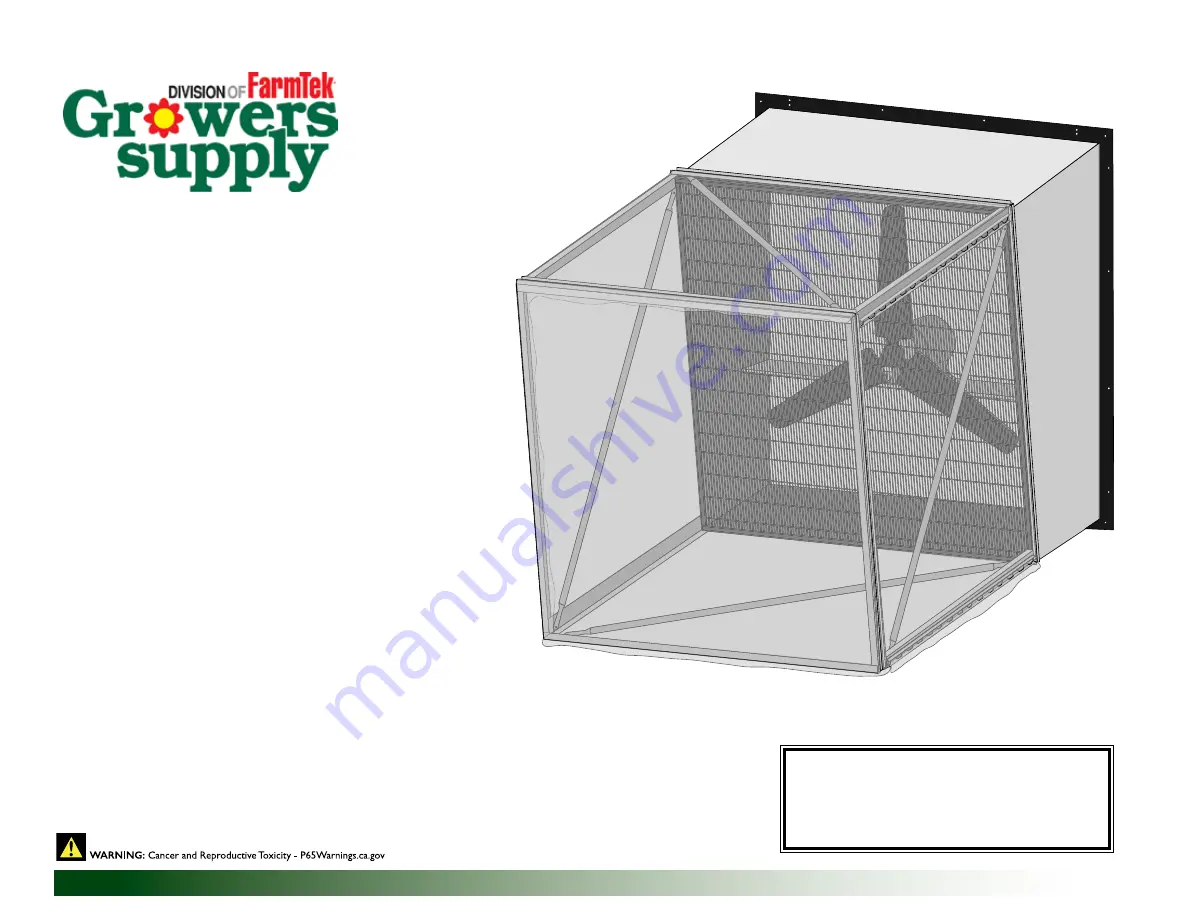
Insect Screen for 

Exhaust Fans

STK# 

  DIMENSIONS

115106F          24" x 24" Exhaust Fan

115107F          36" x 36" Exhaust Fan

115108F          48" x 48" Exhaust Fan

Actual fan and screen kit may differ.

Summary of Contents for Growers Supply 115106F

Page 1: ...Supply All Rights Reserved Reproduction is prohibited without permission Insect Screen for Exhaust Fans STK DIMENSIONS 115106F 24 x 24 Exhaust Fan 115107F 36 x 36 Exhaust Fan 115108F 48 x 48 Exhaust Fan Actual fan and screen kit may differ ...

Page 2: ...ented will help ensure proper assembly Steps outlining assembly process are as follows 1 Verify that all parts are included in the shipment Notify customer service for questions or concerns 2 Read these instructions and all additional documentation included with the shipment before you begin 3 Gather the tools and assistants Assistants are helpful during assembly 4 Assemble kit components Read thi...

Page 3: ...ocedure 1b Assemble 115106F 24 x 24 Screen Kit C D B A B C D A 115106C 115106C 115106C 115106D all cross braces 115106B 115106B 115106B 115106B 115106C 115106A 115106A 115106A 115106A ATTENTION For best results assemble on a flat surface Assemble as shown using the 1 4 fasteners then square each corner using a carpenter s square before you tighten the bolts Assistance is required to lift hold and ...

Page 4: ...ews for non metal building frame After screen frame is secured to the building complete procedure on page 5 6 to install insect screen Install fasteners through this flange and into building frame Add customer supplied materials for framing backer as needed Space fasteners 8 10 on center around perimeter of screen frame Outside of Building Building Frame Screen Frame Profile Fastener Fan w Shutter...

Page 5: ...o 2 panels using the grid shown below For best results spread screen out on a clean surface that will not damage material Cover surface with cardboard or similar material if needed Panels are trimmed after installation Photo below shows spring wire as seen installed in frame channel to lock screen in place Additional photos are found on page 10 115106F 24 x 24 Screen Kit Seal Frame Prepare Screen ...

Page 6: ... spring wire to length as needed Do not stretch screen too tight View sample photos on page 10 3 Trim panel as desired Leave 2 or more to reattach and stretch panel if needed 5 After securing panel to top square of frame stretch panel down to cover front and secure in same channel used for Panel 1 by installing another run of spring wire 6 Trim excess panel Leave 2 or more to reattach and stretch ...

Page 7: ...ied on diagram for purchased kit Main kit diagrams begin on page 13 115107F and page 14 115108F 1 4 hex bolts and locknuts ASSEMBLE SCREEN FRAME 36 and 48 1b Assemble 115107F 36 x 36 and 115108F 48 x 48 Screen Kit 3 Take each u channel section and mark additional hole locations for Tek screws between end mounting holes Evenly space hole locations 4 Position first section along top of fan shroud fl...

Page 8: ...holes through fan shroud using the pre drilled holes in u channel ends as a guide 8 Install the upper and lower side frame sections and struts Connect using the diagonal strut and 1 4 fasteners See connection details on main diagram page for specific kit NOTE Do not fully tighten the 1 4 fasteners at this time Tighten only enough to remove excess play in each connection Drill 5 16 hole through shr...

Page 9: ... s square square corners and tighten all 1 4 fasteners NOTE Ensure frame is square before fasteners are tightened 12 Using the original fasteners Step 2 reinstall wire guard for fan 13 Apply bead of sealant around all u channel attached to shroud to seal any gaps that may be present Allow to dry before installing screen 14 Install insect screen as shown in the next section Choose the procedure for...

Page 10: ...ual frame and screen kits may differ from what is shown Securing insect screen is similar Photos are presented to show that process Examples only Drape screen over frame Secure using spring wire Cut spring wire to length Sample screen shown Trim screen material Install spring wire ...

Page 11: ...cure screen to each frame square using a single run of spring wire in each channel Cut wire to length Do not stretch screen too tight Secure free edge of Panel 1 using same channel and another run of spring wire Trim panel as desired Leave 2 or more to reattach and stretch panel if needed Secure Panel 2 to front of frame Install spring wires in same channels used to secure first panel Trim excess ...

Page 12: ... over frame Secure screen to each frame square using a single run of spring wire in each channel Cut wire to length Do not stretch screen too tight Secure free edge of Panel 1 using same channel and another run of spring wire Trim panel as desired Leave 2 or more to reattach and stretch panel if needed Secure Panel 2 to front of frame Install spring wires in same channels used to secure first pane...

Page 13: ...36 Exhaust Fan 115107FA all u channel 115107FA 115107FBL 115107FBL 115107FBR 115107FE all cross braces 115107FD 115107FD 115107FBR 115107FC 115107FC A B A NOTE Install diagonal braces on the outside surface of fan shroud to ensure a tight connection B Shroud ...

Page 14: ... x 48 Exhaust Fan 115108FA all u channel 115108FA 115108FBL 115108FBL 115108FBR 115108FE all cross braces 115108FD 115108FD 115108FBR 115108FC 115108FC A B A B NOTE Install diagonal braces on the outside surface of fan shroud to ensure a tight connection ...

Page 15: ...15 Revision date 02 17 16 Customer Notes ...

Reviews: