- 17
-
Mi 2554/2
IT
ALIANO
EN
GLISH
FR
ANÇAIS
ES
PAÑOL
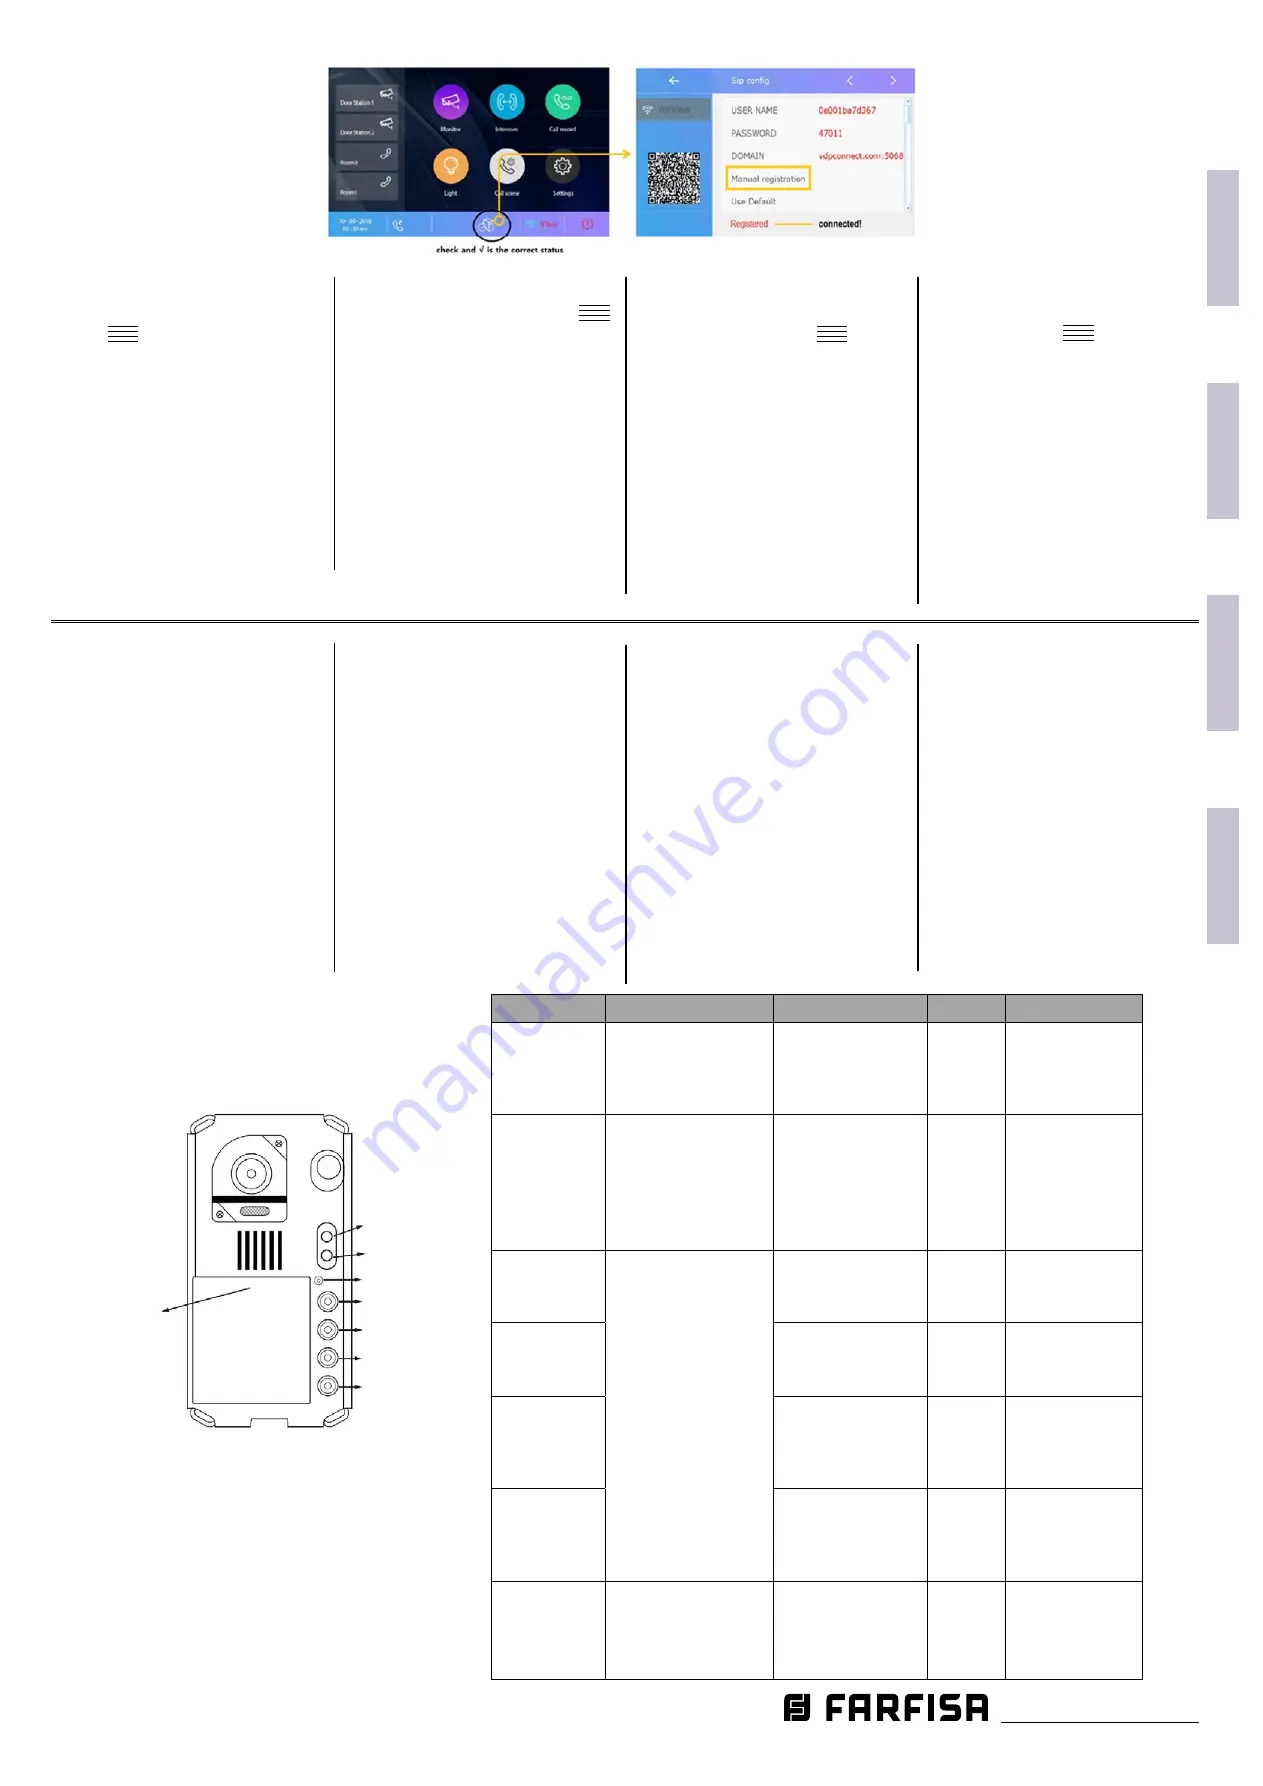
Sul proprio smartphone installa
-
re l’app “
VDP connect
”, toccare il
menù “
”, selezionare “Account”
e quindi [-], utilizzare la fotocamera
dello smart phone per scansionare
il QR code presente nella pagina del
menù “SIP settings” del monitor. Lo
smart phone sarà pronto a ricevere
le chiamate non appena apparirà in
alto la dicitura “Registered”. Dalla
pagina principale del menù sele
-
zionare l’icona “Scenari” e quindi le
opzioni “Deviazione se non rispo
-
sta” o “Deviazione sempre”.
Con riferimento alla figura sotto è
possibile utilizzare la combinazione
di tasti indicati per programmare al
-
cune ulteriori funzioni della pulsan
-
tiera. Il numero di volte in cui viene
premuto il tasto KEY_SET, indicato
nella seconda colonna della tabella
sotto, consente di selezionare la
funzione da programmare. Durante
questa fase la retroilluminazione
del cartellino lampeggerà conti
-
nuamente. Se non viene premuto
alcun tasto entro 10 secondi la pul
-
santiera uscirà automaticamente
dalla fase di programmazione.
On your smart phone install the
"
VDP connect
" app, tap the
“
”,
menu, select "Account" and then [-],
use the smart phone camera to scan
the QR code in the "
SIP settings
"
menu page of the monitor. The
smart phone will be ready to receive
calls and the word "Registered" will
appear at the top. From the main
menu page, select the "Scene" icon
and then the options "Divert call if
no caller" or "Divert call always".
With reference to the below picture
it is possible to use a combination
of the keys for further door station’s
functions programming. The num-
ber of times in which the KEY_SET
button is pressed, as described in
the below table, allows to select
the function to be programmed.
During this process the name plate
backlighting will blink continuous-
ly. If no buttons are pressed within
10 seconds the unit will exit the
programming mode automatically.
Sur votre téléphone intelligent, ins
-
tallez l'application "
VDP connect
",
appuyez sur le menu “
”, sélec
-
tionnez " Compte " puis [-], utilisez
la caméra du téléphone intelligent
pour scanner le code QR dans la
page du menu " Paramètres SIP " du
moniteur. Le téléphone intelligent
sera prêt à recevoir des appels et
le mot "Enregistré" apparaîtra en
haut. À partir de la page du menu
principal, sélectionnez l'icône "Scé
-
narios", puis les options "Renvoyer
l'appel s'il n'y a pas d'appelant" ou
"Renvoyer toujours l'appel".
Concernant la figure ci-dessous,
il est possible d’utiliser la combi
-
naison de touches indiquées pour
programmer quelques autres fonc
-
tions de la plaque de rue. Le nombre
de fois que le bouton KEY_SET est
pressé, indiqué dans la second
colonne du tableau ci-dessous,
permet de sélectionner la fonc
-
tion à programmer. Au cours de
cette phase, le rétro-éclairage de
la porte-étiquette clignote tout le
temps. Si aucun touche est enfoncé
dans 10 seconds, la plaque de rue
sortira de la phase de program
-
mation.
En su propio teléfono inteligente
instale la aplicación "
VDP connect
",
toque el menú
“
”,
, seleccione
"Cuenta" y luego [-], utilice la cám
-
ara del teléfono inteligente para
escanear el código QR presente en
la página del menú "Configuración
SIP" del monitor. El teléfono inteli
-
gente se pondrá en contacto con el
usuario y no aparecerá la palabra
"Registrado". En la página princi-
pal del menú, seleccione el icono
"Escenarios" y, a continuación, las
opciones "Desviar la llamada si no
hay respuesta" o "Desviar la llama-
da siempre".
Con ref
erencia a la figura abajo es
posible utilizar la combinación de
teclas indicadas para programar
algunas funciones adicionales del
panel. El número de veces que se
pulsa el botón KEY_SET, se indica en
la segunda columna de la siguiente
tabla, que le permite seleccionar la
función que se desea programar.
Durante esta fase, la luz de la
tarjeta parpadeará continuamen
-
te. Si ninguna tecla es presionada
en 10 segundos el teclado saldrá
automáticamente de la fase de
programación.
LED_UNLOCK
LED_TALK
KEY_SET
KEY_4
KEY_3
KEY_2
KEY_1
LED_NAME
Function
KEY_SET press
Button press
Beep
Default
Address
selection
1 volta
1 time
1 fois
1 vez
KEY_1
(ID = 0)
KEY_2
(ID = 1)
KEY_3
(ID = 2)
KEY_4
(ID = 3)
1
2
3
4
ID = 0
Calling
mode
(standard
group)
2 volte
2 times
2 fois
2 veces
KEY_1
- Standard (But
-
ton A calls 01)
- Group (button A
calls 00-15; but
-
ton B calls 16-32)
1
2
Group
Unlock
mode
3 volte
3 times
3 fois
3 veces
KEY_1
- Normally Open
- Normally Closed
1
2
Normally open
Unlock time
K E Y _ 2
(k e e p
press)
1 ÷ 99 sec
1 ÷ 99
times
1 sec
Light mode
of name
plate
KEY_3
- On
- Off
- Auto
1
2
3
On
Light mode
for cam
-
era’s LED
KEY_4
- On
- Off
- Auto
1
2
3
Auto
Call con
-
firmation
tone
4 volte
4 times
4 fois
4 veces
KEY_1
- 1 tone
- continuous
- off
1
2
3
1 tone


