background image


Backup through USB port


The unit provides one USB port to simple 
backup over the connection with PC. 
Please mind the following steps to 
successful link.   
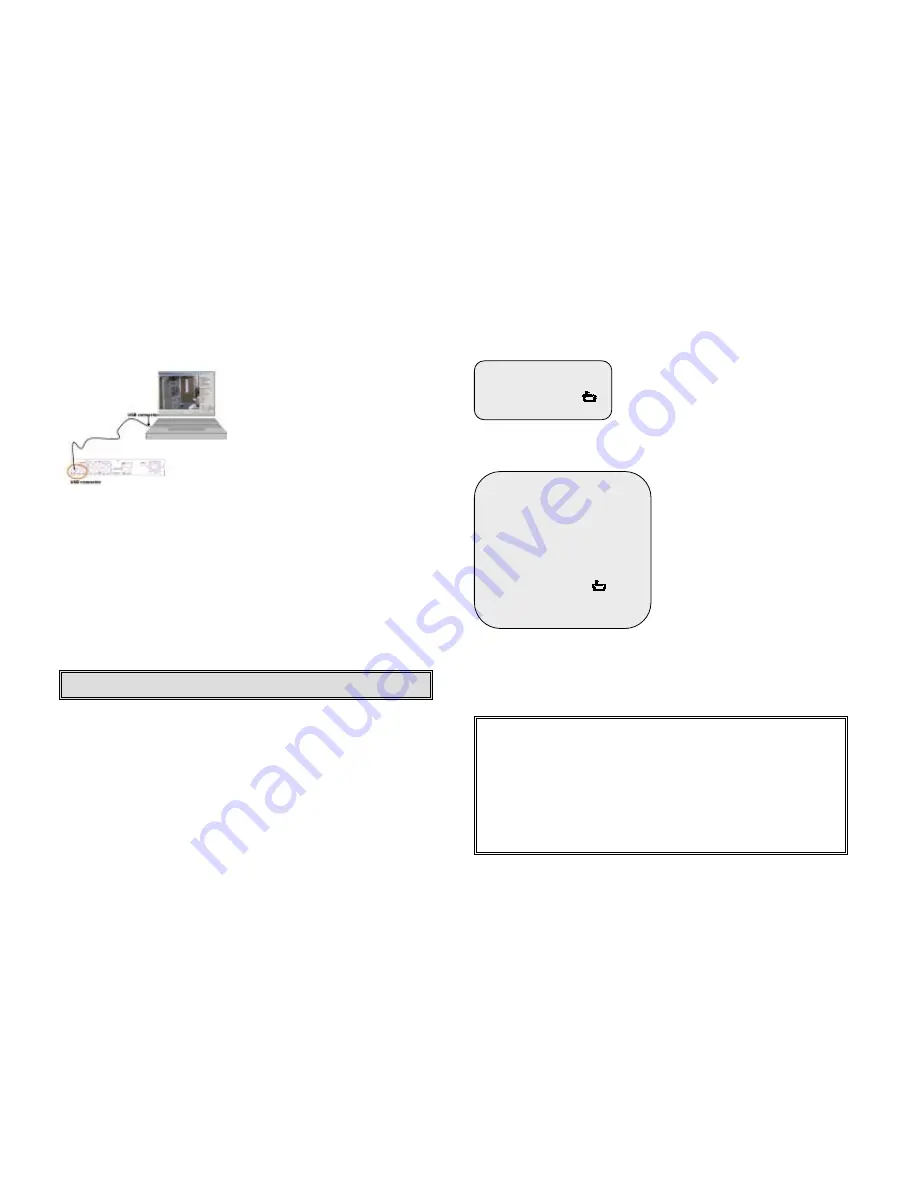
Step 1. Connect the USB cable between 
the unit and PC. 
Step 2. Select  “LINK TO PC” under 
submenu of the unit. 
Step3. The “linking” will take around 
30sec. 
 

Step4. The connection is ready for PC backup as “Linked” indicates on the 
screen.  
Step 5. Open the PC viewer on PC, once PC identifies one unknown Hardware 
device. Follow the instructions at DVR PC VIEWER section to make the 
backup. 
Step6. Press ”Menu” button back to “Main Menu”. 
 

NOTICE 

1. The unit employs USB 2.0, so it will take around 5 min to hand shake with 
USB 1.0. 
2. Before operating backup over USB, please install PC viewer software into 
your PC. 


Sequential time


Use this menu to specify each channel display 
dwell time. 
Dwell time settings determine from 1 sec to 9 
sec between displays for 4 channels. 
To display images with cyclic switcher, press 
Select button in live mode. 


HDD setup


OVERWRITE ENABLED: 
If you choose “YES”, the unit will 
continue recording and overwrite the 
recorded data when HDD’s space is 
full. 
If you choose “NO”, the unit will stop 
recording while HDD’s space is full. 
MASTER HDD SIZE: 
It indicates the capacity of the primary 
HDD installed in the unit 
MASTER HDD USED:   
It indicates how percentage of HDD’s 
capacity has been occupied. 

 
MASTER HDD FORMAT: 
It erases all of the recorded data in Master HDD. 
The authorized password is requested before formatting, after the unit 
formatted, the following information will appear on the screen “HARD DISK 
FORMATTED”. 


Warning: Please don’t  press “MENU” button during linking status,  it would likely 
lead to unpredictable Error on your PC. 

Overwrite

: When the hard disk is full, the DVR will overwrites and

creates new video file gradually. The new created video equals
overwrited portion. When Overwrite function starts, it does not erase the 
whole video file(s) of a hard disk at one time.  
 
When there is a new hard drive, the "HDD OWRT “xx%" represents the
% of the hard drive used. 
If OVERWRITE recording mode is enabled, the "HDD OWRT “xx%"
represents the xx% of the hard drive that has been overwritten for new 
video data. The remaining % (old video data) still exists. 


        HARD DRIVE SETUP 

OVERWRITE ENABLED     YES
MASTER HDD SIZE     40000MB 
MASTER HDD USED  0MB   0%
MASTER HDD FORMAT  


    PRESS 

(

#$

), THEN (     ) 

   PRESS(

!

 ) TO EXIT


SEQUENTIAL  TIME   


  PRESS (

#$

), THEN (       )

 PRESS(

!

 ) TO EXIT 

Summary of Contents for DVR42E

Page 1: ...O AN ITALY Tel 39 071 720 20 38 Fax 39 071 720 20 37 e mail info acifarfisa it www acifarfisa it DVR42E 4CH Digital Video Recorder User s Manual Rif Mi3159 Before operating the unit please read carefu...

Page 2: ...cord mode Record frame rate Record frame rate table Video quality Different video quality settings and HDD capacity Record time table EACH mode Record schedule Sensor recording installation Sub menu P...

Page 3: ...e or enter into a sub menu 16 Power ON LED indicator 17 Recording LED indicator Rear panel 1 S Video output 2 Composite video output 3 Monitor Secondary Video output 4 Video input 5 Video loop through...

Page 4: ...nect the signal line to the unit The sensor signal terminal is usually at the sensor s back panel Connect a suitable power adaptor into the sensor to power on it There are two kind of sensors N O Norm...

Page 5: ...HDD CHECKING OK CH1 CH3 CH3 CH4 Turn off and on the DVR Press button to stop playback SEARCH TIME HDD MASTER 04 03 24 13 24 21 04 03 24 13 44 54 01 TIME 04 03 24 13 24 21 02 TIME 04 03 24 13 30 55 03...

Page 6: ...elect This option allows to enable disable the recording of the cameras Enabling channels on this menu option using the same way described in CAMERA SELECT Cameras will be recorded only if properly se...

Page 7: ...ps 8 10 fps 6 7 fps 4 5 fps 4fps But the DVR is set to 30 fps NTSC 25fps PAL as factory default Please use buttons of front panel to select mode and then enter to select the option Recording frame rat...

Page 8: ...3H Record schedule Enter into this option to change a recording schedule during a day 24 hour period Numbers below indicate the time duration within the 24 hours T Letter indicates recording S Letter...

Page 9: ...ANGE menu and the password change input menu replaces the SUB MENU The default password is 111111 When the new password is accepted the board will flash the following screen message PASSWORD changed T...

Page 10: ...when HDD s space is full If you choose NO the unit will stop recording while HDD s space is full MASTER HDD SIZE It indicates the capacity of the primary HDD installed in the unit MASTER HDD USED It...

Page 11: ...ear If alarm symptom didn t disappear recording won t stop Is it possible to set one of the following choices 5s 10s 15s 20s 25s and 30s seconds 3 ALARM OUT TIME This function is setting how long alar...

Page 12: ...s button to switch to time selection 3 Press button to see new created by overwriting files list It can list up to 64 files Choose desired video file by moving up down buttons and press once again to...

Page 13: ...o advance one single frame upon pause mode DVR PC Viewer via USB cable In order to display recorded images through a PC it is required to install the viewer software in the CD ROM provided with the un...

Page 14: ...erating system None Video input channel 4ch BNC Video output 2 BNC 1 S Video Video loop thruogh 4ch BNC Alarm in out 4 input 1 output Built in buzzer On board NTSC 120fps 4x30fps Display frame rate PA...

Reviews: