


5
fantech
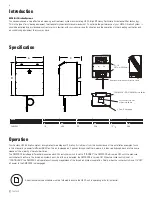
5" x 10'
(127 mm x 254 mm)
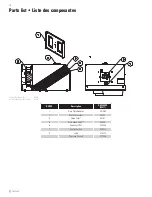
Negative pressure port of pressure switch
CONTINUOUS / OFF/ STANDBY Rocket Switch
5' Cord - 3 prong plug
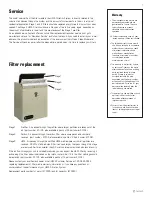
A semi-annual service schedule must be followed to ensure the HEPA unit is operating at its full potential.
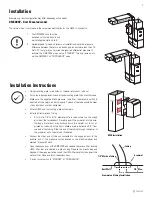
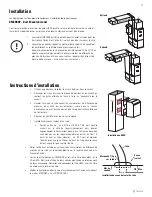
Installation
Example only – duct configuration may differ depending on the model.
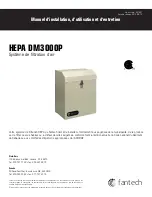
DM3000P - Duct Mounted model
The return side of the furnace is the recommended location for the HEPA to connect to.
1. The DM3000P should not be
installed on its side. Should only
be installed like Option A & B.
2. Variable speed forced air systems or installation where the pressure
difference between the return air and supply air ducts are less than 18
Pa (0.07 in wg) may not provide the required differential pressure to
activate the DM3000P when set on "STANDBY". The only remedy is to
set the DM3000P on "CONTINUOUS" mode.
•
Using mounting plate, mark holes on furnace return duct to be cut.
•
Cut holes in desired location and attach mounting plate to duct with screws.
•
Make sure the negative static pressure tube from the pressure switch is
inserted into the return air duct properly. The end of the tube should be clear
of any insulation or other obstacles.
•
Attach HEPA unit to mounting plate with screws.
•
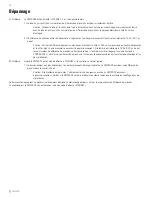
Installing Grommet and Tubing
•
First drill a 1/4" to 5/16" diameter hole in the duct wall on the supply
air side of the furnace duct. Carefully insert the grommet into the hole.
(Drilling a metal duct may produce burrs. Be careful not to cut or
pricked by the burrs or the duct.) Make a mark a distance of1/2" from
one end of the tubing. Slide this end of the tubing through the center of
the grommet up to the mark as illustrated.
•
Connect the other end of tube you connected to the supply air duct to the
positive port of the pressure switch located on the electrical panel and
marked "Pressure Switch"
•
Open the access door of the DM3000P and remove the carbon filter and the
HEPA filter that are sealed in a plastic bag. Remove the plastic bag and
dispose of them appropriately. Insert the HEPA filter carefully then insert the
carbon filter. Close and latch the access door.
•
Switch rocker switch to "STANDBY" or "CONTINUOUS".
Installation Instructions
HEPA Installation
Grommet and Tubing Installation
Tubing
Grommet
1/2" Mark on Tubing
1/4" Max.
Duct Wall
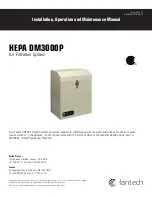
Summary of Contents for HEPA DM 3000P
Page 8: ...8 fantech Notes ...
Page 17: ...17 fantech Notes ...
Page 18: ...18 fantech Notes ...
Page 19: ...19 fantech Notes ...


