7
WIRING INSTRUCTIONS : Before doing wiring, ensure that you have all pole
disconnection of the electricity supply.
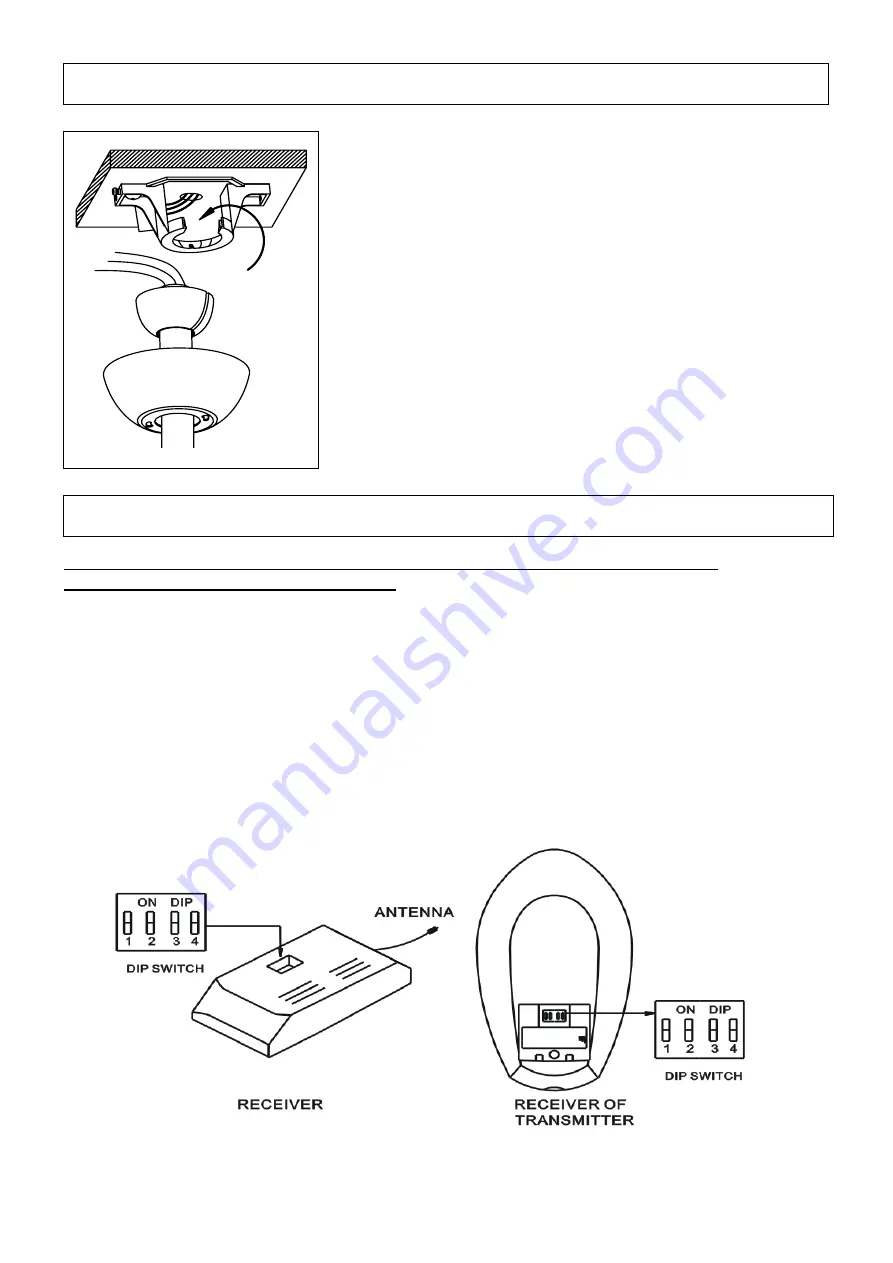
2. Drop rod assembly
Your fan had been pre-assembly with drop rod and canopy.
Lift the fan up to the hanger bracket, steer the ball in from
the side of the bracket and lower it into there recess of the
bracket.
Rotate the ball around until the groove in the side of the ball
aligns with the protrusion on the upper edge of the recess.
When aligned the fan should drop slightly as it assumes it’s
correct position. This is to prevent rotation of the rod and
fan when the unit is working.
Connect the wiring as shown following step
3. Remote control and Wiring instructions
Your fan is supplied with a radio frequency remote control unit, and the fan does not have a pull
switch for speed control, the fan can only be controlled by remote control. You can find the unit
in the box. Before connecting the wiring, please set up the code of remote control.
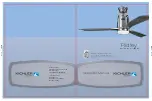
CODE SWITCH: Codes are set by pushing dip switches up or down. It is imperative that the code
used for both transmitter and receiver is exactly the same, otherwise the remote control will not
work. Please note the code switch will enable you to operate a second remote controller
independently. For example, if you have two ceiling fans with 2 remote control units, set 2
different codes for each set of transmitter/receivers. This means you can operate each ceiling
fan independently. Please see following drawing.


