5
Please power off the unit before inserting or removing card or USB device! Failure to do so, may damage
the card or USB device.
Package Contents
The following items are included in the received package:
1 Digital Photo Frame
1 AC/DC adaptor
1 Documentation (Instructions manual and warranty card)
1 Remote control
If any item is missing, please contact the retail store you purchased the product from.
Pictures of product and accessories in this manual are for reference only! Actual product or accessories
may differ!
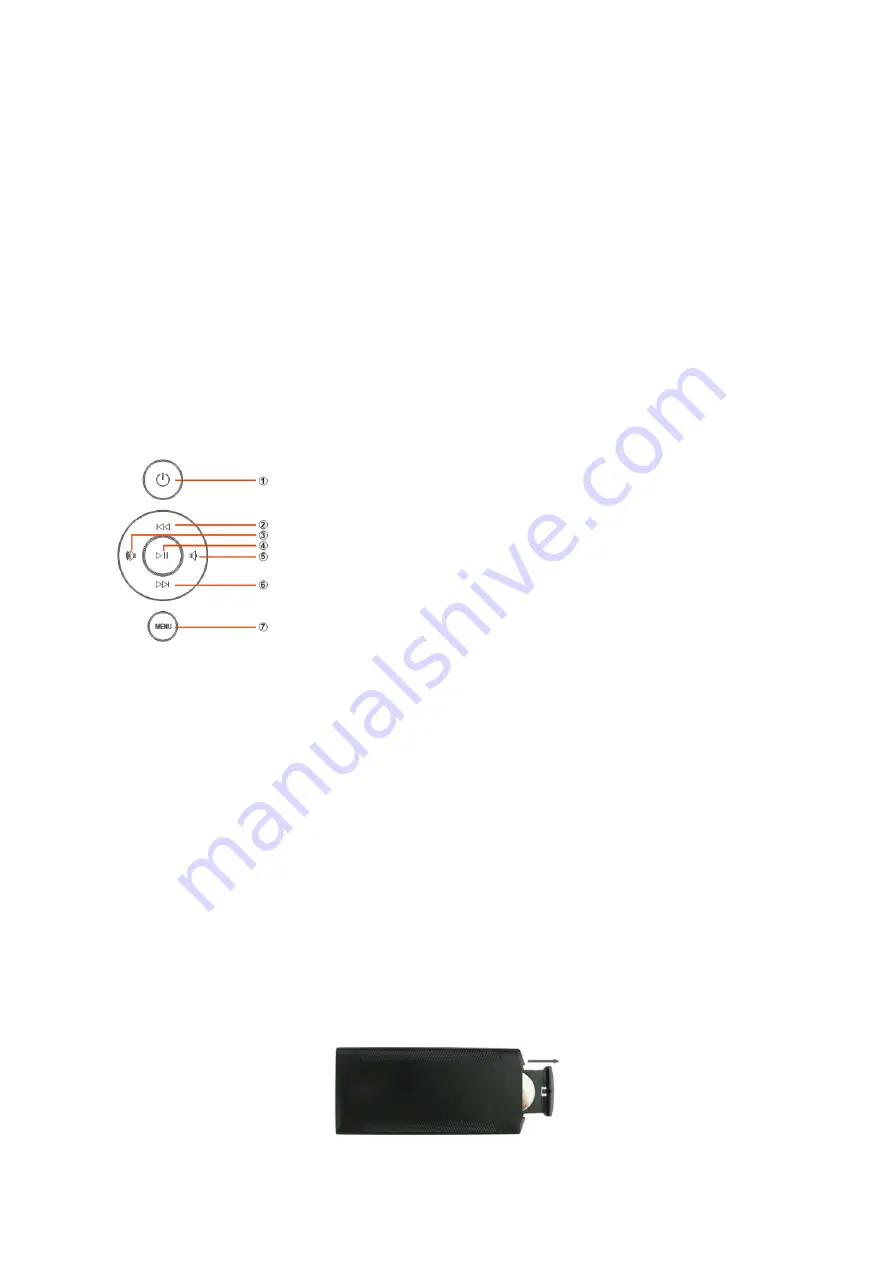
Rear side buttons overview
Connecting to the mains
1. Place the digital photo frame bracket on the rear side of the frame and tthen connect the adaptor plug
to a wall socket and the adaptor cable to the DC connection
2. Remove the protective film covering display.
3. Remove the plastic battery insulator from the battery compartment of remote control unit.
4. Power on the unit by pressing POWER button on remote control. The unit will start playing pictures
from media. If there is no media inserted then the unit will go to Main Menu. You can go directly to Main
Menu by pressing RETURN button.
Installing & Replacing the Battery
Place the upside of the remote control down, press down on the ridged area of the battery
cover and pull towards you to remove the tray. Place one CR2025 lithium button-cell battery
on the tray with the positive “+”side facing you. Reinsert the tray.
1. Power
2. UP
3. VOL +/LEFT
4. Play/Pause/OK
5. VOL -/ RIGHT
6. DOWN
7. MENU


