2.6.3. Dip Switch Configuration of the Receipt Printer
In general, the receipt printer unit is pre-installed on the POS system and need not change the
settings. To change the setting of the printer, Please follow the steps as follows:
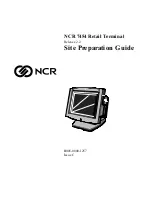
Securing Screw
The Securing Screw of Receipt Printer
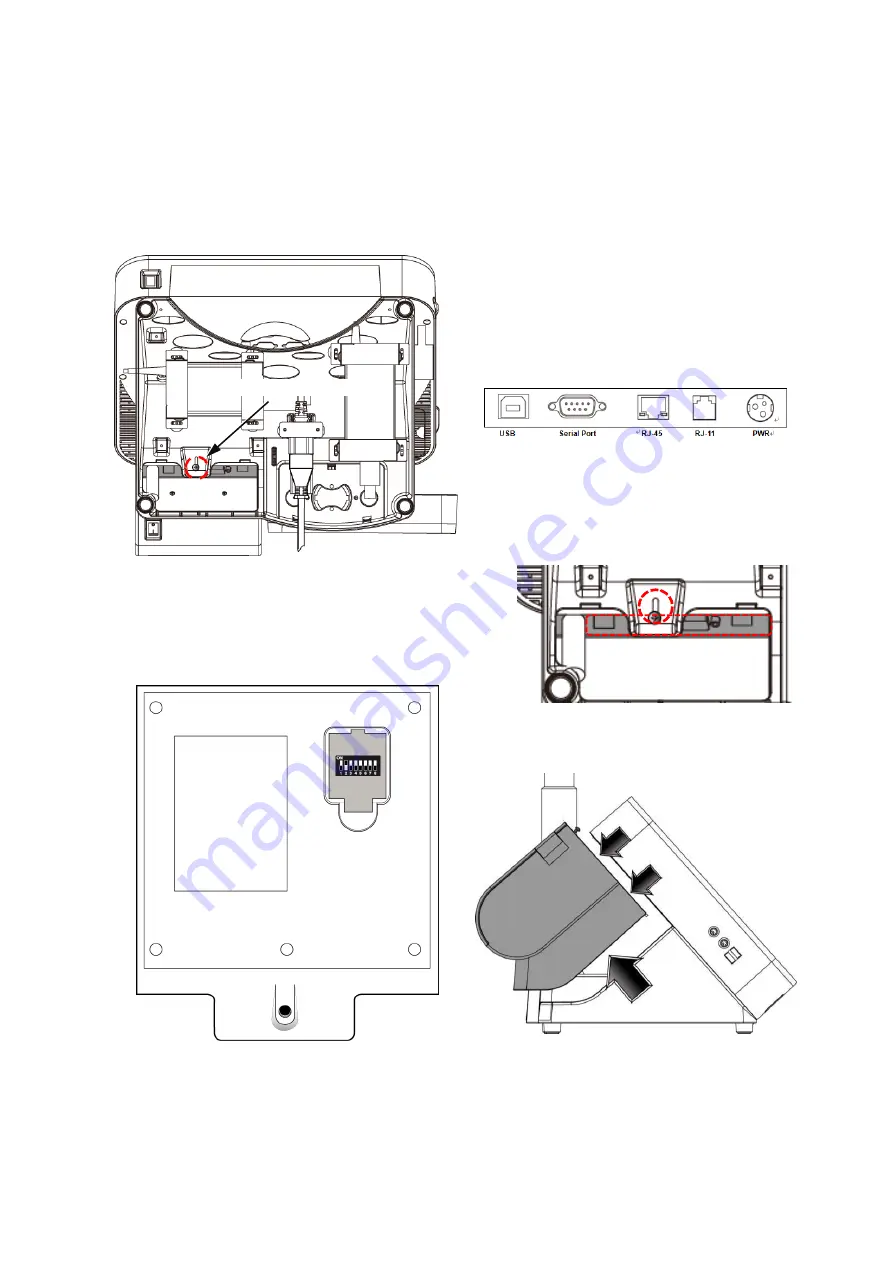
The Dipswitches of Receipt Printer
(bottom)
a. Switch off the power and carefully lift up
the POS system.
b. Disconnect the cables from the I/O ports
of the printer unit.
c. Loose the securing screw on the
bottom-left of the POS system
(as image below illustrated).
Securing screw
I/O Ports of
Printer
d. Pull up to unhook the printer unit and
then pull to detach the printer.
e. Turn over the printer unit and open the
cover of DIP Switch Cover
(in the bottom of receipt printer unit)
Summary of Contents for Zircon Series
Page 7: ...vi...
Page 54: ...3 2 3 Hardware Monitor...
Page 58: ...3 2 6 Serial Port Console Redirection Console Redirection Configuration options Enable Disable...
Page 60: ...3 2 7 1 Socket 0 CPU information...
Page 72: ...3 3 Chipset...
Page 73: ...3 3 1 North Bridge Max TOLUD Dynamic 2GB 2 25GB 2 5GB 2 75GB 3GB...
Page 88: ...e Click Install to continue f Click Finish to complete setup...
Page 90: ...e Read File Information Click Next to continue f Click Next to continue...
Page 93: ...e Click Finish to complete the installation...
Page 97: ...d Follow the instructions to finish the installation...
Page 99: ...f Click Next to continue g Accept the License Agreement and click Next to continue...
Page 100: ...h Click Next to continue i Click Finish to complete setup and restart the computer...
Page 116: ...e Select Install driver only and click Next to continue f Click Install to begin Installation...
Page 142: ...20161225...