4
2.
Connect the AC Power Adaptor Jack end to the DC Power Input Jack of the receiver.
3.
Select/match the receiver channel to the desired video camera transmission channel.
4.
Plug the AC Power Adaptor into a standard 120V AC electrical outlet.
5.
Slide the ON/OFF Switch to the ON position.
6.
Television Set configuration:
a.
Turn on the power to the television set (TV).
b.
Switch the TV channel to the VIDEO/LINE INPUT position.
c.
Adjust the TV volume
and picture, as desired.
7.
Unplug the AC Power Adaptor from the electrical outlet when it is not in use or is left
unattended.
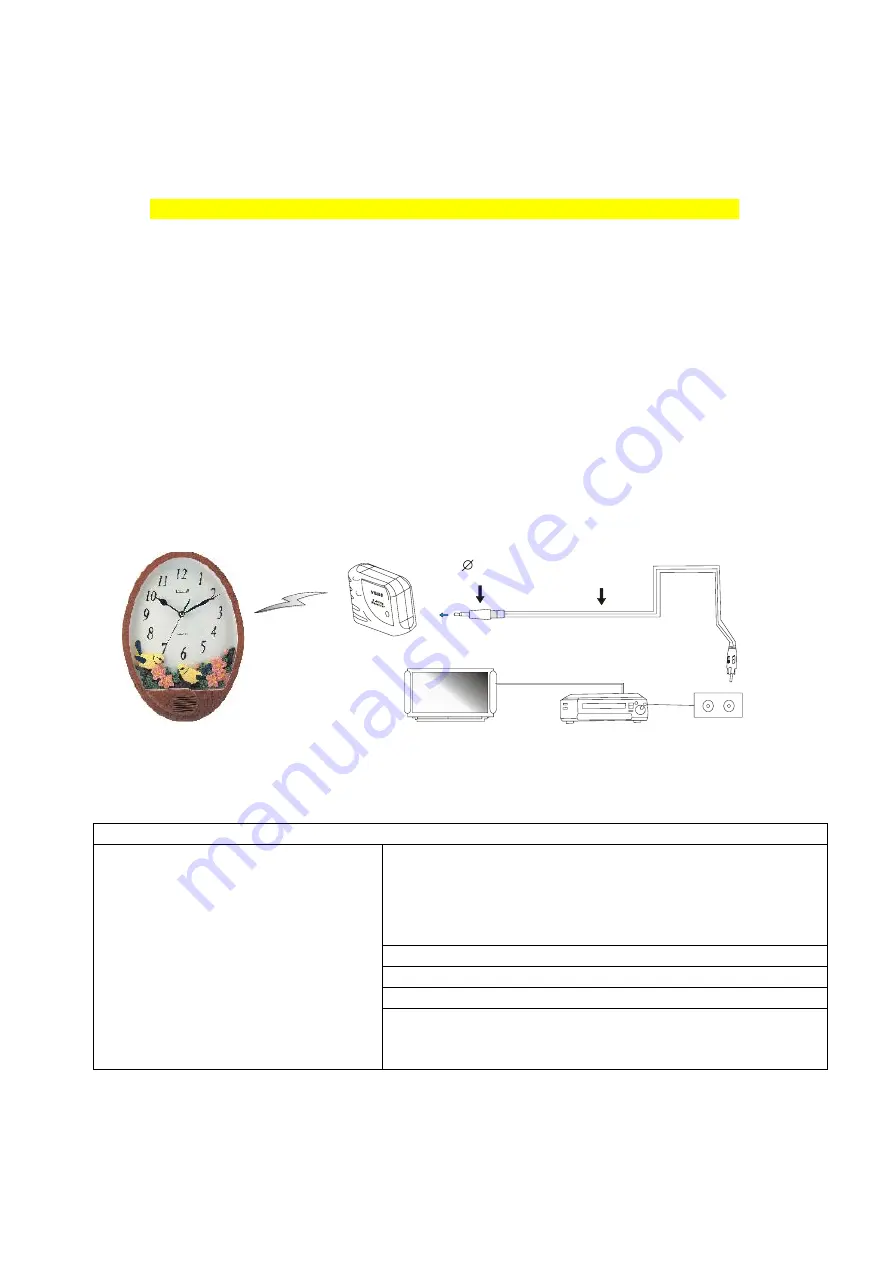
Video Recording Setup:
1.
Follow the normal setup procedures for the Clock video camera and receiver.
2.
Insert the (yellow) cable plugs into the Video Input Jack of your VCR, as appropriate.
3.
Connect another video cable from your VCR
to the Video Input Jack of your television set.
TROUBLESHOOTING
Check the power supply:
• Ensure the both the transmitter and receiver are
properly connected and set.
• Ensure both the transmitter and receiver power
indicators illuminate.
Ensure the video cable is well connected.
Ensure the TV channel is set to “Video.”
Set the receiver to the channel with the clearest signal.
No picture after turning on the TV.
Shorten the transmission range/distance between the
transmitter and receiver. Reposition and/or adjust the video
camera.
TV
VCR
Video Cable
3.5 Plug
Video
Input
Jack
Audio
Input
Jack
Yellow
Plug
Wireless Video Camera
in the Clock


