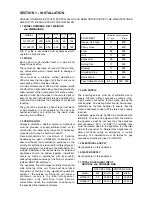
PARTS LIST
Description
No. Off
LH Support (A)
1
Shelf (B)
2
RH Support (C)
1
Front Skirt (D)
1
Adjustable Foot
4
M5 x 10mm Screws
14
M6 x 12mm Screws
4
M5 Shakeproof Washer
14
M6 Shakeproof Washer
4
2.1.3 FloorStand Assembly Instructions
a) Fix both shelves (B) to the end supports (A & C)
using the M5 screws provided.
b) Fix the front skirt (D) to the end supports (A & C)
using the M5 screws provided.
c) Screw the adjustable feet into the sockets in the
end supports and level the stand.
d) Lift the grill on to the stand. Secure it with the four
M6 screws provided, through the holes in the front
skirt and the lugs in the end supports.
e) Holes are provided in the stand foot pads to
facilitate floor fixing.
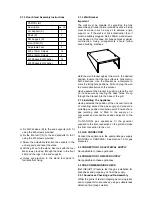
2.1.4 Wall Bracket
Important
The wall must be capable of supporting the fully
assembled grill under normal conditions of use. Fixing
must be made in such a way as to achieve a rigid
support, i.e. If the wall is of brick construction then it
must be suitably plugged. No.8 x 50mm wood screws
may be used in this case. For breeze block or similar
construction, fixing arrangements should follow
sound building practices.
Hold the wall bracket against the wall in the desired
position. Ensure that the top surface is horizontal in
both directions. Use the bracket as a template to
mark the fixing hole positions. Drill and plug the wall
to accomodate fixture of the bracket.
Having secured the bracket in position, place the unit
on it and secure by locating the base holes. Fix up
through the bracket into the base of the grill.
2.1.5 Installing The Appliance
Having selected the position of the unit and its mode
of mounting, extend the gas supply and prepare a
suitable gas position connection point. Ensure that a
gas isolating cock is fitted in the supply at a
convenient and accessible position adjacent to the
grill.
On NATURAL gas appliances, fit the governor
supplied to the inlet connection on the grill and make
the final connection to the unit.
2.2 GAS CONNECTION
Connect the appliance to the appropriate gas supply
(NATURAL or PROPANE ). See Section 1.9 for gas
pressures.
2.3 CONNECTION TO ELECTRICAL SUPPLY
Not applicable to these appliances.
2.4 CONNECTION TO WATER SUPPLY
Not applicable to these appliances.
2.5 PRE-COMMISSIONING CHECK
(Ref IGE/UP/1) Pressure test the gas installation for
soundness and purge any air from the supply.
2.5.1 Soundness Checking and Re-Assembly
Whilst the grill is lit test all integral gas carrying joints
and components for soundness, using a suitable leak
detection fluid (soap solution).


