


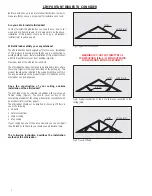
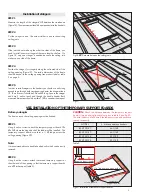


Fig.32. Legs too long.
13
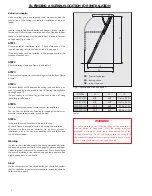
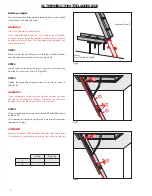
Fig.29.
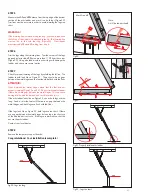
Fig.30.
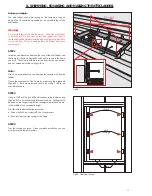
Fig.31. Properly instaled attic ladder
Fig.33. Legs too short.
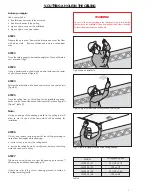
Note:
A will be shorter than B
Mark A and B
gap
gap
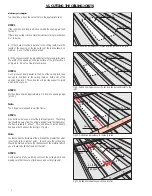
STEP 5
Measure the
ď
A
Ē
and
ď
B
Ē
distance from the top edge of the bottom
section of the attic ladder and mark it on both legs (Figure29).
Trim lines must be accurate in order to avoid trimming the legs too
short.
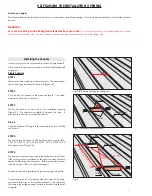
WARNING!
If the trimming line is marked along the rung, you should reposition
the full run of steps where it is attached to the lid. The trimming line
must not be in line with the rung (Figure30). Next repeat
measurements
ď
A
Ē
and
ď
B
Ē
starting from step 4.
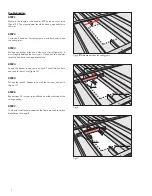
STEP 6
Trim the legs along the trimming lines. Trim the corners of the legs
perpendicular to side
ď
B
Ē
but no more than 1/ 2
Ē
from the corner
(Figure29). Using attic ladder with too short legs will damage the
ladder and can cause severe injuries.
STEP 7
Check for proper trimming of the legs, by unfolding the full run. The
ladder should look like on Figure 31. There should be no gaps
between the metal hinges and the feet should be flush with the floor.
ATTENTION:
Gaps between the metal hinges mean that the feet are not
properly trimmed (Figure32 and 33). Do not climb the attic ladder
if there are visible gaps between the metal hinges. This can cause
damage to the attic ladder and and result in serious injury.
If the attic ladder looks like on Figure 32, one or both legs are too
long. Send or trim the feet until there are no gaps between the
metal hinges and both legs are flush with the floor.
If the legs look like on Figure 33, both legs are too short. If there
are no gaps between the metal hinges but one leg is too short, use
of the attic ladder is not safe. If the legs are trimmed too short do
not use the attic ladder.
Contact your local dealer.
STEP 8
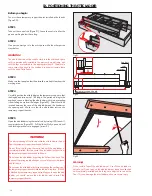
Remove the temporary support boards.
Congratulations! Your installation is complete!


