TM
User Manual
Page
67
Go
Export
MFX
Preroll
Offset
GPI
ADR
Edit
Loop
Edit
Mark
Gate
EQ
Audio
Base
OLD
edit
number
level
NEW
in/out
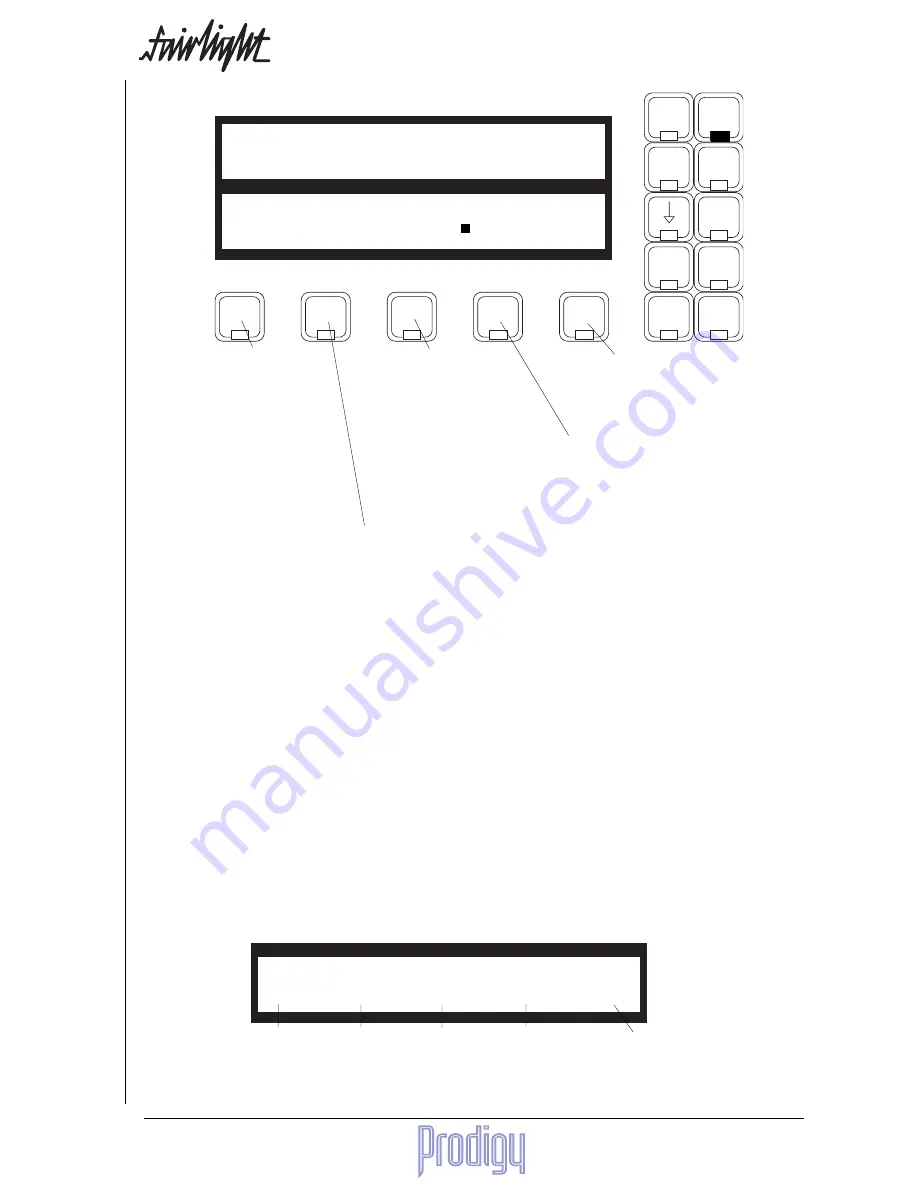
Once you have started editing
parameters, this Soft Key flashes,
indicating that the ENTER key
must be pressed to adopt the
changes. Before doing so you
may select other parameters us-
ing the Numeric Keypad, and
change their values with the
Jogger Wheel or + and - keys.
Press this Soft Key while it is
flashing to abort the changes
and escape.
Press to enter a value using the Numeric Keypad (this is normally not possible
because it is being used to select parameters.) While typing, numbers enter the
display field from the right and move left as you add more numbers. To enter
a negative number, type <Clear><->, then the number. Press ENTER to adopt
the value.
Allows you to set a level
as part of the EQ. It can be
used as compensation for
the level changes caused
by EQ settings, and is
switched in and out with
the Equaliser.
Press to toggle between the sound as
you have changed it, and the way it
was before you started editing the
EQ parameters.
Press to toggle the entire EQ for
this clip on or off. If you press
ENTER while the EQ is off, this is
saved with the clip.
Notes:
1.
While you are changing parameter values with the Jogger Wheel, the actual sound is updated every .25 sec.
Turning the Wheel faster increases the steps between values.
3.
There is no limit to the frequency range for each band, so you can have your low frequency higher than your
high frequency if you want.
4.
Use <Blue><+> or <Blue><- > while the Q for a band is selected to make that band into a high or low shelf.
5.
When you are using a range, it is possible to change one or more bands for the entire range, while leaving
other bands as they were. So, for example, the clips might have different settings for LOW EQ but the same
setting for HIGH EQ.
Copying EQ Settings
You may copy settings from one clip to others by first pressing the copy Soft Key while the source clip is touching
the cursor (if there is no range this clip will be red - if there is a range, the clip may be inside or outside the range.)
The parameter display shows the parameter values for the copied clip, and the menu changes as follows:
Low
Low Mid
High Mid
High
level
Toggles each band on or off for copying. When off,
a band is not copied into the destination clips.
Toggles the level function on or
off for copying.
After pressing copy, you may change tracks or make a range to include new clips in the copy destination. Pressing
ENTER causes the copy to occur.
Summary of Contents for Prodigy
Page 6: ...TM Page 6 User Manual ...
Page 16: ...TM Page 16 User Manual NOTES ...
Page 24: ...TM Page 24 User Manual NOTES ...
Page 25: ...TM User Manual Page 25 NOTES ...
Page 34: ...TM Page 34 User Manual NOTES ...
Page 35: ...TM User Manual Page 35 NOTES ...
Page 42: ...TM Page 42 User Manual ...
Page 44: ...TM Page 44 User Manual ...
Page 51: ...TM User Manual Page 51 NOTES ...
Page 52: ...TM Page 52 User Manual NOTES ...
Page 79: ...TM User Manual Page 79 NOTES ...
Page 80: ...TM Page 80 User Manual NOTES ...
Page 93: ...TM User Manual Page 93 NOTES ...
Page 94: ...TM Page 94 User Manual NOTES ...
Page 110: ...TM Page 110 User Manual NOTES ...
Page 128: ...TM Page 128 User Manual NOTES ...
Page 129: ...TM User Manual Page 129 NOTES ...


