OPERATION AND SERVICE INFORMATION
Page 16
Owner’s Manual and Service Guide
Read all of Manual to become thoroughly familiar with this vehicle. Pay particular attention to all Notes, Cautions and Warnings
The oil should be checked with the engine warm. The
vehicle must be on a level surface with the park brake
engaged. Allow adequate time for oil to drain into the
crankcase before checking.
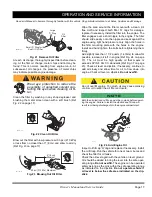
Remove the dipstick and wipe off the entire area indi-
cated with a lint free cloth (Ref Fig. 17 on page 16).
Fig. 17 Clean Entire Dipstick
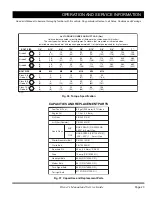
Insert the dipstick fully into the dipstick hole and remove.
Examine the level of oil on the dipstick.
The engine can be operated safely as long as oil is within
the safe operating range as indicated on the dipstick. Do
not operate vehicle if oil level is below the safe area
indicated on the dipstick (Ref Fig. 18 on page 16).
Fig. 18 Check Oil Level on Dipstick
Oil should be added to bring the level into the safe oper-
ating range. Do not overfill. Check that the oil fill cap
and dipstick are firmly in place.
CHANGING THE OIL
Tool List
Qty. Required
Socket, 10 mm, 3/8" drive ........................................... 1
Ratchet, 3/8" drive ....................................................... 1
Extension, 8", 3/8" drive .............................................. 1
Oil drain pan ................................................................ 1
For maximum performance and longevity, the engine oil
should be replaced every 125 hours of operation or semi-
annually, whichever comes first.
The selection of oil is dependent upon the service that
the vehicle will perform. Most vehicles require 10W-30
oil, whereas vehicles used at capacity or near capacity
load applications will require 10W-40 oil after run-in (Ref
Fig. 19 on page 16).
To reduce the possibility of severe injury, wear
rubber gloves to protect skin from exposure to
hot, used oil and degreaser. These fluids con-
tain chemicals known to cause cancer.
Fig. 19 Oil Viscocity Chart
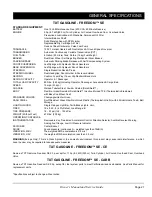
The oil should be changed with the engine warm. Park the vehi-
cle on a level surface, engage the park brake and remove the
key. Place a drain pan under the engine. Wipe the top of the
engine clean with a cloth (Ref Fig. 20 on page 16). Remove the
oil fill cap.
Fig. 20 Clean Top of Engine
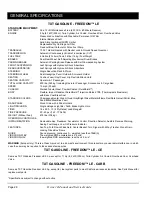
Clean the area around the filter. Oil drainage is accom-
plished by removing the three bolts securing the oil filter
to the engine. Remove the filter by pulling it from the
engine and allow the oil to drain. The ‘O’ rings may
remain on the engine or the filter (Ref Fig. 21 on page
17).
F
Ref Ced 1
Maximum oil level
DO NOT OVERFILL
Safe
operating range
Add
oil
Full
Ref
D
sk 1
-20
0
20
40
60
80
100
-30
-20
-10
0
10
20
30
40
C
F
0
0
10W-30
10W-30
10W-40
10W-40
HEAVY DUTY WORK
LIGHT DUTY WORK
(AIR TEMPERATURE)
10W-30
10W-30
Ref Ovc 1
Oil Fill Cap
Ref Cte 1
Summary of Contents for 605584-DK
Page 10: ...Owner s Manual and Service Guide Notes Page viii SAFETY INFORMATION ...
Page 16: ...Owner s Manual and Service Guide Notes Page xiv SAFETY INFORMATION ...
Page 45: ...Page 25 GENERAL SPECIFICATIONS Owner s Manual and Service Guide GENERAL SPECIFICATIONS ...
Page 54: ...Page 34 Owner s Manual and Service Guide GENERAL SPECIFICATIONS Notes ...
Page 55: ...Page 35 Owner s Manual and Service Guide VEHICLE WARRANTIES VEHICLE WARRANTIES ...
Page 61: ...Appendix A 1 Owner s Manual and Service Guide LABELS AND PICTOGRAMS LABELS AND PICTOGRAMS ...
Page 68: ......
Page 70: ...Appendix B 2 DECLARATION OF CONFORMITY Owner s Manual and Service Guide ...
Page 71: ...Appendix B 3 DECLARATION OF CONFORMITY Owner s Manual and Service Guide ...
Page 72: ...Appendix B 4 DECLARATION OF CONFORMITY Owner s Manual and Service Guide Notes ...
Page 74: ......


