background image


5


Power On 


Insert the CF memory card that has Picture, Music, Movie or WMV9 files. 


Press the “POWER” button to power on the Eyezone B1080PW-1, then press the “TV 

MODE” button to select the output mode. 


Status After Power On 


Status 1

If the “AUTOPLAY (Movie or Picture)” function is enabled and there are movie 

or picture files in the CF card, the Eyezone B1080PW-1 will auto play movie or picture 

files on the CF card after power on. 


Status 2

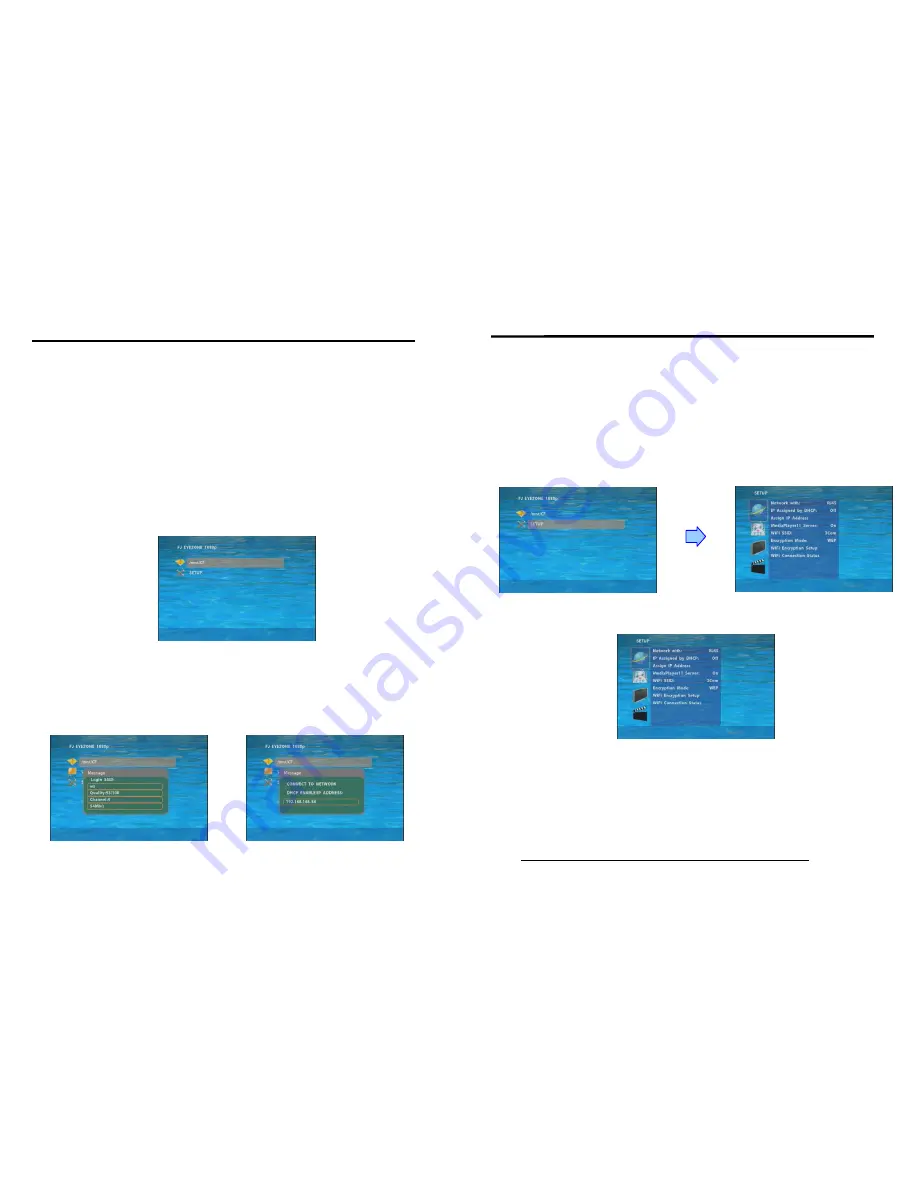
If the “AUTOPLAY” function is disabled, after power on the main menu will 

appear as shown in the following figure. There are two groups in the main menu 

(“/mnt/CF” and “SETUP”). 


NOTE


1.


The pop-up window that shows the state of wireless will appear later, if the wireless network 

is enabled when the Eyezone B1080PW-1 is turned on. 

2.


The pop-up window that shows the IP address will appear later, if DHCP mode is selected 

when the Eyezone B1080PW-1 is turned on. 


Power Off

Press the “POWER” button again to power off. 


6. START THE B1080PW-1 


6


In the main menu, please using the “

” button on remote control to select the “SETUP” 

item, then press the “ENTER” button. You will be presented with the Eyezone B1080PW-1 
settings screen. 


You can also press the “SETUP” button on remote control to directly open the settings 
screen. (If there is file that is being play, please stop first.) 


There are four groups of sub-menu in the main menu (“Network Setup”, “FTP Setup”, 
“Video Setup” and “Other Setup”). 


In the settings screen, you can use the “

” buttons to select an item, and press 

the “ENTER” button to confirm the selection. 


Press the “SETUP” button on remote control to save and quit the settings screen. 

7.1 NETWORK SETUP 


Network with

Select your network connection Disable/ RJ45/ Wi-Fi. 


IP Assigned by DHCP

If you have a DHCP-enabled router, please select “On”, then the 

router will automatically assigns an IP address to the Eyezone B1080PW-1. If you don’t 
have a DHCP –enabled router, select “Off” and type the network information in “Assign IP 
Address
”. 


Assign IP Address

If the Eyezone B1080PW-1 is connected to a network without a DHCP 

server or you want to use Local FTP Server function, type the fixed IP address, Mask, 
Gateway and DNS for the Eyezone B1080PW-1. 

PS. Refer to 5.1 for how to enter IP address by remote control.


7. SETTING UP 

Summary of Contents for B1080PW-1

Page 1: ...7 3 Video Setup 9 7 4 Other Setup 9 8 Using the B1080PW 1 11 8 1 Play Media Files on the CF Card 11 8 2 Download Function 14 8 3 Play the Media Files on the PC 17 8 4 Download Upload Media Files 20 8...

Page 2: ...Mode 60Hz 480P 720P 1080i PAL Mode 50Hz 576P 720P 1080i HDMI Output 480P 720P 1080i 1080P VGA output supports resolution 640x480 800x600 1024x768 1280x1024 1360x768 Supports RS 232 port for computer c...

Page 3: ...ile Open the setup menu Mute sound OSD display function on off Auto play function on off Mute sound Volume up down Move the cursor Confirm the selection entry Go back one layer Select the TV type NTSC...

Page 4: ...emote control to select the SETUP item then press the ENTER button You will be presented with the Eyezone B1080PW 1 settings screen You can also press the SETUP button on remote control to directly op...

Page 5: ...ssword are case sensitive Wi Fi Connection Status Shows the Wi Fi information SSID Name Quality Channel Connection Speed 8 7 2 FTP SETUP Local FTP Server Turn on off the Eyezone B1080PW 1 server If yo...

Page 6: ...SPDIF Out Supports Analog DPCM audio output Speakers Out Supports 2 channel amplifier output Lock Remote Controller Enable disable the auto key lock function The B1080PW 1 will auto lock when there is...

Page 7: ...URE LIBRARY 8 USING THE B1080PW 1 RETURN 12 8 1 1 Using the Remote Control When Media File Is Playing SETUP Press the button to adjust the brightness contrast or saturation while the movie or picture...

Page 8: ...e network Refer to 7 1 Network Setup Please use the button to select the DOWNLOAD item and press ENTER button The Eyezone B1080PW 1 will connect to the FTP server and download files automatically Befo...

Page 9: ...pe the User ID ipmedia Password 0000 and Port 21 Please enter the Network Timer NTP window of Eyezone B1080PW 1 and set up the Download Time then the Eyezone B1080PW 1 will download all the files from...

Page 10: ...ndows Media Player Version 11 and the window below will appear Step 3 Click the Library tab and then click Add to Library Step 4 Click Add and select the folder containing the media files you want to...

Page 11: ...AUDIO PICTURES you want to play and then press the ENTER button on remote control 20 Step 11 Select the file you want to play and press ENTER or PLAY button on the remote control to play the file NOTE...

Page 12: ...zone B1080PW 1 will be listed You can download and upload the media files between CF card and your PC NOTE After file being download upload will stop playing After downloading files the Eyezone B1080P...

Page 13: ...emale D Sub 9Pin Female Pin 1 Pin 4 Pin 2 Pin 3 Pin 3 Pin 2 Pin 4 Pin 1 Pin 5 Pin 5 Pin 6 Pin 6 Pin 7 Pin 8 Pin 8 Pin 7 Pin 9 Pin 9 24 Confirm that the Eyezone B1080PW 1 is already connected to the ne...

Page 14: ...the CF card on the Eyezone B1080PW 1 will be listed You can download and upload the media files between CF card and your PC Volume Control Enter the value for volume 0 30 Auto Play Select the auto pl...

Page 15: ...ample There are 6 demo files on the CF card The file names are a01 xxx 33 xxx b55 xxx 1abc xxx 07 xxx and A01 xxx xxx is extension of the file Default File 07 xxx Demo File 1 1abc xxx Demo File 2 33 x...

Page 16: ...epeat All when the demo file finishes playing The functions can be set in the setup menu Other Setup Play Button Repeat Default Eyezone B1080PW 1 will automatically play the default file when the demo...

Reviews: