


3-5
VSC 200/200D/300/300D Operation
Preset Memory
The scan converter preset memory contains 130 locations that store scan rates and
associated size, zoom, pan, centering, and filter controls. The 30 user presets can be
changed or erased. The remaining locations are factory-loaded, permanent presets
that cannot be changed or erased.
When a video input is connected, the scan converter automatically scans the user
presets and then the factory presets, looking for a match to the input scan rate. If a
match is found, the stored settings become the active settings. If no match is found,
a user preset is created automatically using the default settings. If the user preset
memory is full, the new user preset overwrites the oldest user preset.
If a user preset is active and changes are made to the zoom, size, pan, or filter
controls, the changed settings are stored automatically in the preset memory for the
active scan rate. If a factory preset is used and changes are made to the zoom, size,
pan, or filter controls, a new user preset that includes the new settings is created.
To reset all user presets, perform a system reset (see page 3-4).
Preset memory does not include selections from the
configuration controls
menu. The scan converter uses only the most recently applied configuration
controls selections.
Optimizing the Image
Follow the procedures in this section, in sequence, after you have installed the scan
converter. This will help you configure the scan converter for the best settings for
your display environment.
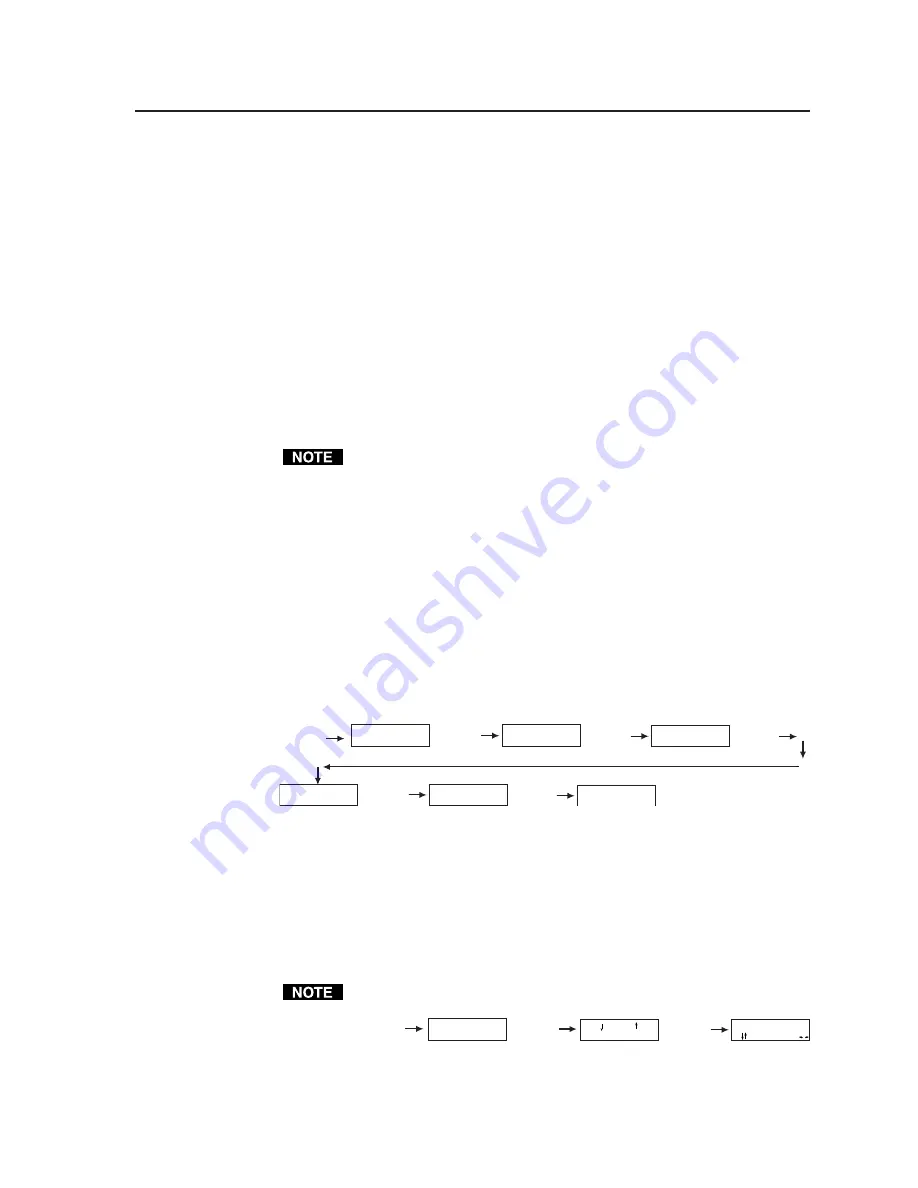
1.
Select the output standard:
a.
Press and release the Menu button until the
configuration controls
menu
appears.
b.
Press and release the Next button until the
standard
screen appears.
c.
Press the Left or Right cursor button to select NTSC or PAL.
Figure 17 — Selecting the output standard
2.
Size the image to fill the screen:
a.
Press and release the Menu button.
b.
Press and release the Next button.
c.
Press the Left or Right cursor buttons until the image fills the width of
the screen. Press the Up or Down cursor buttons until the image fills the
height of the screen.
Turn the rotary knobs to keep the image centered while sizing it.
Figure 18 — Sizing the image
ZOOM/SIZE/PAN
CONTROLS
Next button
SIZE
V H
ZOOM
Next button
Menu button
FILTER
CONTROLS
ZOOM/SIZE/PAN
CONTROLS
Menu button
CONFIGURATION
CONTROLS
Menu button
OUTPUT RES.
xxxxxxxx
Next button
OUTPUT
SVID <RGB> YUV
Next button
STANDARD
<NTSC> PAL
Next button
Menu button
im Vertrieb von
CAMBOARD Electronics
www.camboard.de
Tel. 07131 911201
Fax 07131 911203


