HSA 822MS • In
s
tallation
HSA 822MS • In
s
tallation
Installation, cont’d
Pr
eliminary
Pr
eliminary
2-5
2-4
The preferred and recommended method for preparing the
table is to have the hole cut to the exact dimensions identified in
appendix A by a reputable carpenter or other craftsman.
Preparing the Table
CAUTION
The opening in the table for the HSA should be cut
only by licensed and bonded craftspeople. Exercise
care to prevent scarring or damaging the furniture.
When selecting a mounting location, be aware that the
HSA 822MS is not exactly square. The cable and AAP
access is on the 6.220" (15.80 cm) side. Angle the cut
for the optimum positioning. If necessary, use a square
to ensure that the cut is properly positioned. Extron is
not responsible for improperly-positioned HSA products.
The levelling adjustment allows the HSA to be installed
in a table with a thickness between 3/4" (1.9 cm) and
1.5"(3.8 cm).
The preferred and recommended method for preparing the
table is to have the hole cut to the exact dimensions identified
in appendix A by a reputable carpenter or other craftsman. Save
the removed material or fabricate a piece of the same material
that is the same size of the removed material for use as the top
surface of the HSA.
For best results, the surface block dimension should be
1/32" to 1/16" (1 mm) smaller on all four sides than the
cutout hole.
The metal drilling template is reusable. Do not discard
this template when the installation is complete. Save it
for future HSA 822MS installations.
1
.
Turn the table upside-down.
CAUTION
Protect the table surface.
2
.
Place the metal drilling template into the hole in the table.
The drilling template should fit snugly into the hole, with
no noticeable sideways or top-to-bottom motion.
The metal drilling template should fit snugly in the hole.
If the template can move, the hole size is too large.
3
.
Drill pilot holes, each 3/32" (2.4 mm) in diameter by 1/4"
(7 mm) deep, at each of the template’s eight standoff
guides (figure 2-2).
Wear safety glasses when operating the drill.
Failure to heed this warning can result in eye injury.
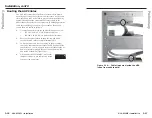
Figure 2-2 — Using the drilling template
4
.
Remove the drilling template. Keep the template for
future installations.
Preparing the HSA
1
.
Set the HSA 822MS on its side on a work surface.
2
.
Cut the tie wraps that lock the yellow shipping restraints
in place and remove the restraints (figure 2-3).
HSA 822MS
Enclosure
Yellow Shipping
Restraint
REMOVE
Figure 2-3 — Removing the shipping restraints


