DTP2 T 212 • Setup Guide (Continued)
For information on safety guidelines, regulatory compliances, EMI/EMF compatibility, accessibility, and related topics, see the
Extron Safety and Regulatory Compliance Guide
on the Extron website.
© 2019 Extron Electronics — All rights reserved.
All trademarks mentioned are the property of their respective owners.
Worldwide Headquarters:
Extron USA West, 1025 E. Ball Road, Anaheim, CA 92805, 800.633.9876
ATTENTION:
•
Do not overtighten the HDMI connector mounting screw. The shield it fastens to is very thin and can easily be stripped.
•
Ne serrez pas trop la vis de montage du connecteur HDMI. Le blindage auquel elle est attachée est très fin et peut
facilement être dénudé.
4
Loosely place the included tie wrap around the HDMI connector and the LockIt lacing bracket as shown.
5
While holding the connector securely against the lacing bracket, use pliers or similar tools to tighten the tie wrap, then remove any
excess length.
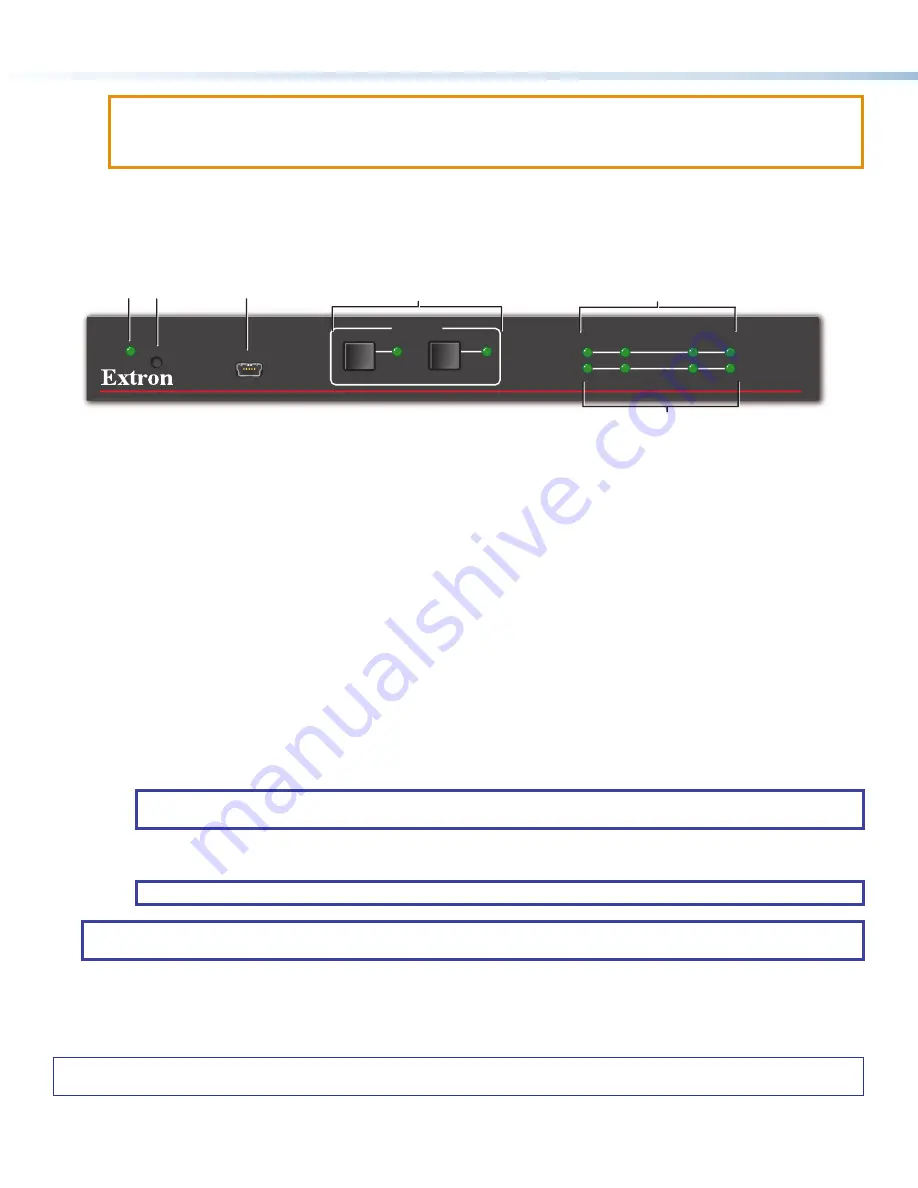
Front Panel Features
DTP2 T 212
CONFIG
2
A
B
1
INPUTS
MODE
NORM/AUTO
OUTPUTS
SIGNAL
HDCP
R
AUTO
SWITCH
INPUTS
1
2
A
A
A
B
B
B
C
C
C
D
D
D
E
E
E
F
F
F
A
Auto Switch LED
C
USB Config port
E
Inputs and Outputs Signal LEDs
B
Reset Button
D
Input selection buttons and LEDs
F
Inputs and Outputs HDCP LEDs
Figure 5.
DTP2 T 212 Front Panel
A
Auto Switch LED
— Lights when Auto Switch is enabled.
B
Reset button
— Press and hold the reset button for 3 seconds while operating the unit to reset back to factory default.
C
USB Config port
— Connect a USB A to mini-B cable between your computer and this female USB mini-B port to configure and
control the switcher via SIS commands or PCS, and to update the firmware.
D
Inputs selection buttons and LEDs
— Press one of these buttons to select an input to switch to the output. The LED at the right of
each button lights when the corresponding input is selected. If auto-input switching is in effect, these buttons are disabled, but the
LEDs continue to light to indicate the selected input.
To enable or disable Auto-Switch mode via the front panel
, press and hold the
Input
1
button for 3 seconds, then press and
release the
Input
2
button to toggle between Normal and Auto Switch.
E
Inputs and Outputs LEDs
•
Inputs
— Light when a source is connected to the corresponding input and TMDS clock activity is detected.
•
Outputs
— Light when active sink devices are connected to the HDMI and TP outputs.
Inputs and Outputs HDCP LEDs
•
Inputs
— Light if the connected sources are HDCP encrypted and have been authenticated by the switcher inputs.
NOTE:
If the source device connected to the selected input is HDCP encrypted (requires HDCP authentication), the
corresponding signal LED may not light unless HDCP has been authenticated.
•
Outputs
— Light when the currently selected input requires HDCP and the connected output device has been successfully
authenticated.
NOTE:
HDCP is re-authenticated on the output whenever a new input is selected.
NOTE:
All front panel LEDs will flash three times simultaneously to indicate enabling or disabling of Executive Mode, which will lock
out front panel input buttons when enabled via PCS or SIS commands.
5
68-2915-50 Rev. A
12 19
4


