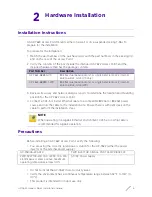
Hardware Installation
AP-7622 Access Point Installation Guide
10
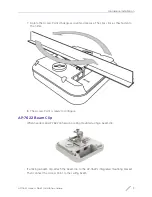
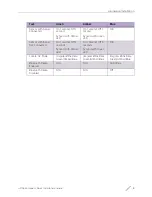
4 Verify the Access Point is receiving power by observing the LEDs are lit or flashing.
5 Secure the AP-7622 to the wall using oval head screws.
6 The Access Point is ready to configure.
Ceiling Mount Instructions
A ceiling mount requires holding the AP-7622 up against a T-Bar of a suspended ceiling
grid and twisting the unit on to the T-Bar. If deploying the AP-7622 on a sculpted ceiling T-
Bar, the Access Point mounting kit (Part No. KT-135628-01) can be used as well. A beam clip
is also available to attach the Access Point to a ceiling beam.
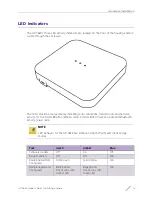
A metal clip (Ordering Part
No. 37210) is also available to attach the access point to a solid surface.
1
Align (but do not permanently secure) the Access Point’s integrated mounting bracket
on the T-Bar.
2 Cable the Access Point using the Power Injector solution, approved AP-7622 power
supply or a POE enabled switch.
For Power Injector installations:
a Connect a RJ-45 CAT5e (or CAT6) Ethernet cable between the network data supply
(host) and the Power Injector
Data In
connector.
b Connect a RJ-45 CAT5e (or CAT6) Ethernet cable between the Power Injector
Data &
Power Out
connector and the Access Point’s GE1/POE port.
c Ensure the cable length from the Ethernet source (host) to the Power Injector and
Access Point does not exceed 100 meters (333 ft). The Power Injector has no On/Off
power switch. The Power Injector receives power as soon as AC power is applied.
For standard power adapter (non Power Injector) and line cord installations:
a Connect a RJ-45 Ethernet cable between the network data supply (host) and the
Access Point’s GE1/POE port.
b Connect the power supply line cords to the power adapter.
c Attach the power adapter cable into the power connector on the Access Point.
d Attach the power supply line cord to a power supply.
3 Verify the unit has power by observing the LEDs.
4 Orient the Access Point chassis by its length and the length of the ceiling T-Bar.
5 Rotate the Access Point chassis 45 degrees clockwise.
6 Push the back of the Access Point chassis on to the bottom of the ceiling T-Bar.
NOTE
Before mounting the AP-7622 on a ceiling, obtain the unit’s default IP address
from the backside of the unit. This default IP address is needed when
connecting to the Access Point.
NOTE
Extreme Networks recommends wrapping the auxiliary power adapter cable
around the Access Point’s cable hook to avoid accidental disconnection.


